
Using GitMind to edit nodes makes it easy to organize and structure your information, resulting in clearer thinking. In complex project management or learning tasks, you can express different levels of relationships and information by editing nodes, thereby improving efficiency. When creating a mind map, such as developing work plans, organizing study materials, or planning projects, you may need to edit nodes. For example, when developing a work plan, you may need to modify task priorities or add new subtasks. Below is a detailed tutorial to assist you!
1. Add Node
Three ways to add nodes:
1. Select one node first, then press “Tab” key to insert the subnode, press “Enter” to insert sibling node and hit “Shift+Tab” to add parent node. Press “Shift+Enter” to enter a new line.
2. Select one node and then click the icons at the top toolbar to add nodes.
3. Access outline mode and hit “Enter” to add node, “Tab” to insert subnode.
2. Move Node
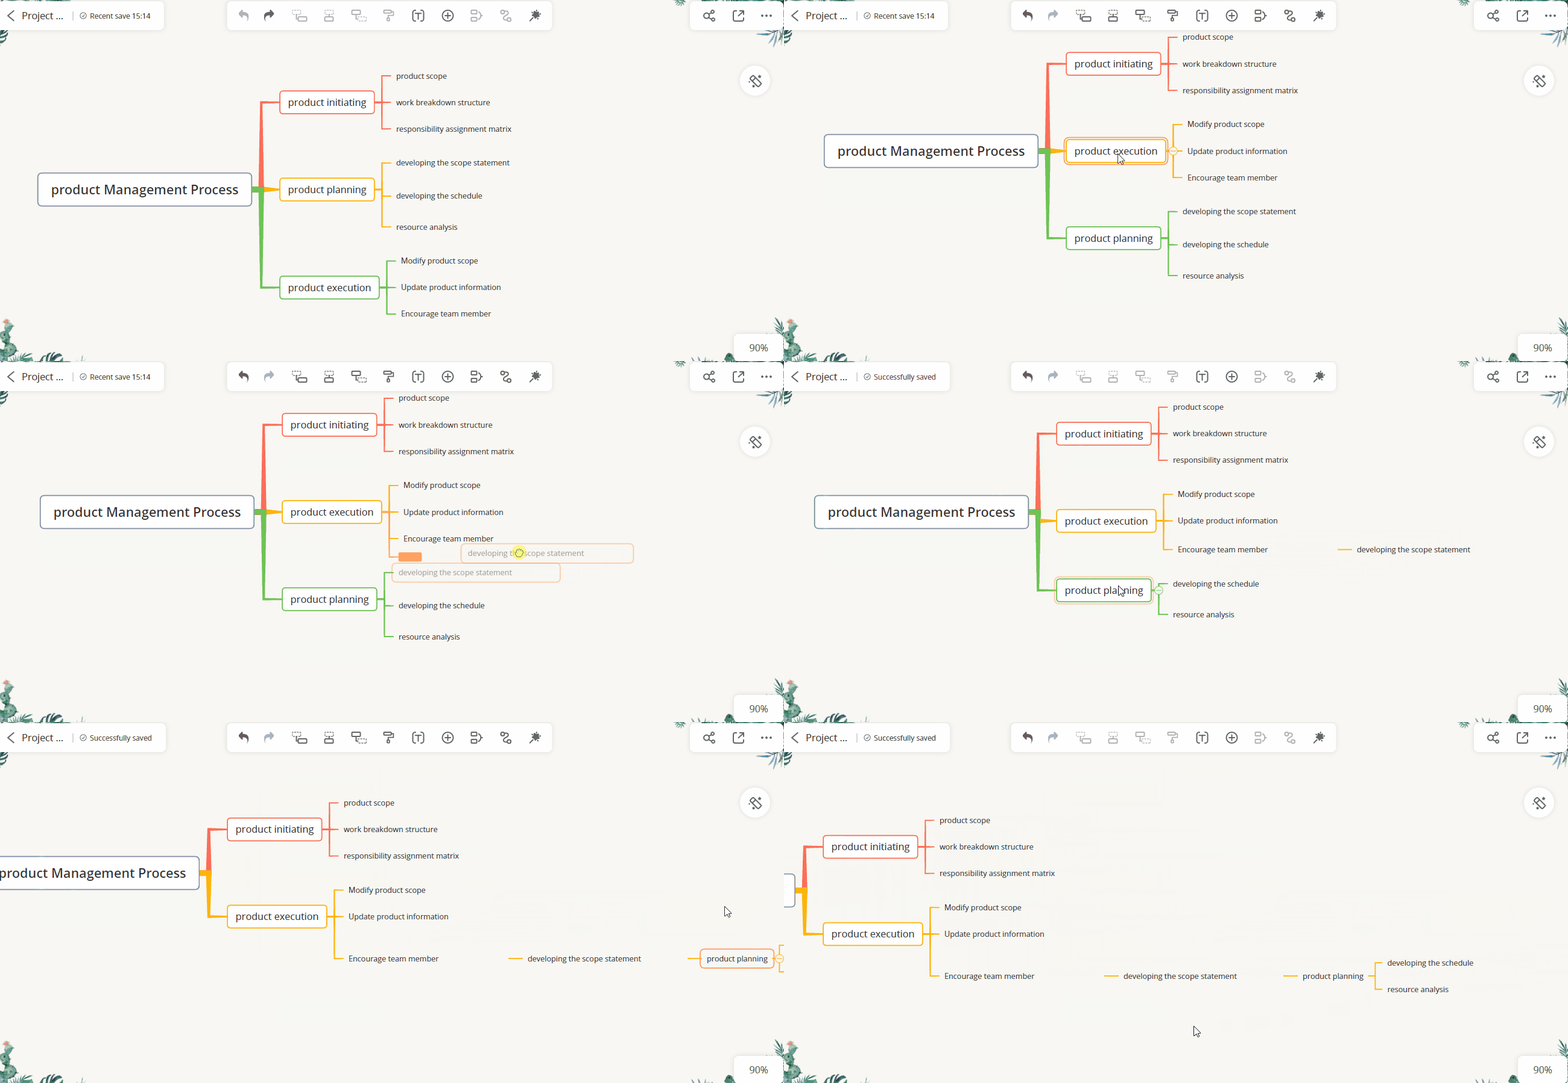
Select the node, drag it to another node. When an orange mark appears near the node, you can release the mouse to finish moving the node.
If you drag node A to node B, node A will automatically become a child node of node B.
In addition, you can also use the shortcut keys “Alt + Up” to move the node up and “Alt + Down” to move the node down.
3. Copy Node/Branch
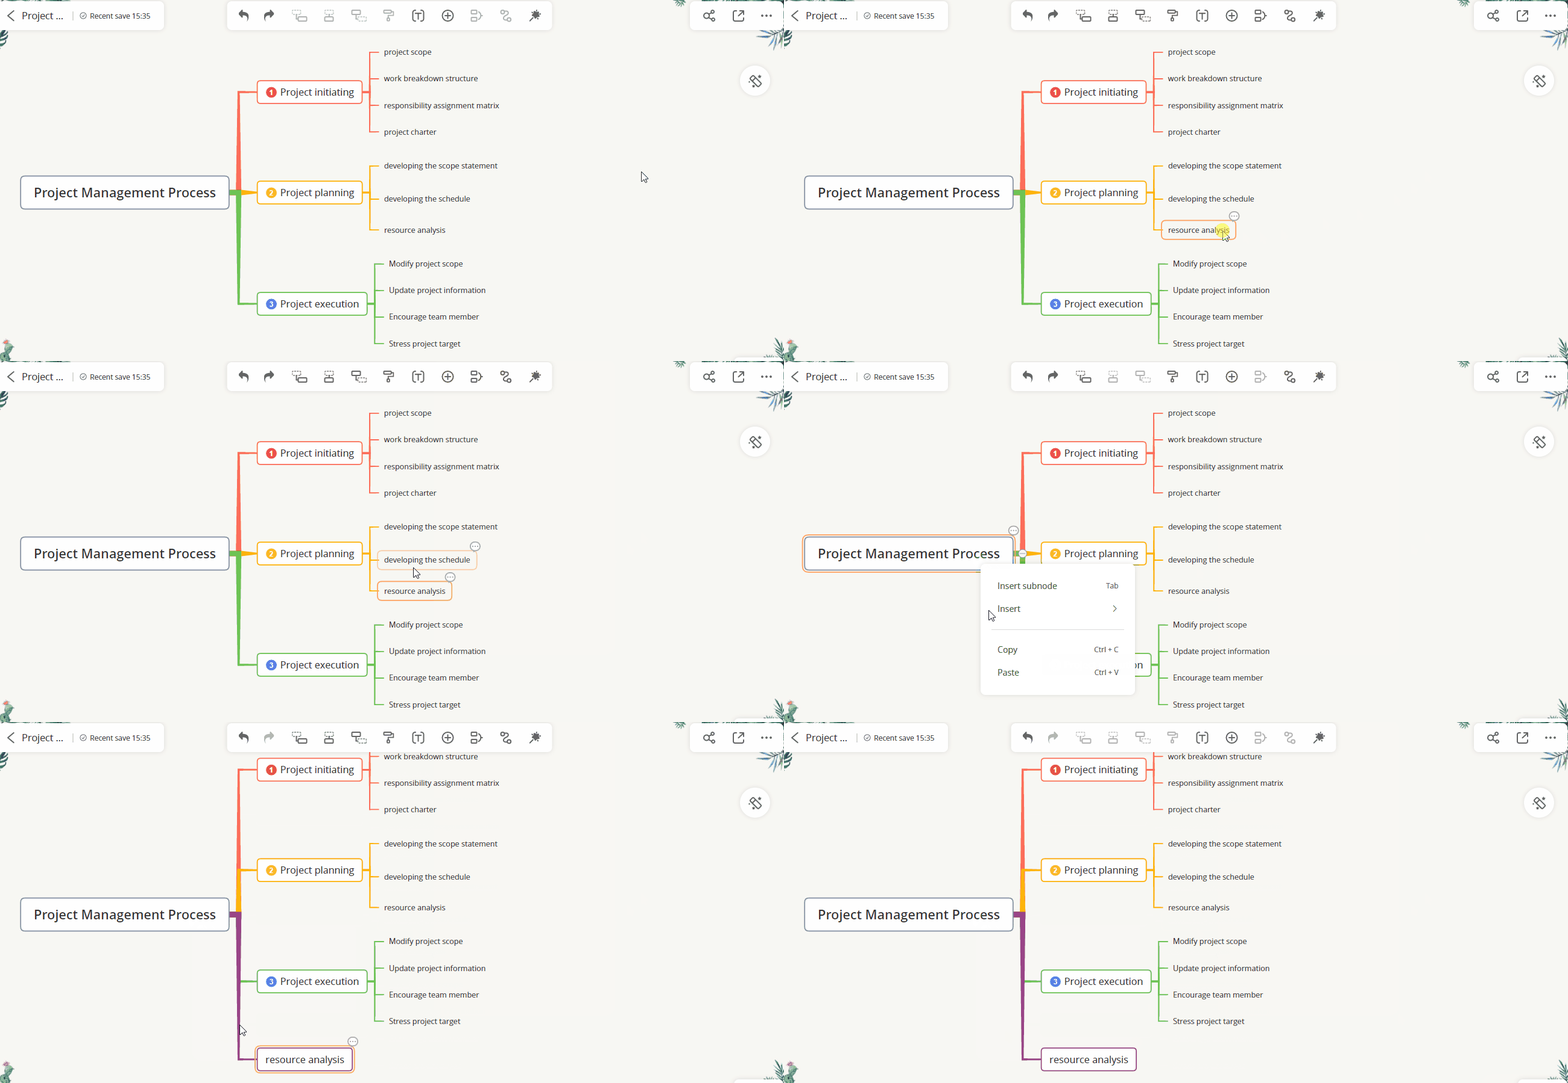
You can press “Ctrl+C” to copy the selected node and paste it to another node. You can also select a branch and copy it to another mind map.
4. Floating Node
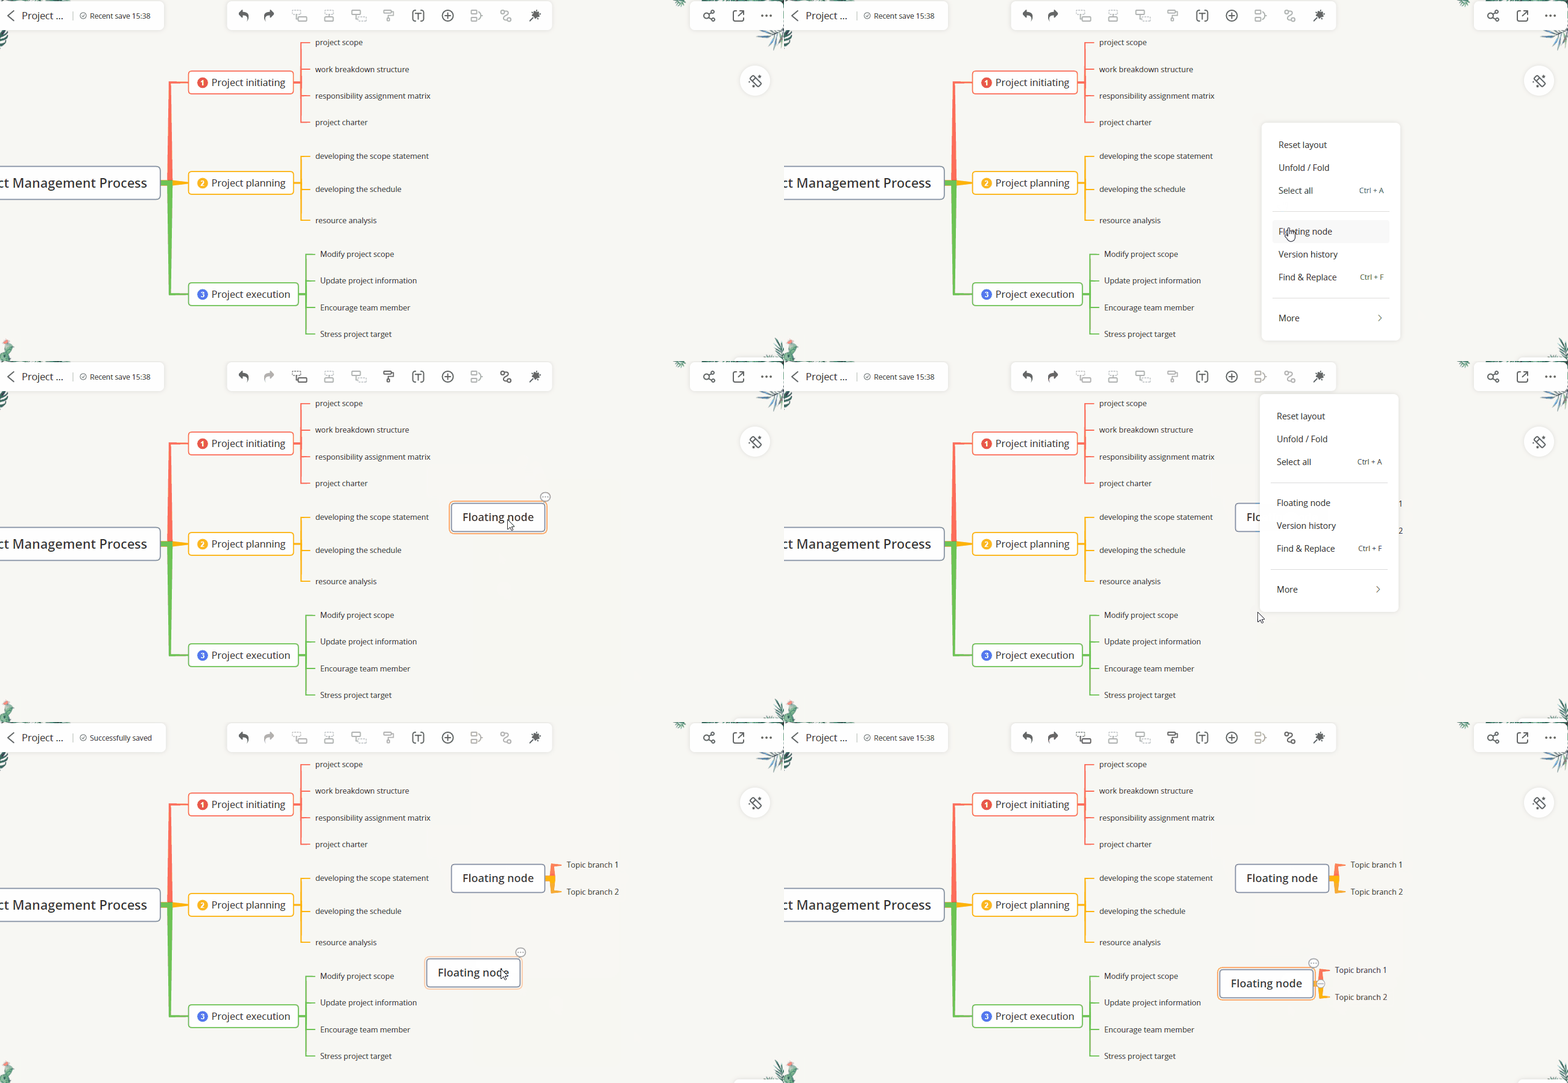
Right-click anywhere and select “Floating node”. You can insert multiple floating nodes in a mind map.
5. Delete Node
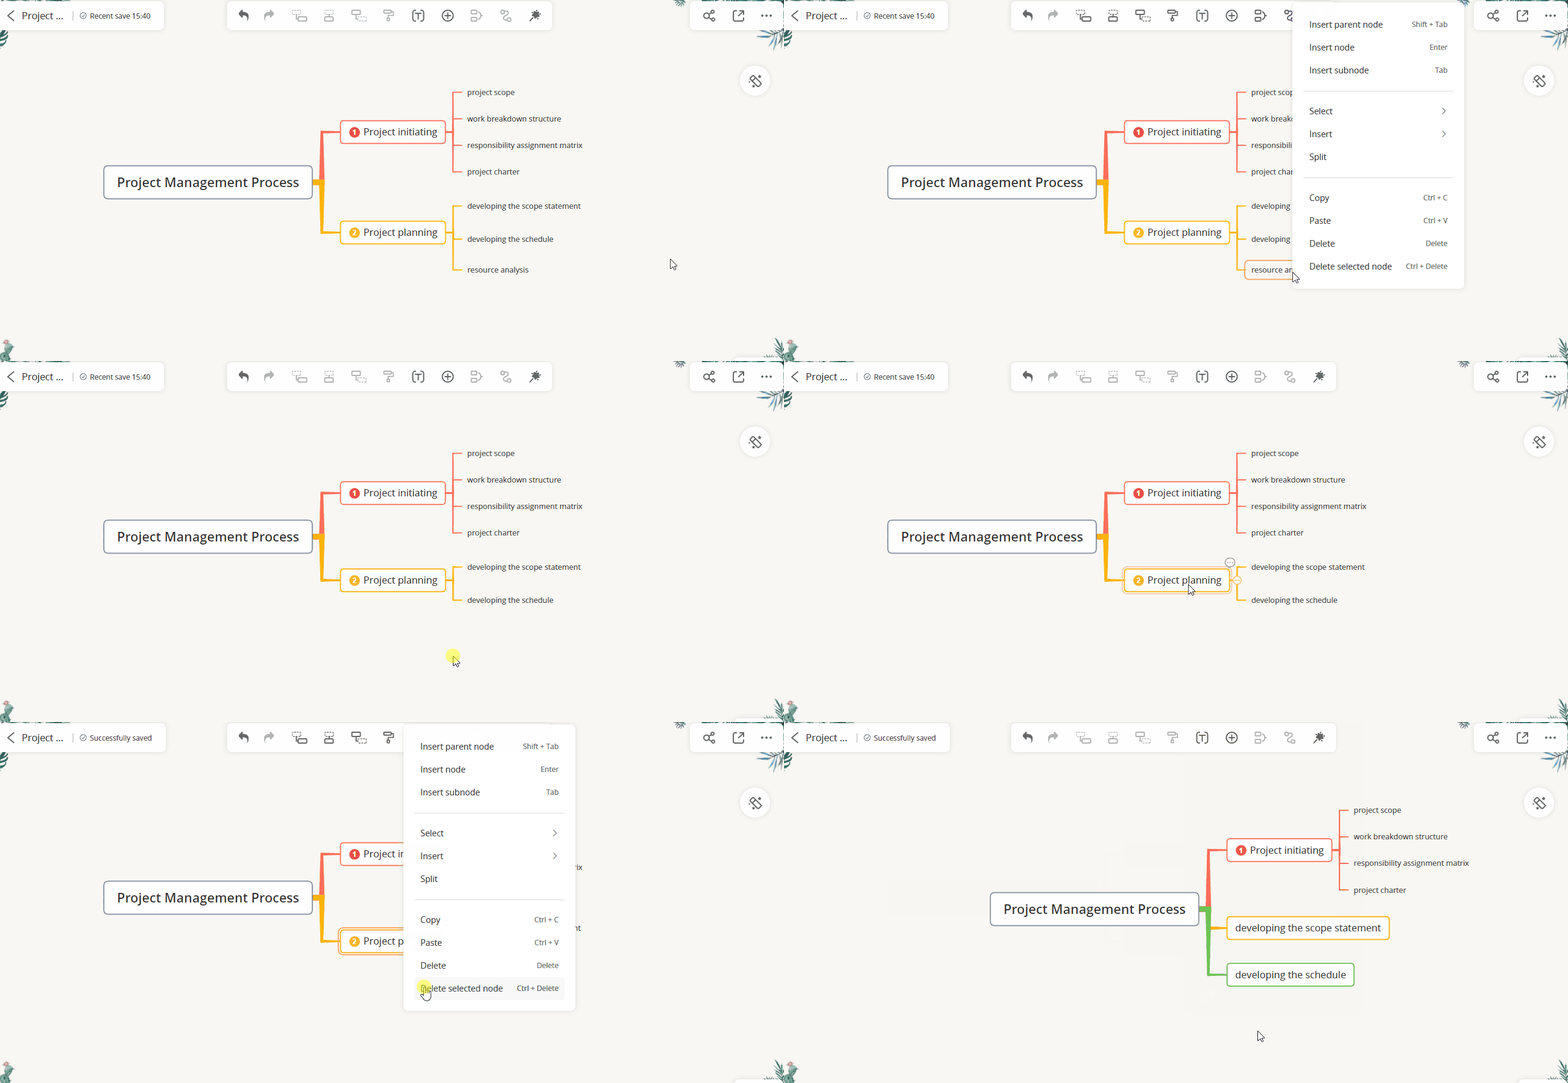
Select the node and then press “Delete” on the keyboard to delete node. You can also right-click the node and then click “Delete” option.
If you want to delete the selected node and keep its child node, you can select “Delete selected node” or press “Ctrl+Delete” on the keyboard.
6.Change node width
Drag the frame/boarder of the node to adjust the node width for better layout. You can also select multiple nodes and change node width together.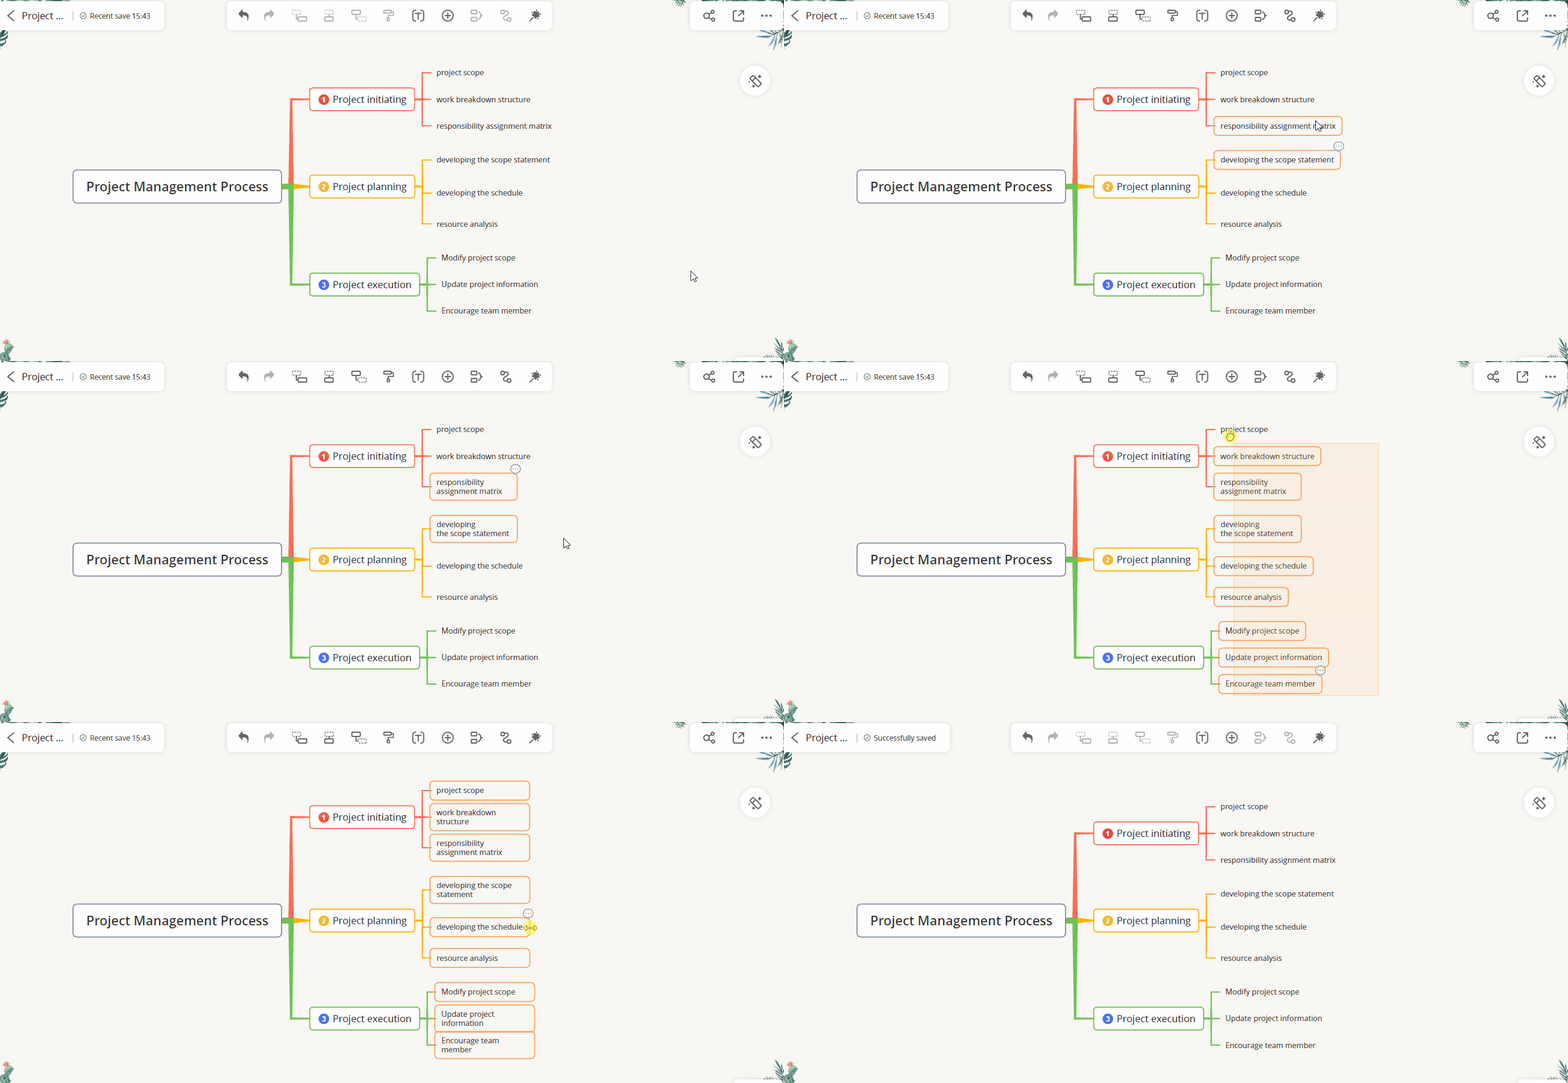
7.Align sibling nodes
The length of nodes may vary in GitMind. If you want to make the length of sibling nodes look neater, you can try ‘Align sibling nodes’. Simply select the corresponding nodes, click the ‘Style’ button on the top toolbar, and check ‘Align sibling nodes’ to align all nodes at the same level.
When editing nodes, GitMind also offers a variety of rich editing options. For example, you can use different colors to mark your nodes to indicate different statuses or priorities, or you can add relationship lines between nodes to represent their connections. In the following tutorial, we will provide detailed steps on how to change styles.
Leave a Comment