GitMind icon & sticker and illustration insertion feature not only make your mind maps more vibrant and colorful but also help you better classify and mark your mind maps. For example, you can use different icons to mark different task statuses or use stickers to emphasize key content or use illustrations to personalize decorations. This way, you can quickly capture key information when viewing mind maps. Let’s take a look at the steps together.
Insert icons
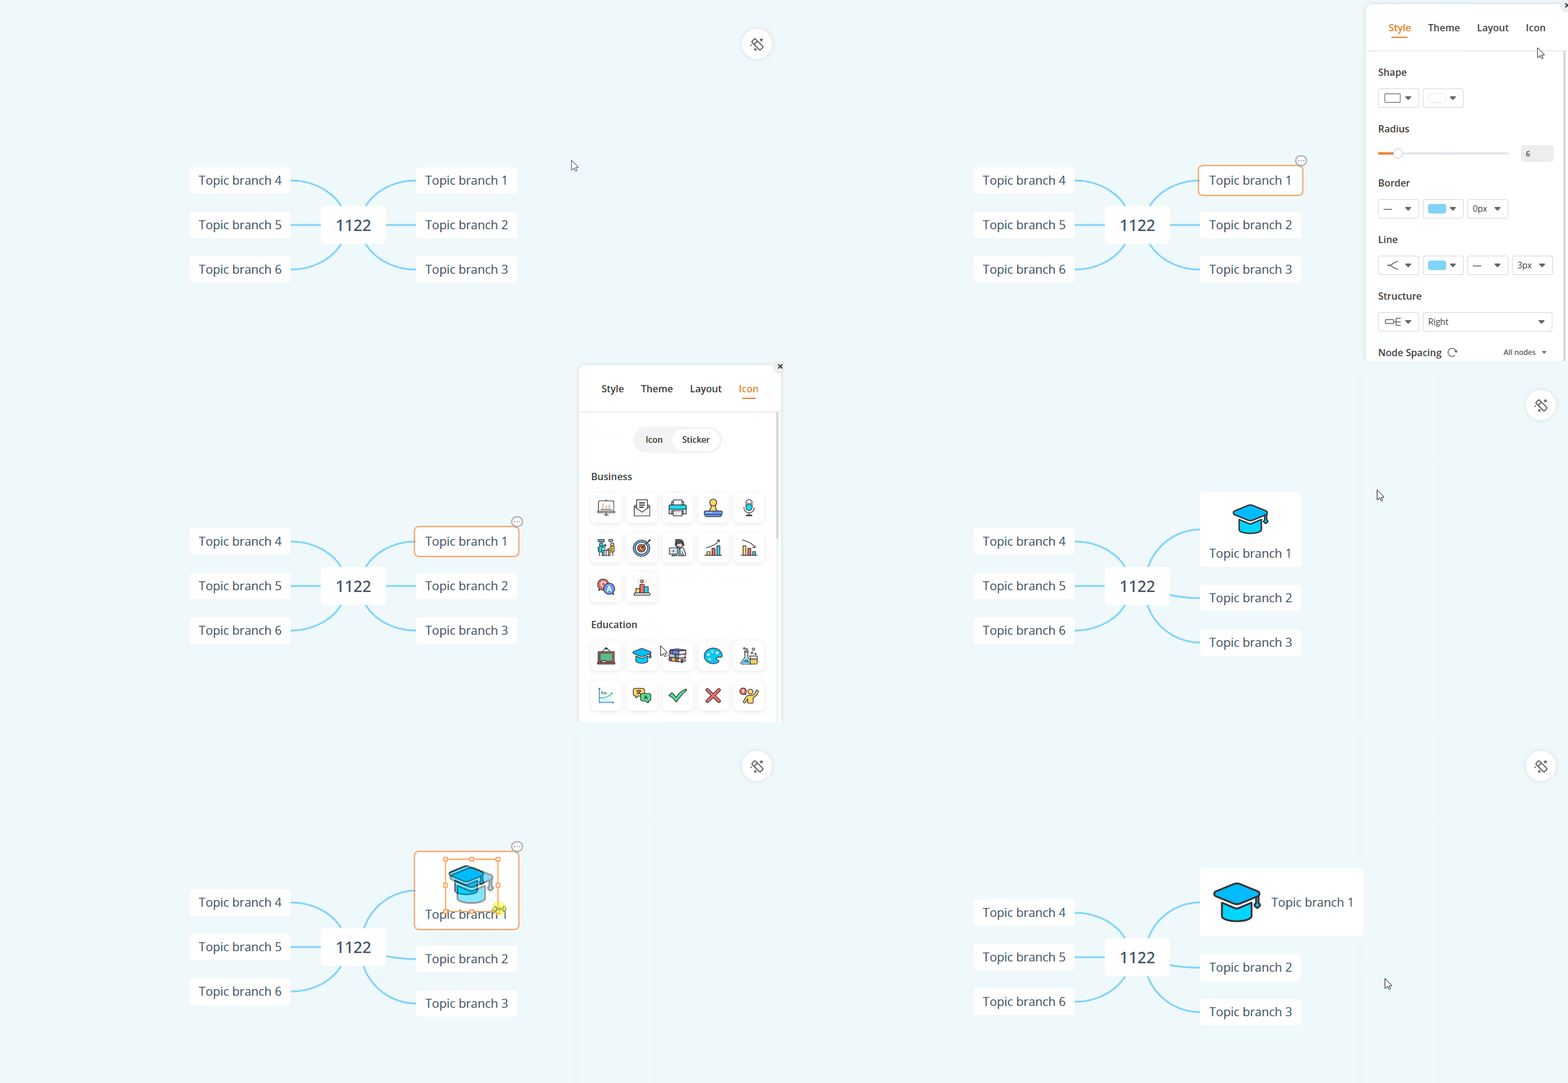
Open the mind map and select a node. Click on ‘Style’ on the right side. In the style menu, choose ‘Icon’ to insert icons such as priority, progress, flag, emotion, symbol, or logo into the mind map. You can select and remove the icon by clicking on it again within the node.
![]()
Insert stickers
Open the mind map and select a node. Click on ‘Style’ on the right side. In the style menu, choose ‘Icon’, then select ‘Sticker’. Choose stickers from various categories like Business, Education, Technology, Emotions, Travel, Weather, etc.
Insert illustrations
You can insert illustrations in your GitMind mind maps as well. Simply open a mind map and select a node. Click on ‘Insert’ in the upper toolbar, then select ‘Sticker’ and select ‘Illustration’. Select the desired illustrations to insert them into your mind maps, making your mind map more attractive.
❤️What are the benefits of using icons, stickers and illustrations?
- When managing projects, you can use icons, stickers and illustrations to mark the completion status and priority of each task.
- When taking notes or studying, you can use icons, stickers and illustrations to highlight key content and improve learning efficiency.
- During creative thinking or brainstorming sessions, you can use icons, stickers and illustrations to express your thoughts and inspiration.
In GitMind, you can also customize the color and style of your mind map using the theme feature, adding personalized elements to your mind map. Additionally, you can export your mind map as an image or PDF for easy sharing or printing.
GitMind provides a rich library of icons and stickers for you to choose from according to your needs. The above is a detailed tutorial on adding icons and stickers to mind maps in GitMind. Hope it helps you!
Leave a Comment