Inserting images into your mind map can make the information more intuitive and vivid. Especially for complex or hard-to-understand information that requires a visual explanation, using images can help users better understand and absorb the content. Learning how to insert images in GitMind will undoubtedly make your mind maps more expressive and appealing.
Insert Image
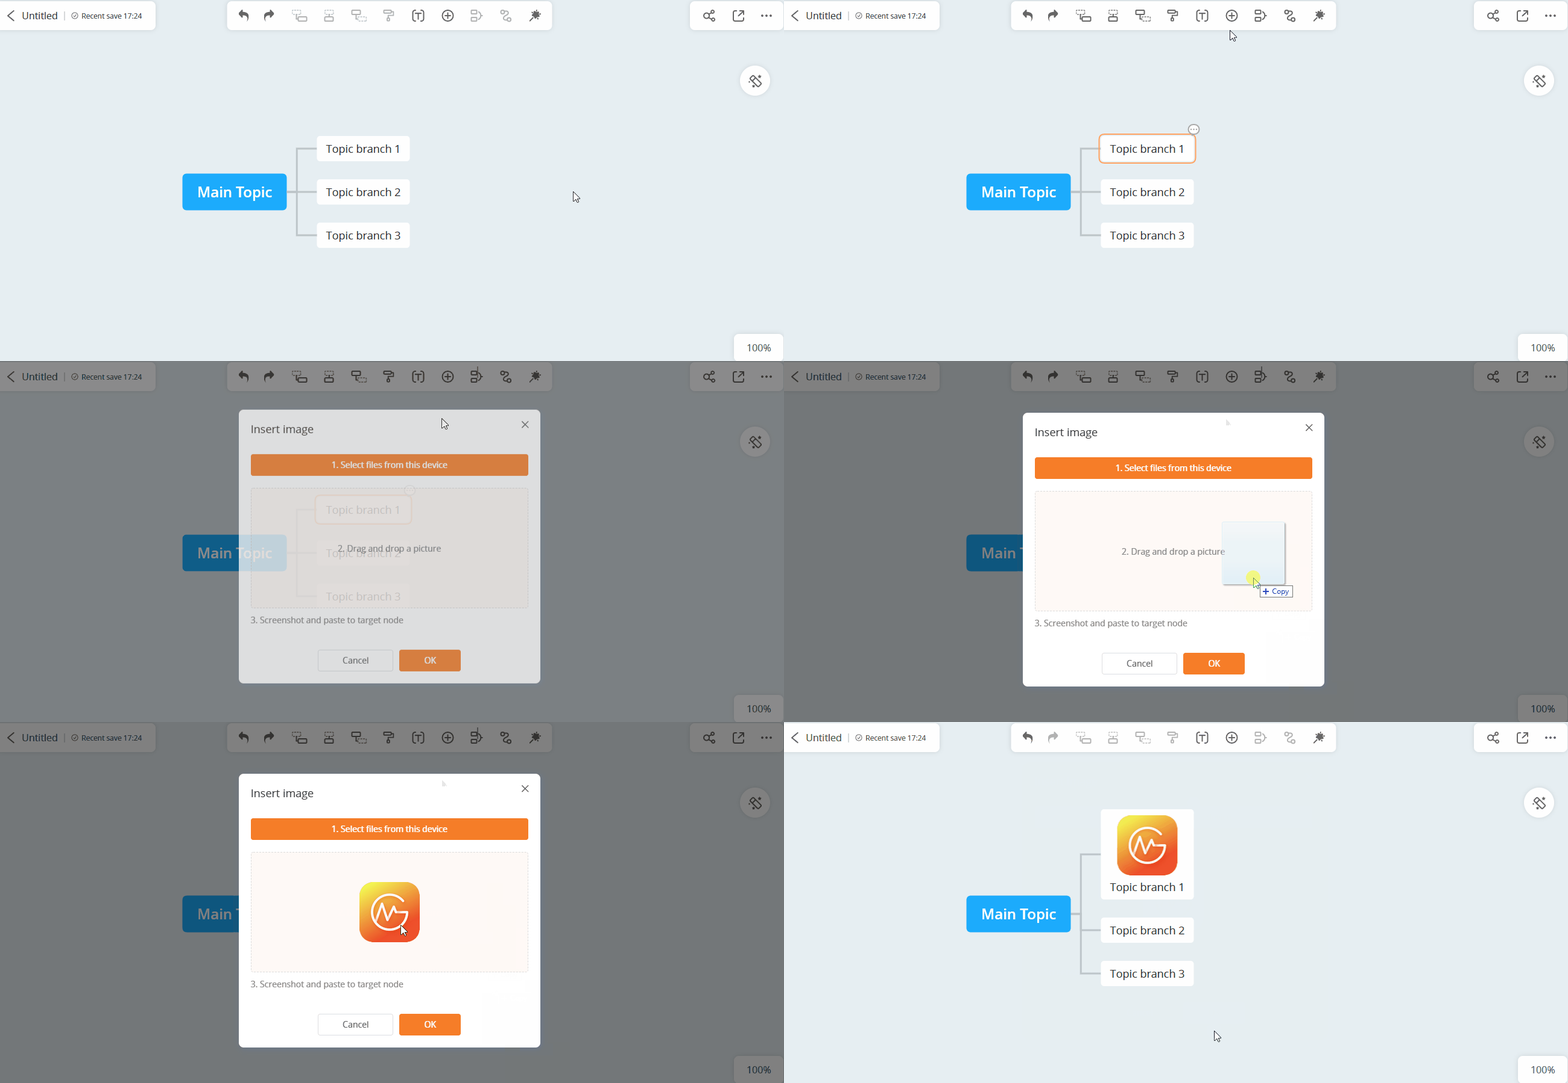
- Open your mind map.
- Select a node and click on the ‘+’ option in the upper toolbar, then choose ‘Image’.
- Select a local image or drag and drop an image to upload and insert it.
- You can also copy an image and paste it directly into the selected node by pressing Ctrl+V.

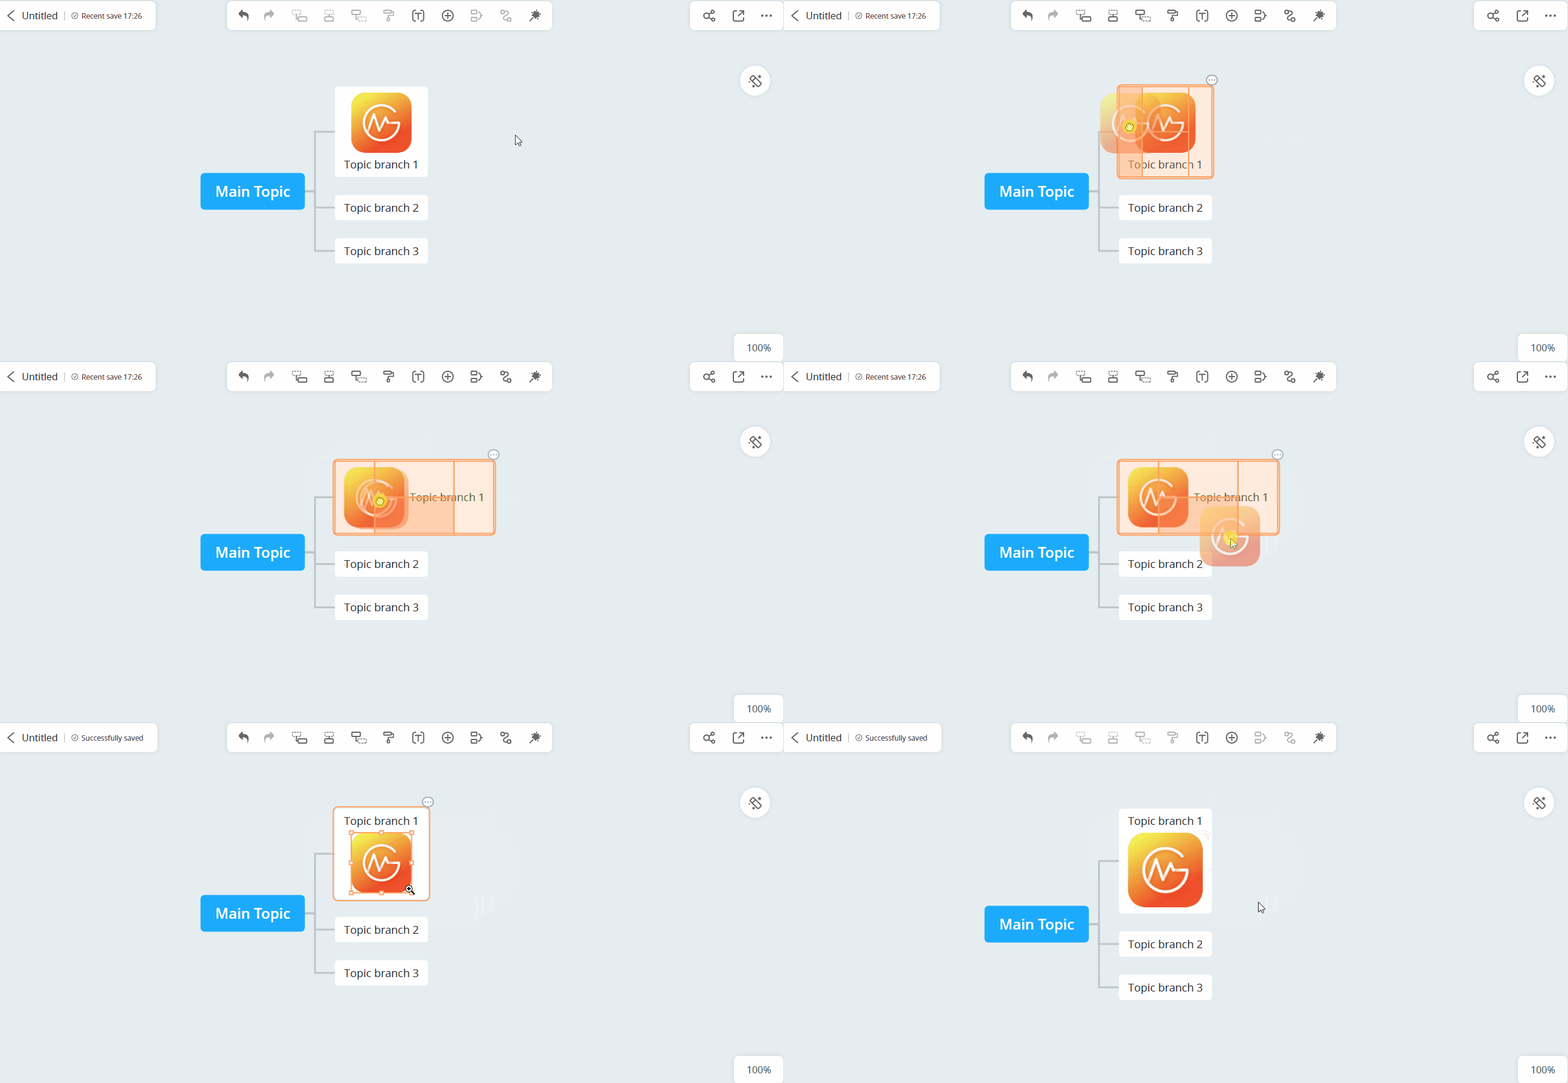
Adjust Image Position
Once inserted, you can freely adjust the image’s position by selecting and dragging it to the desired location.
Inserting images is particularly useful for scenarios where visual representation is key, such as creating project plans, brainstorming design ideas, or making classroom presentations. GitMind, as a powerful mind mapping tool, enhances these tasks with its image insertion feature.
In addition to the image insertion feature, we also highly recommend trying out our icon and sticker features. These allow you to find various preset icons and stickers that will make your mind maps look more professional and refined. With just a few clicks, you can change the entire style of your mind map easily and quickly.
Leave a Comment