GitMind Flowchart/Diagram Making User Guide
1. Introduction
Introduction
GitMind is an online mind mapping and flowchart tool. With GitMind, you can easily create mind maps, flowcharts, swimlane diagrams, UML diagrams, sequence diagrams, and so on.
2. Getting Started
2.1. Register and Login
Enter the official website of GitMind, click “Login” in the upper right corner to enter the registration process, click “Register”, enter your email and password. Besides email, you can also sign up with Google, Facebook and Twitter.

2.2. My Account
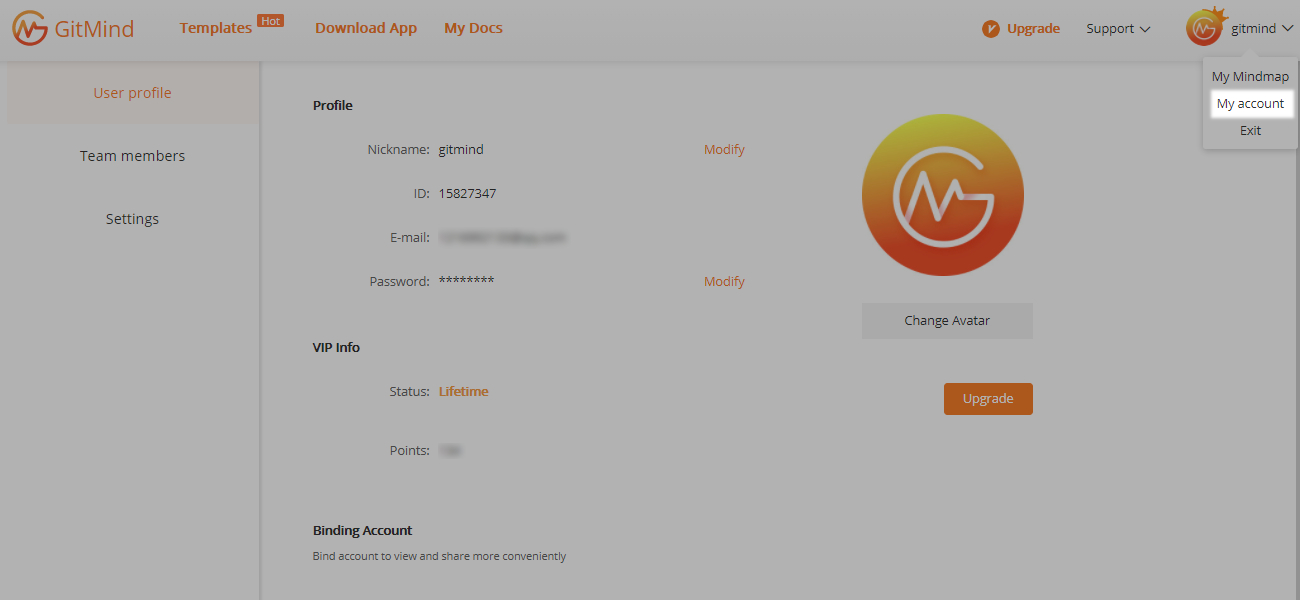
Click “My account” in the upper right corner. You can modify your nickname, bind other accounts, change your avatar here.
3. File Management
3.1. New Flowchart
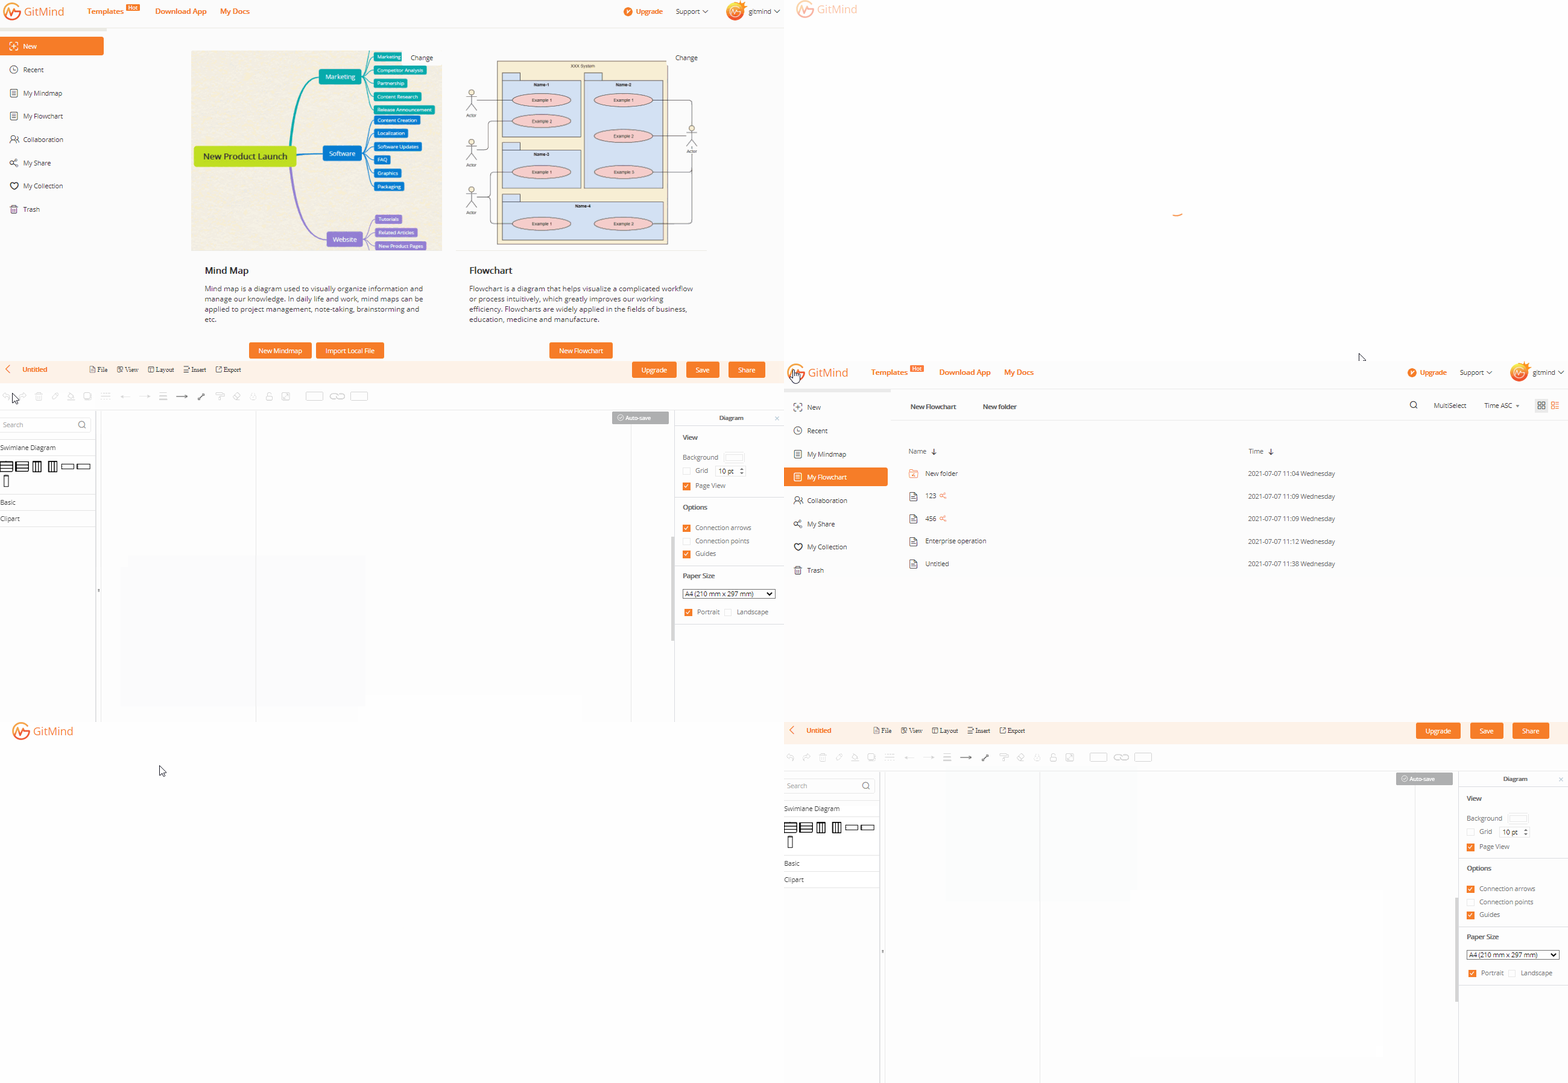
There are two ways to create a new flowchart. The first way is to click “New” in the upper left corner of the software function page and select “New Flowchart”. The second way is to right-click to select “New Flowchart” or “New Folder” on the My Flowchart page.
3.2. Rename
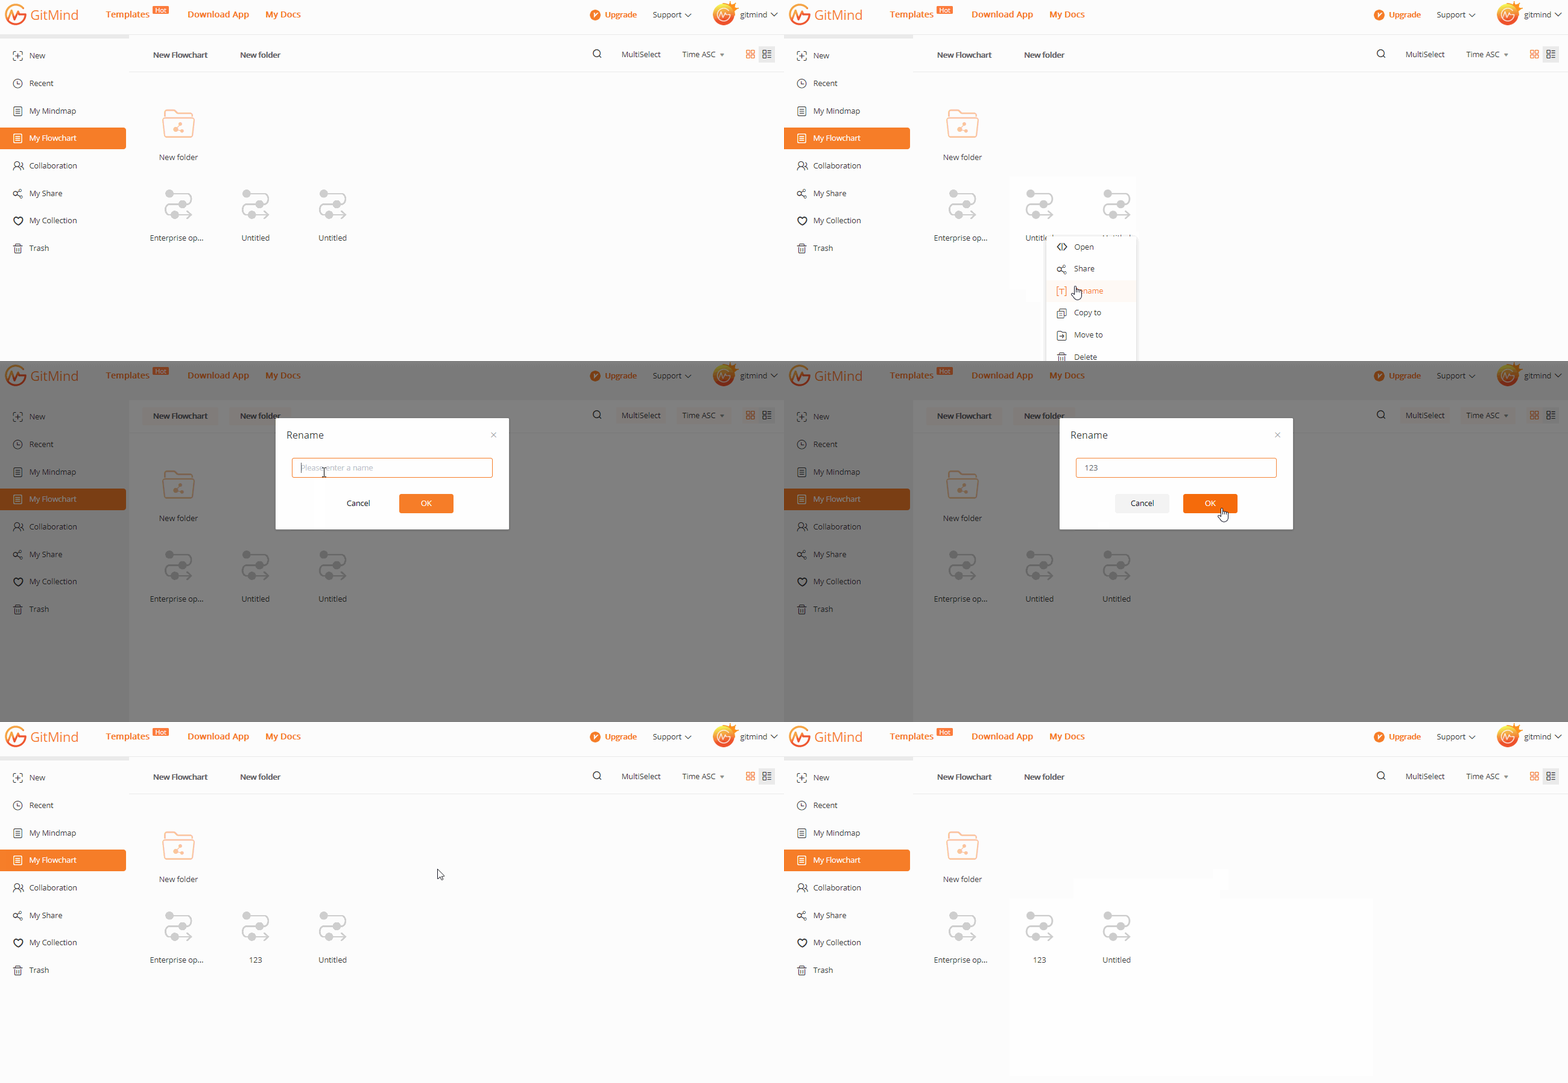
Right-click on the target file and select “Rename”.
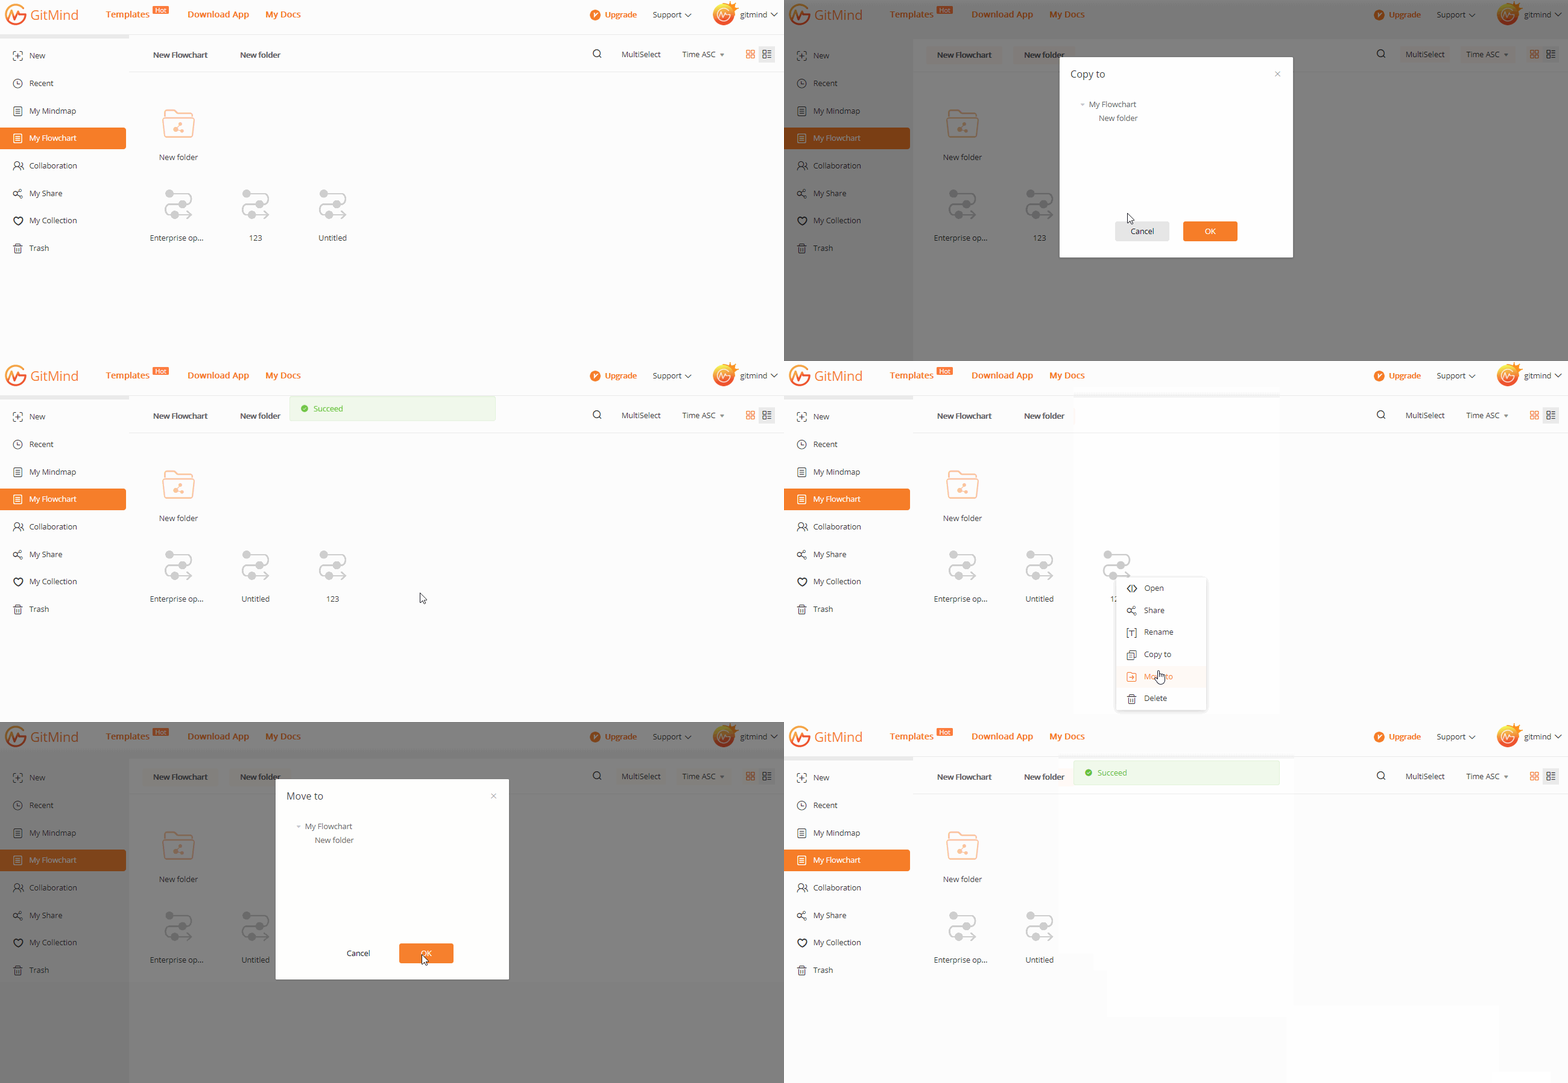
3.3. Move & Copy
Right-click on the target file and select “Move to” or “Copy to”.
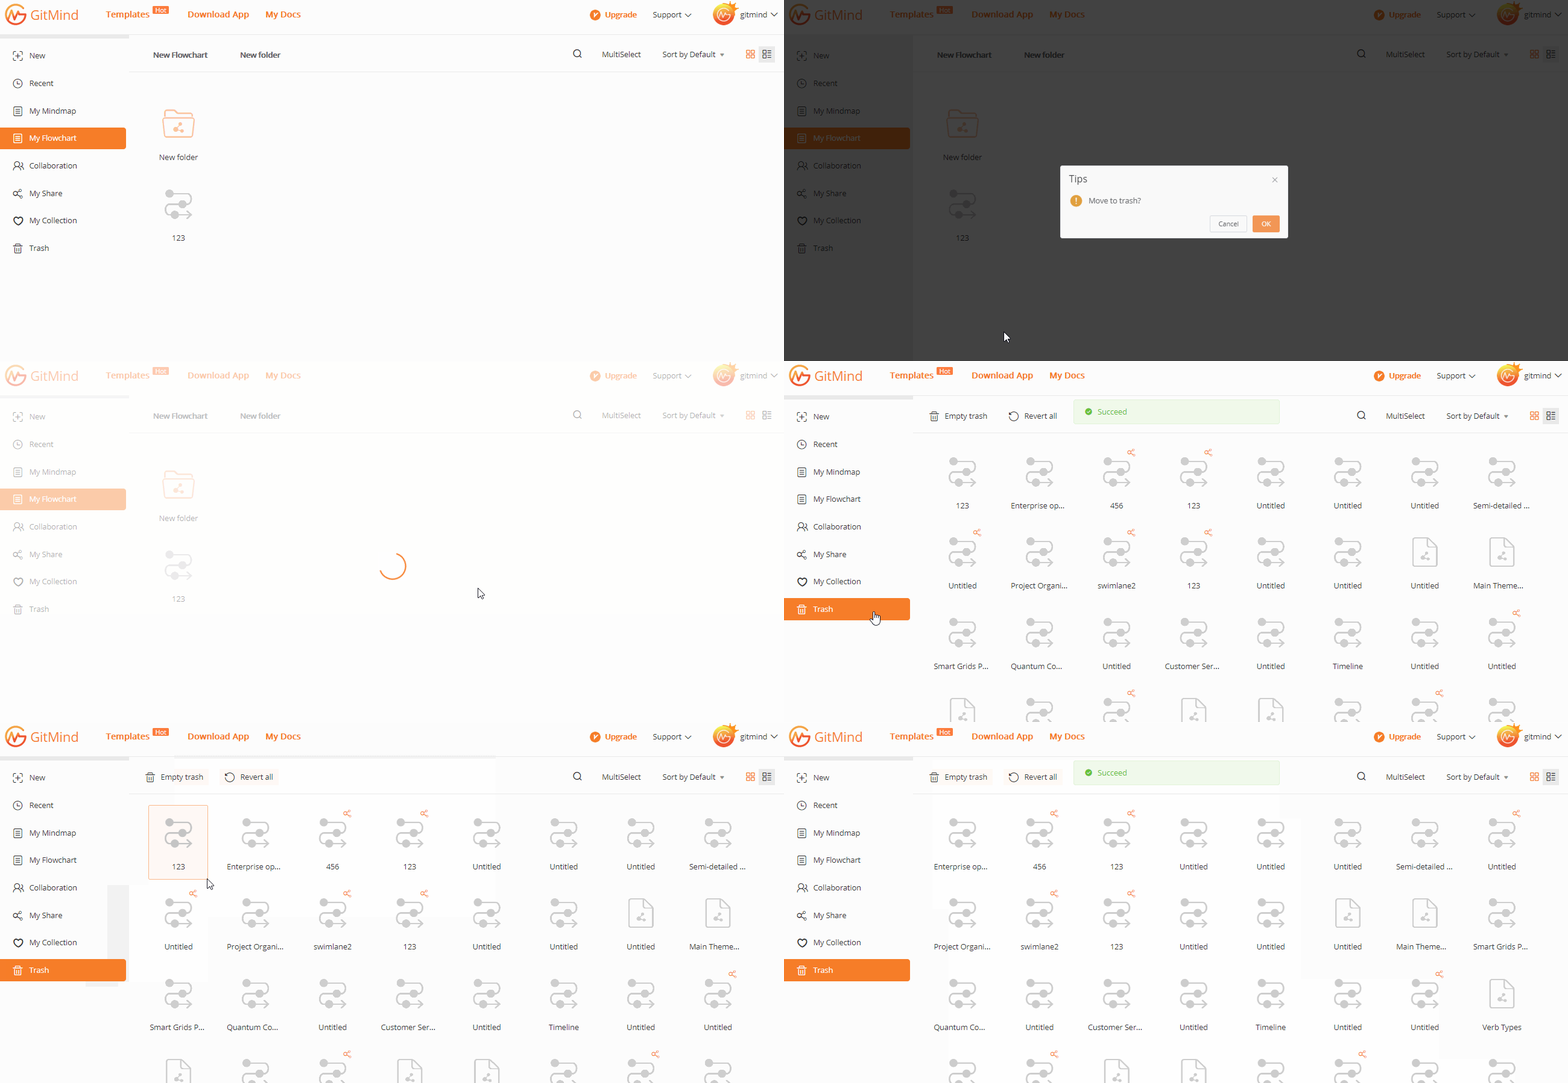
3.4. Delete & Restore
Right-click on the target file and select “Delete” to immediately delete it. If you want to delete permanently, go to the Trash and delete it again. If you accidentally delete a file, you can “Restore” it in the Trash.
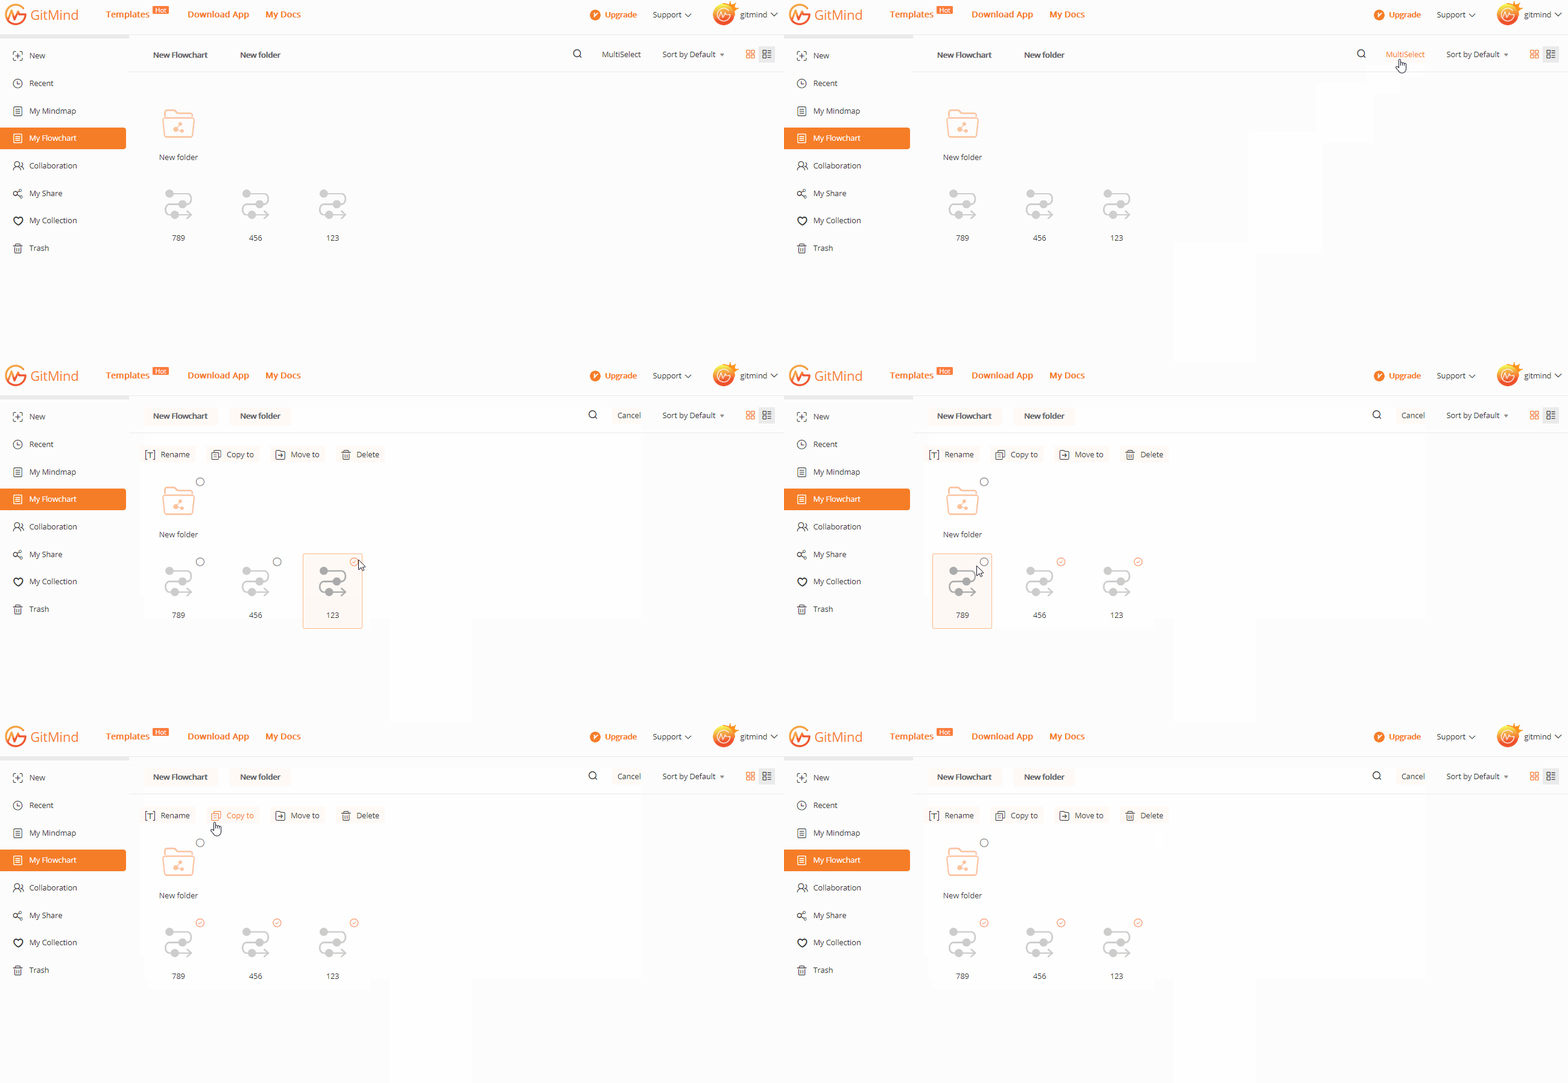
3.5. Bulk Operation
In the “My flowchart” page, click “MultiSelect”.
Please select the folders you want to operate in bulk, then rename, copy, move or delete the folders.
With this function, users can save great time and improve the working efficiency.
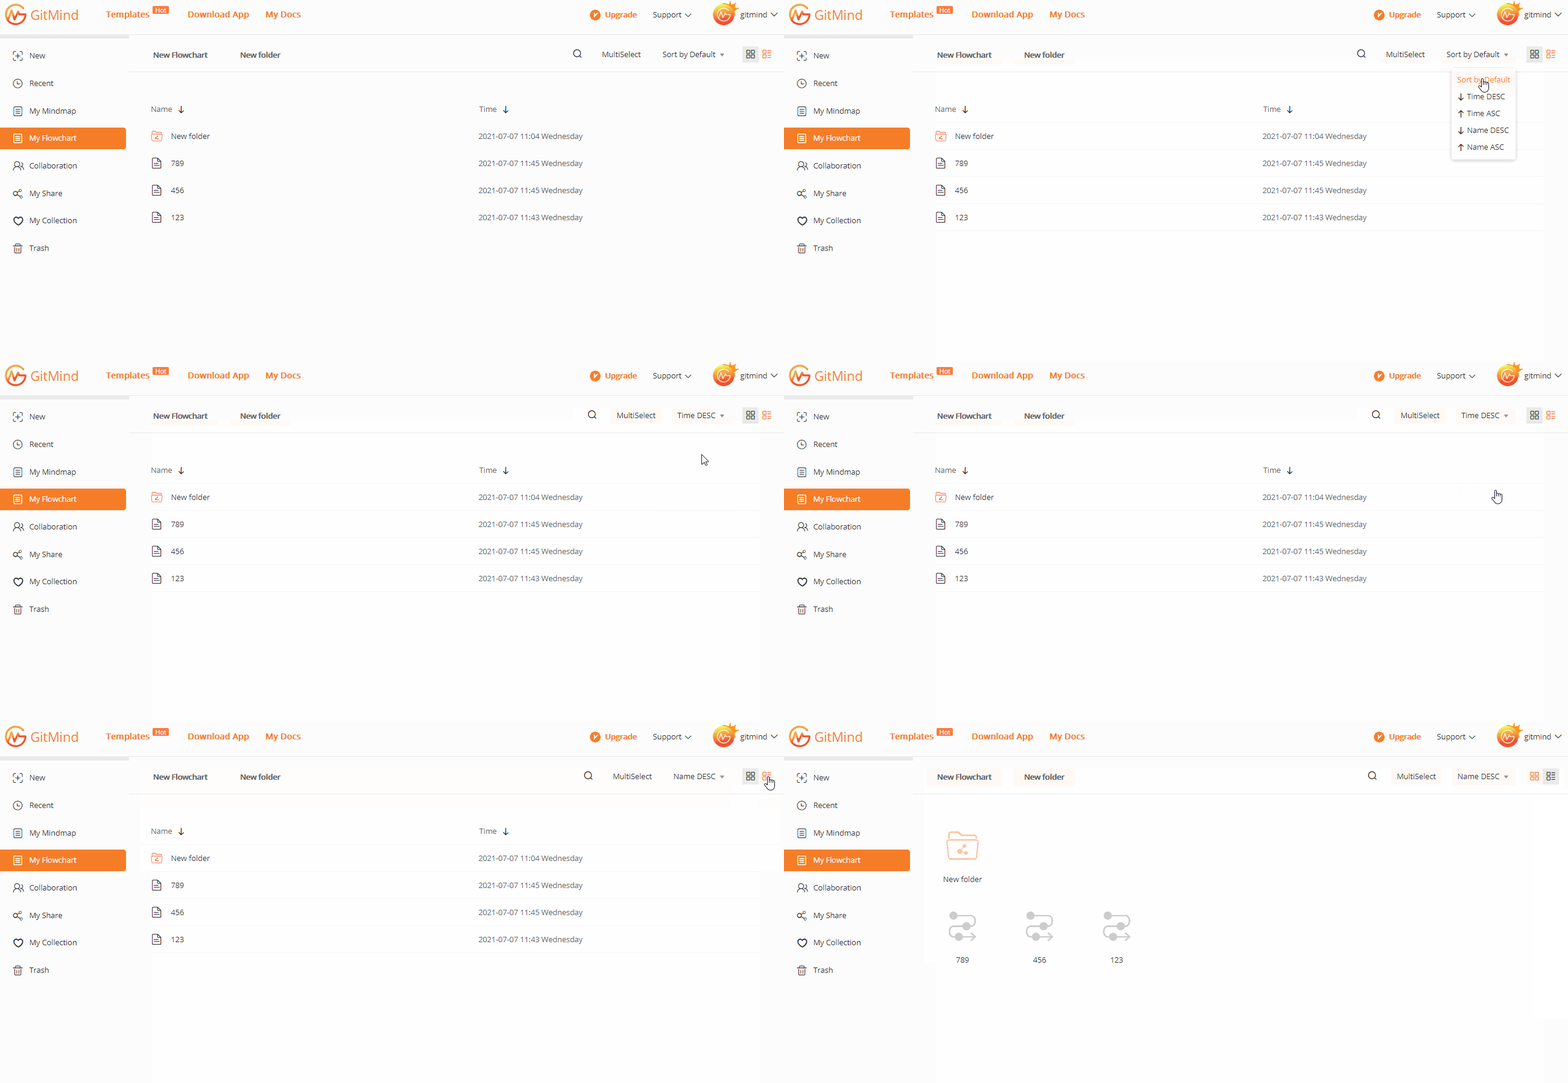
3.6. Sort by
In the “My flowchart” page, select the sorting method in the upper right corner. You can sort by time and name in ascending or descending order. You can also choose to display files in list view or grid view.
3.7. Share
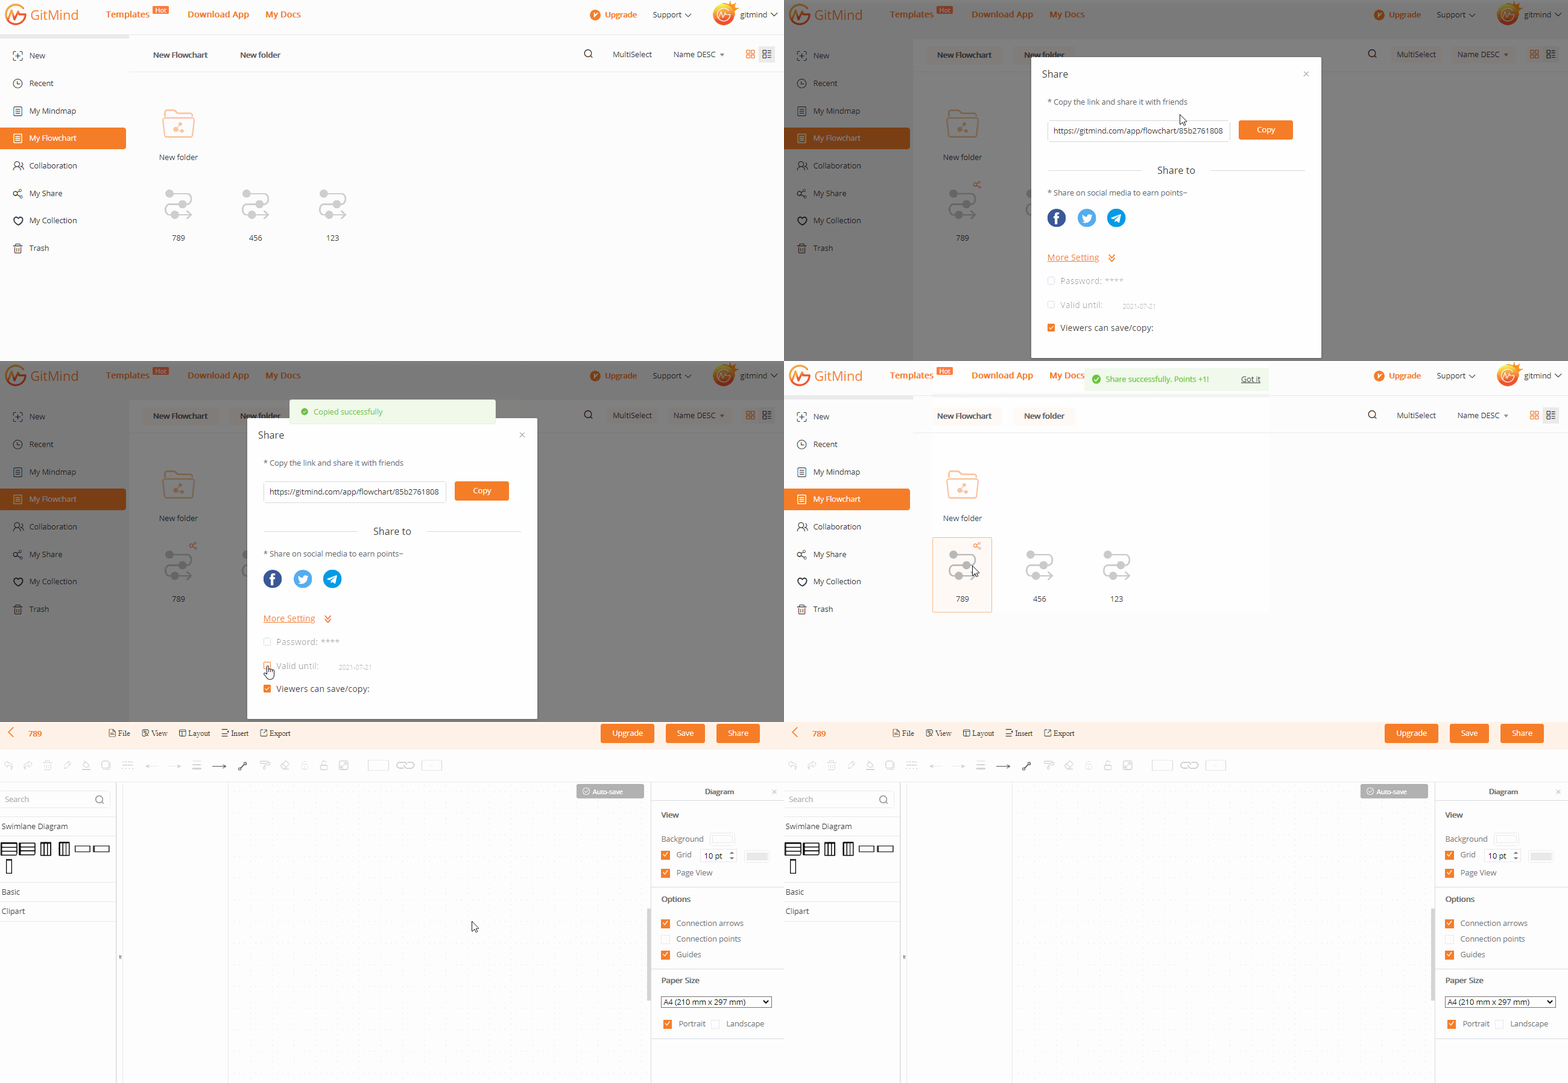
In the “My flowchart” page, right-click on the file to share with others. You can also set a password and time period for the shared diagram. Additionally, you can let viewers copy your diagram or not.
4. Use Templates
Use Templates
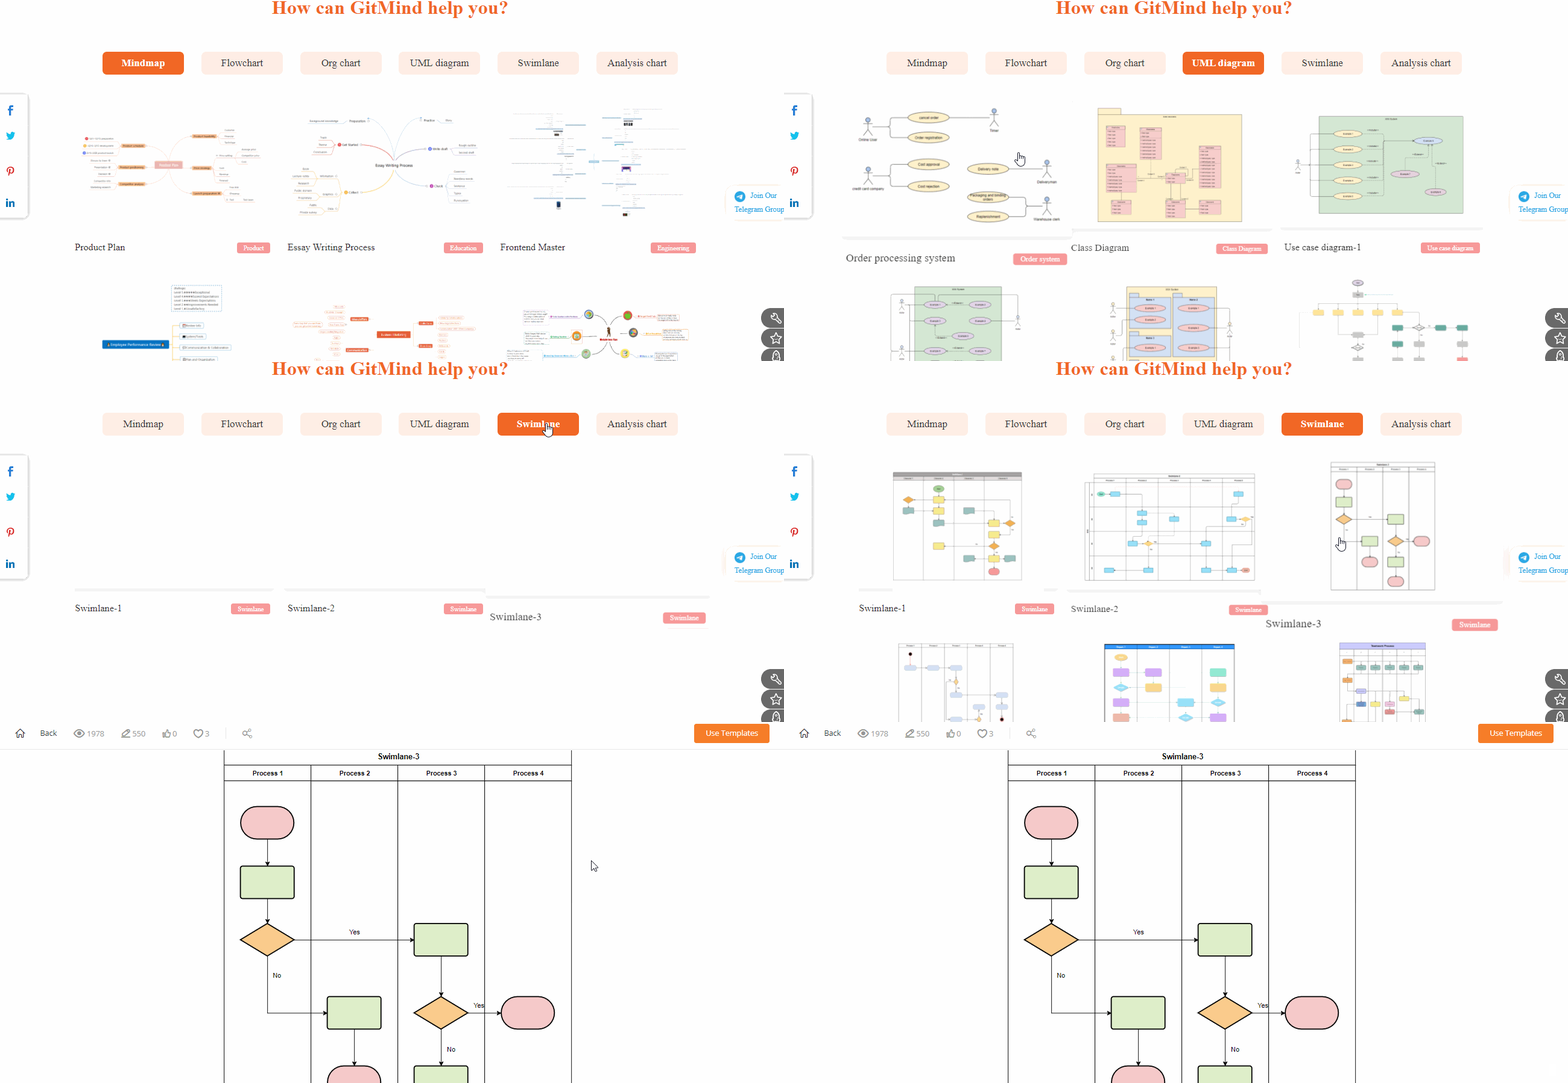
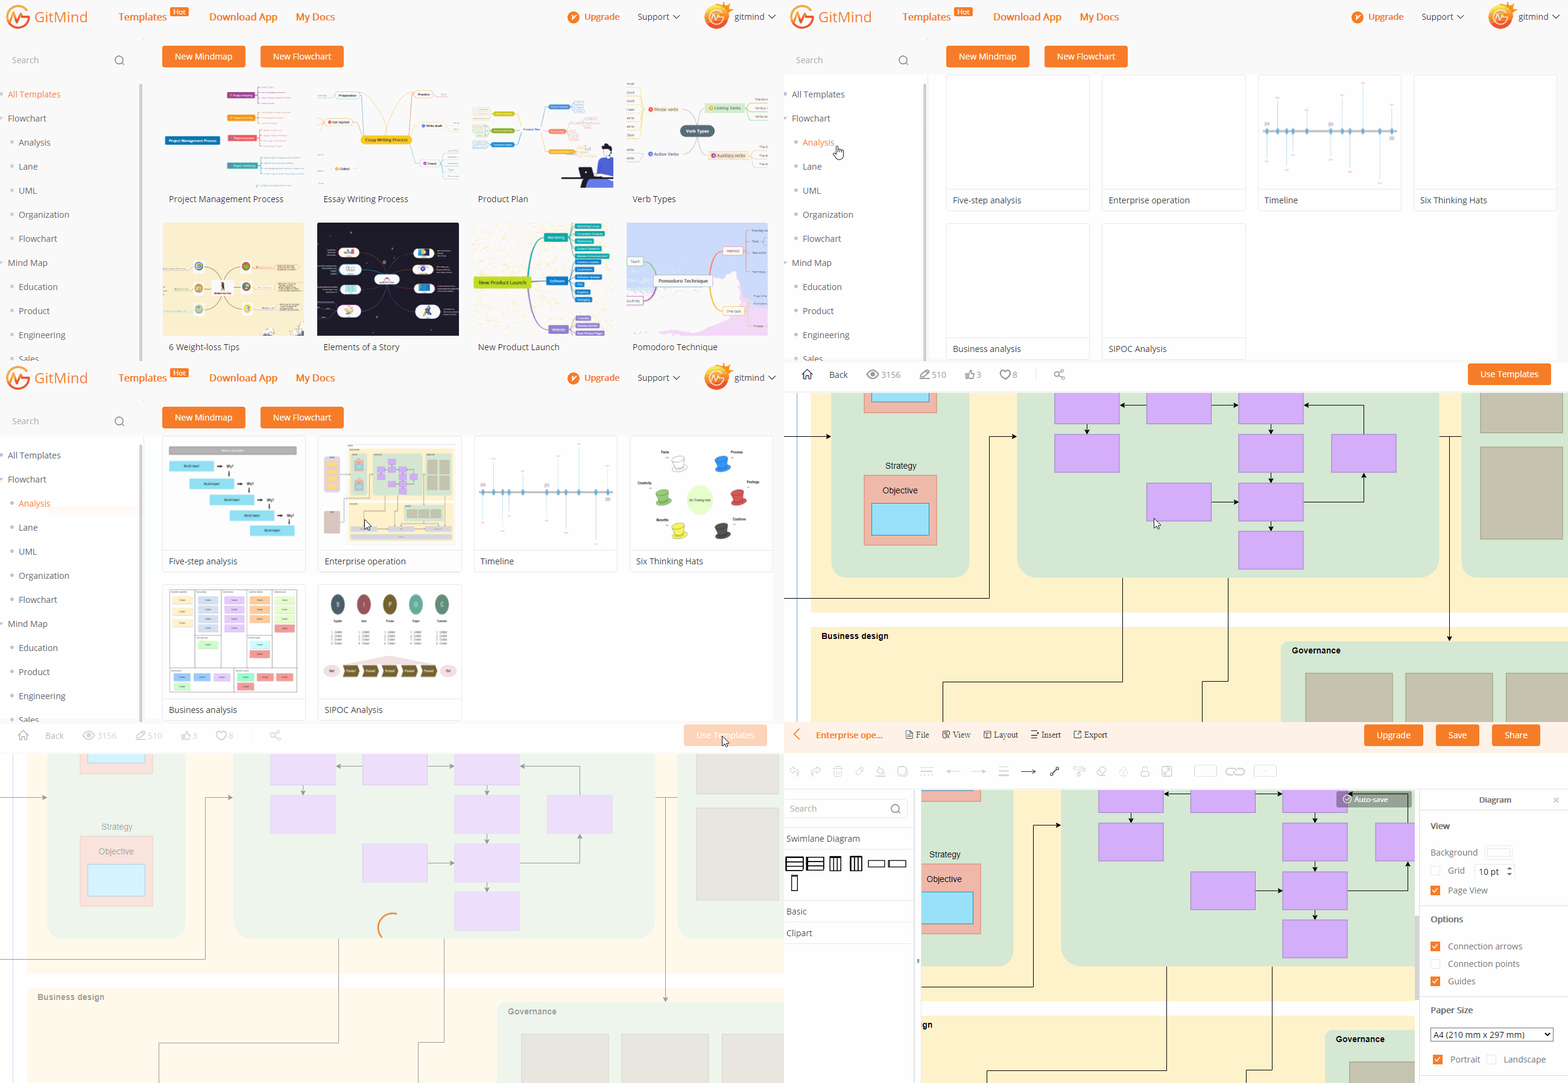
Go to the template library, choose a template you like, click to open it and select “Use Templates” in the upper right corner. Then you can customize it on your own.
5. Shapes Drawing
5.1. Shape Management
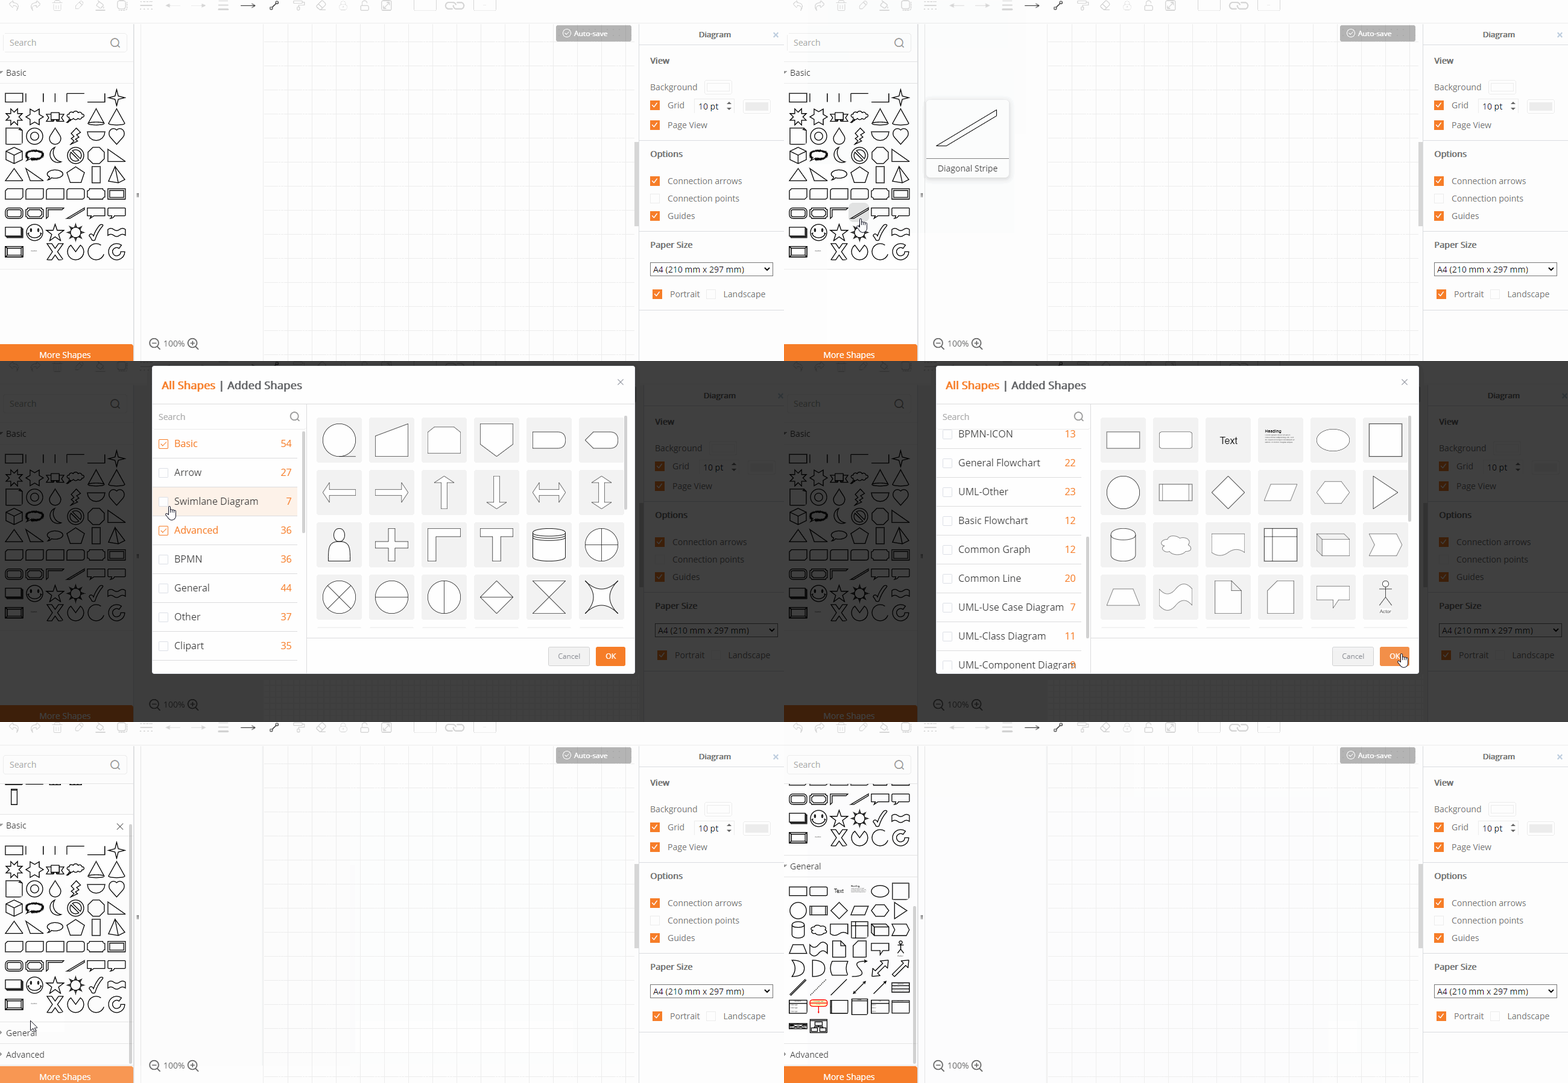
GitMind provides a large number of shapes for you to use. You can also add more or hide shapes.
5.1.1. Drag and Drop
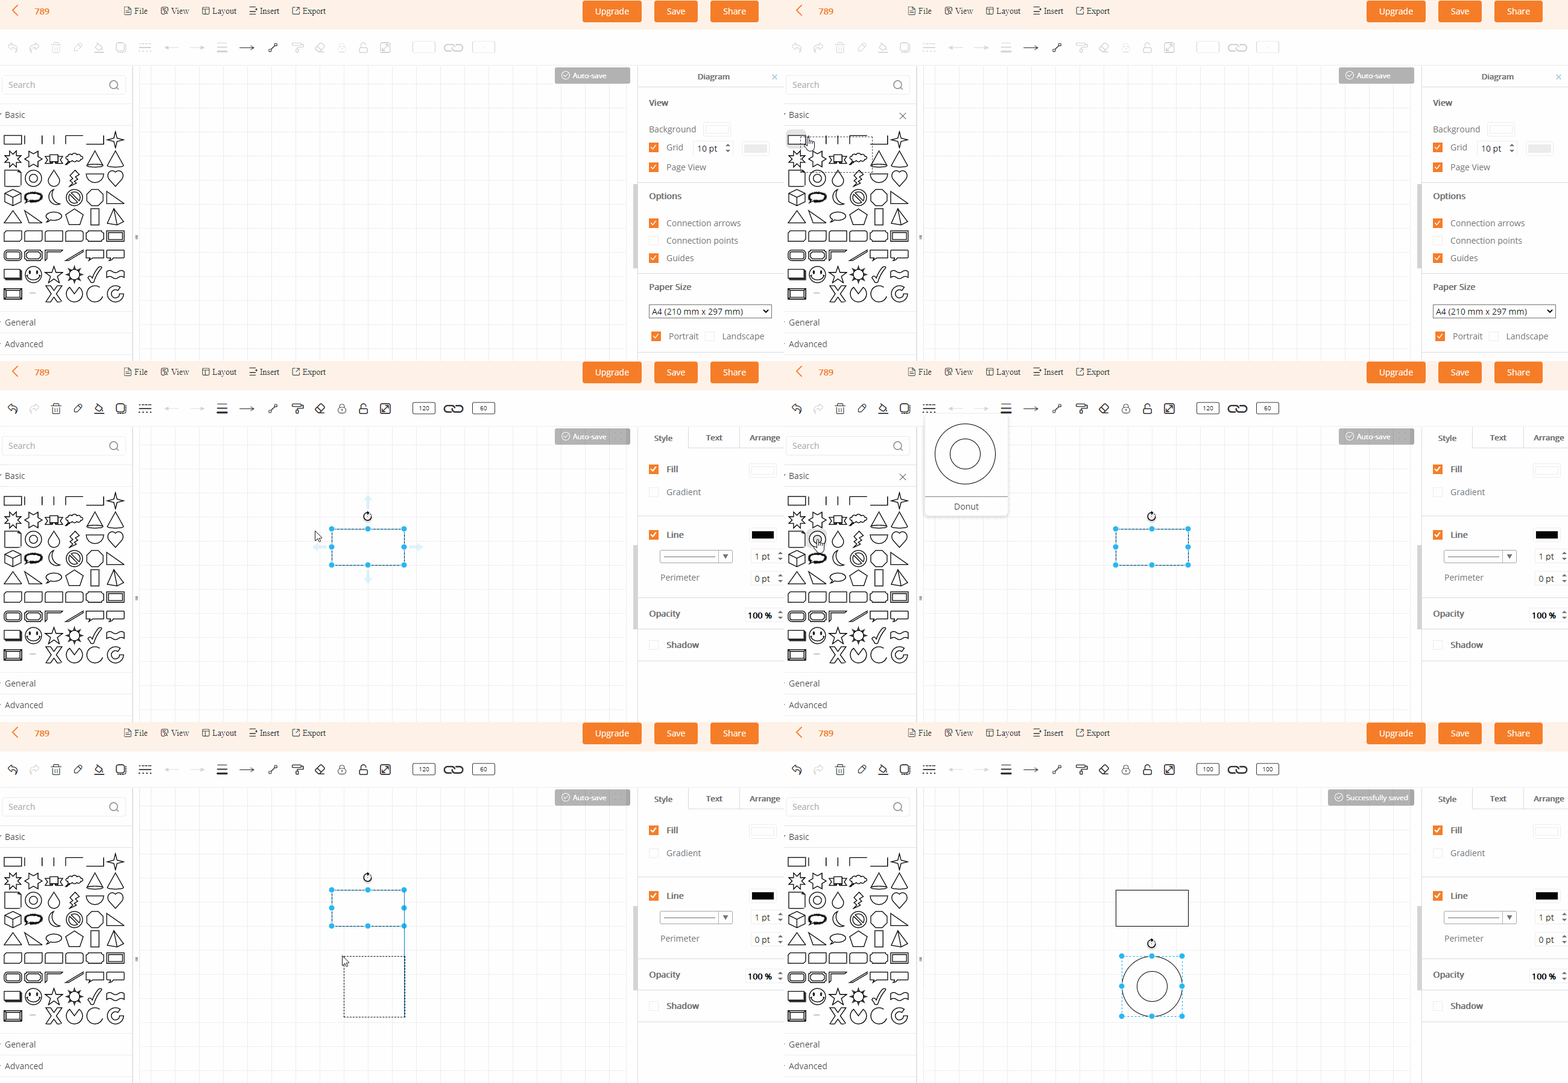
In the flowchart making page, select the shapes in the left shape library, and drag it to the canvas.
5.1.2. Dimension
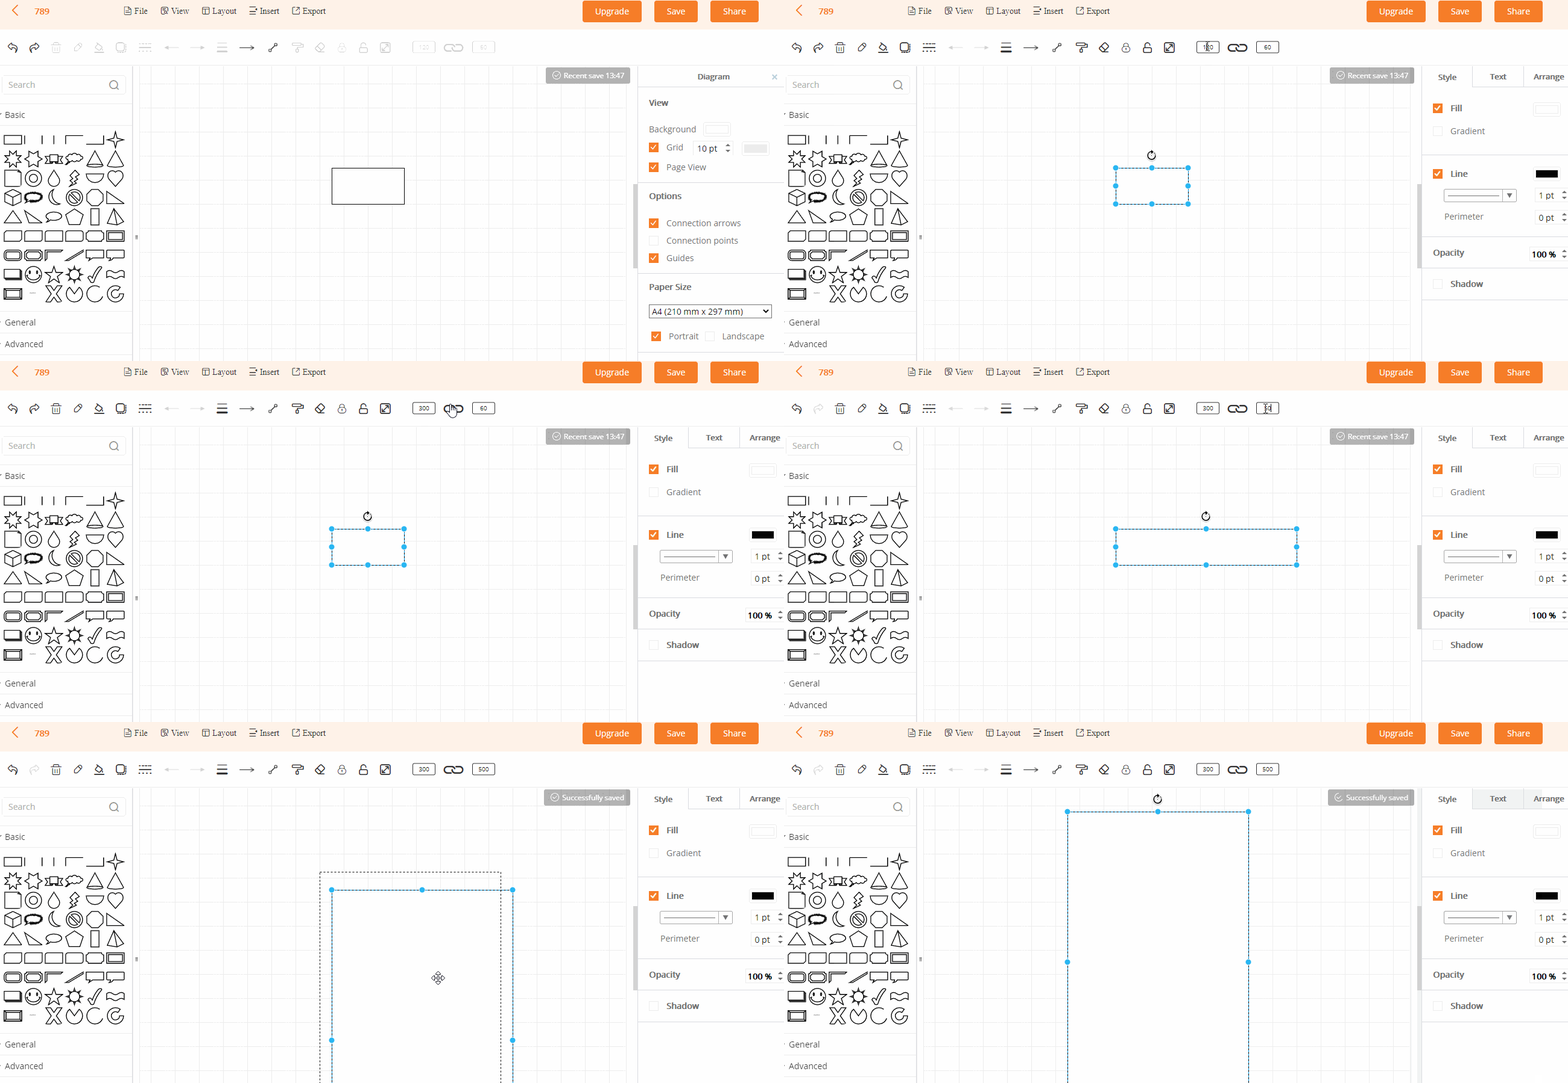
Select the shape and enter the value to adjust the length and width of it. You can also select multiple shapes and apply bulk adjustment.
5.1.3. Style
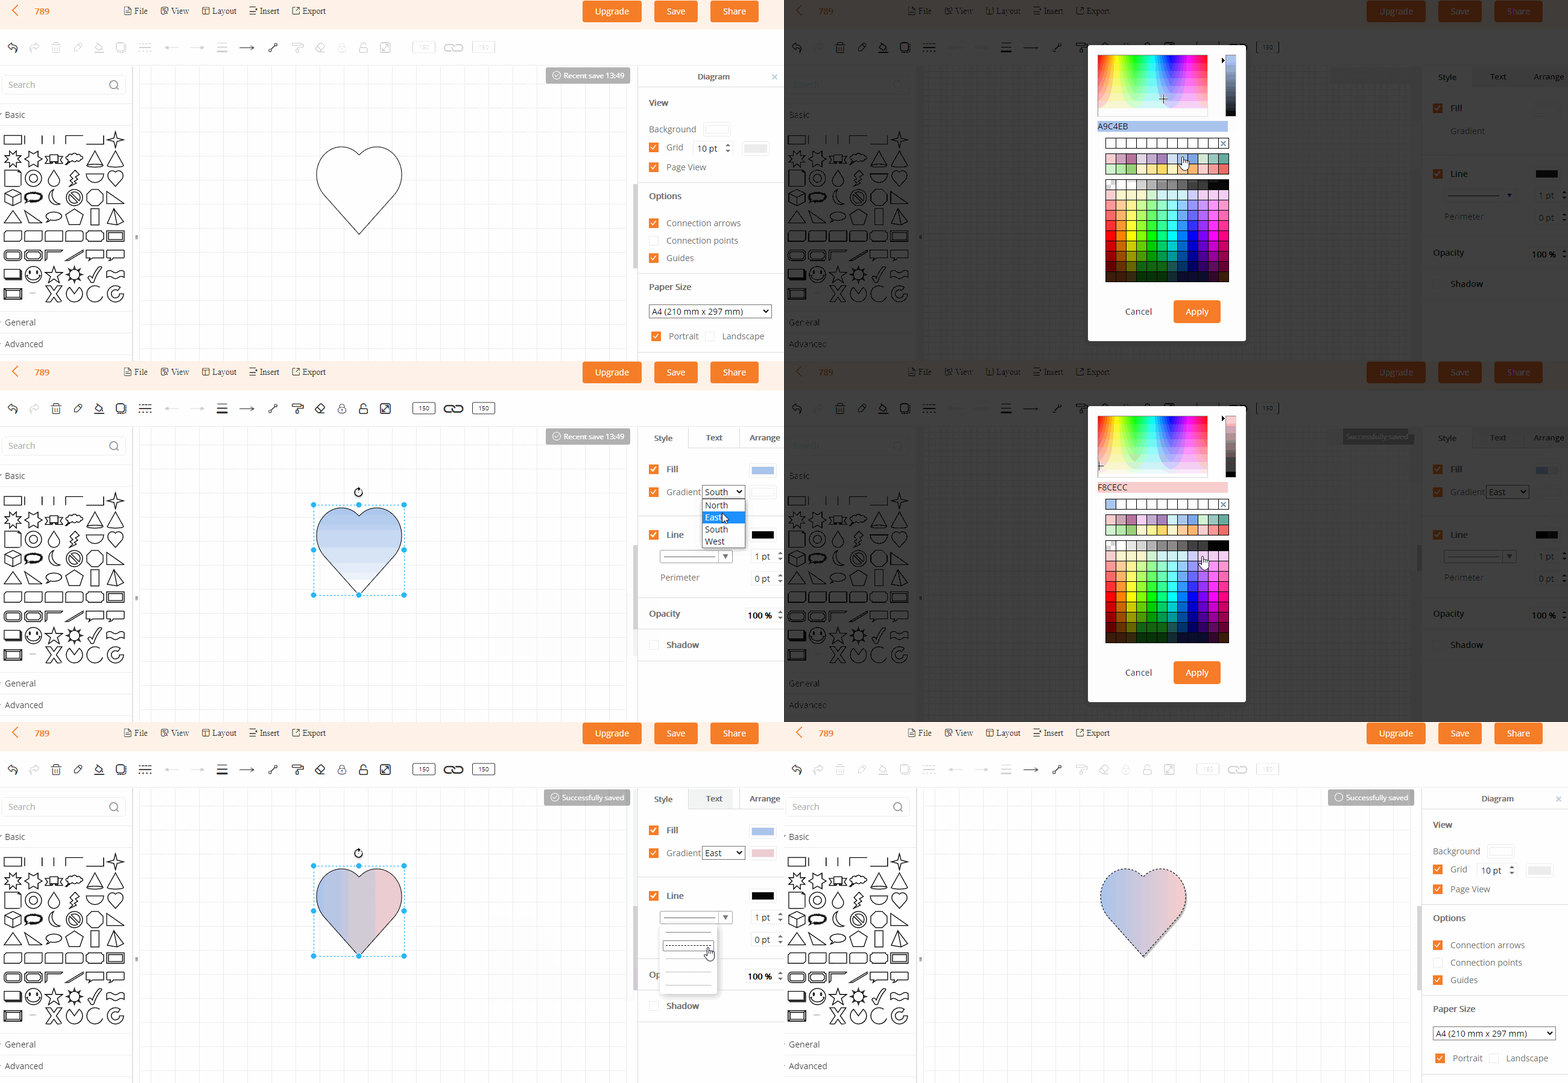
Select the shape in the canvas, then you can customize the fill color, line color, border and other parameters.
5.1.4. Text
Double click on the text and you can set the text font, position, color, spacing and other parameters in the pop-up toolbar.

5.1.5. Arrange
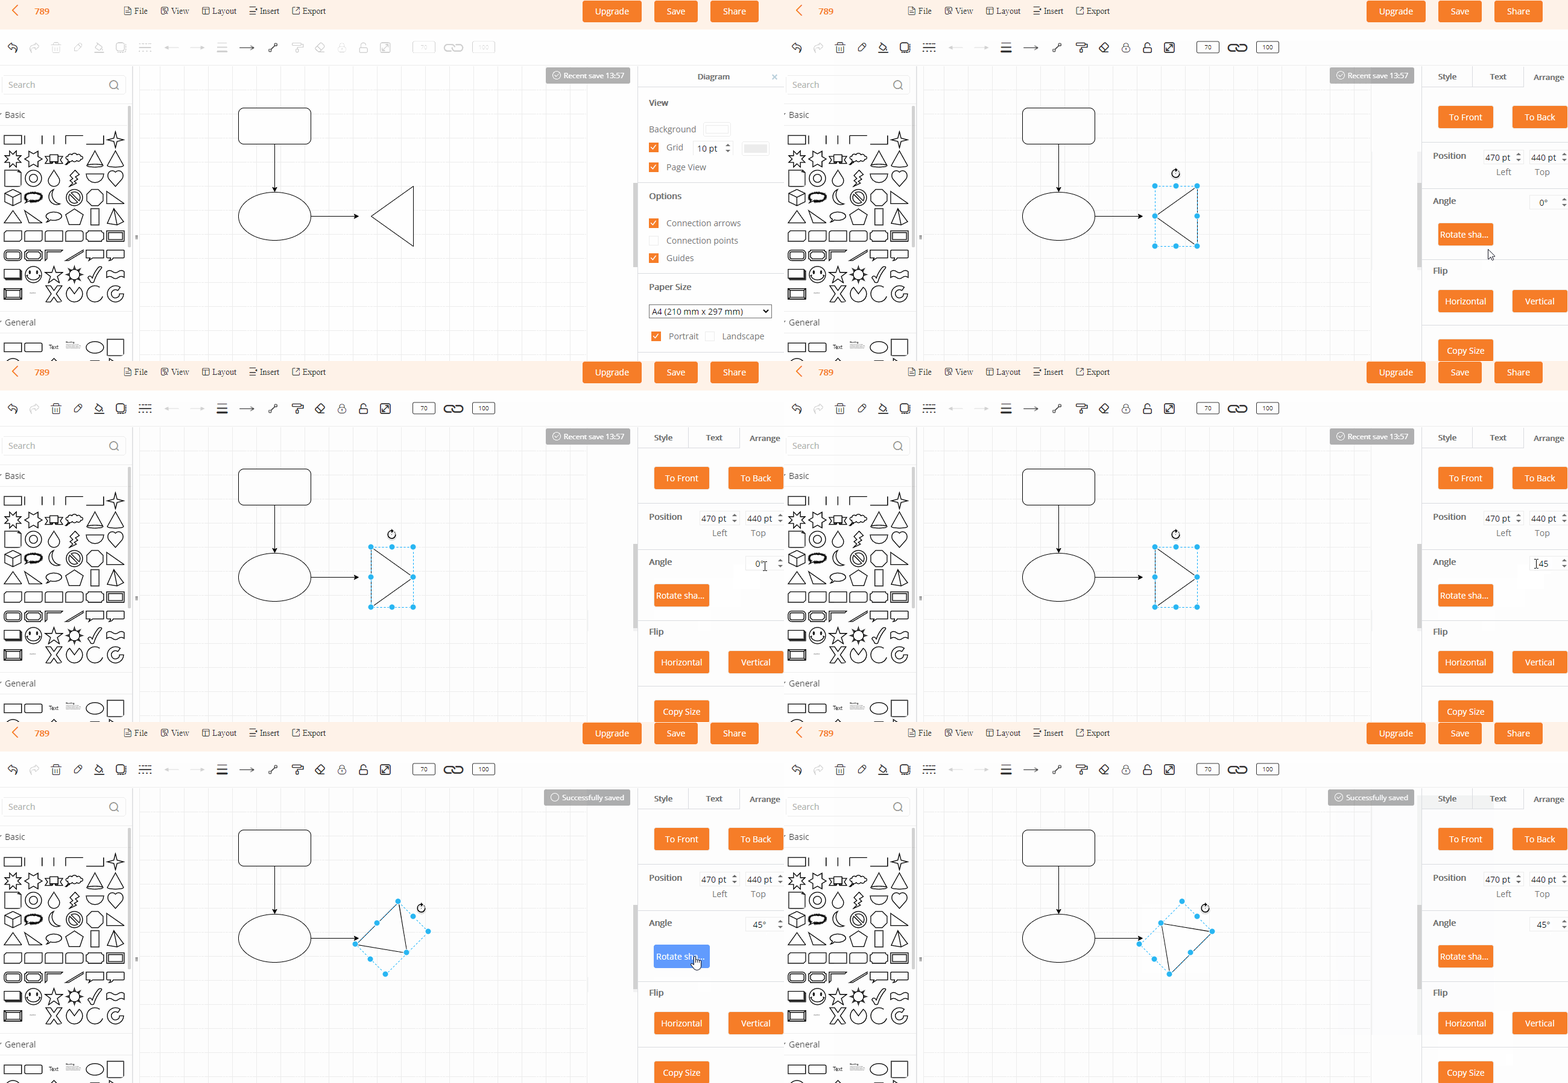
Select the shapes in the canvas, and you can adjust the position, angle, and direction at the right “Arrange” toolbar.
5.1.6. Copy Size
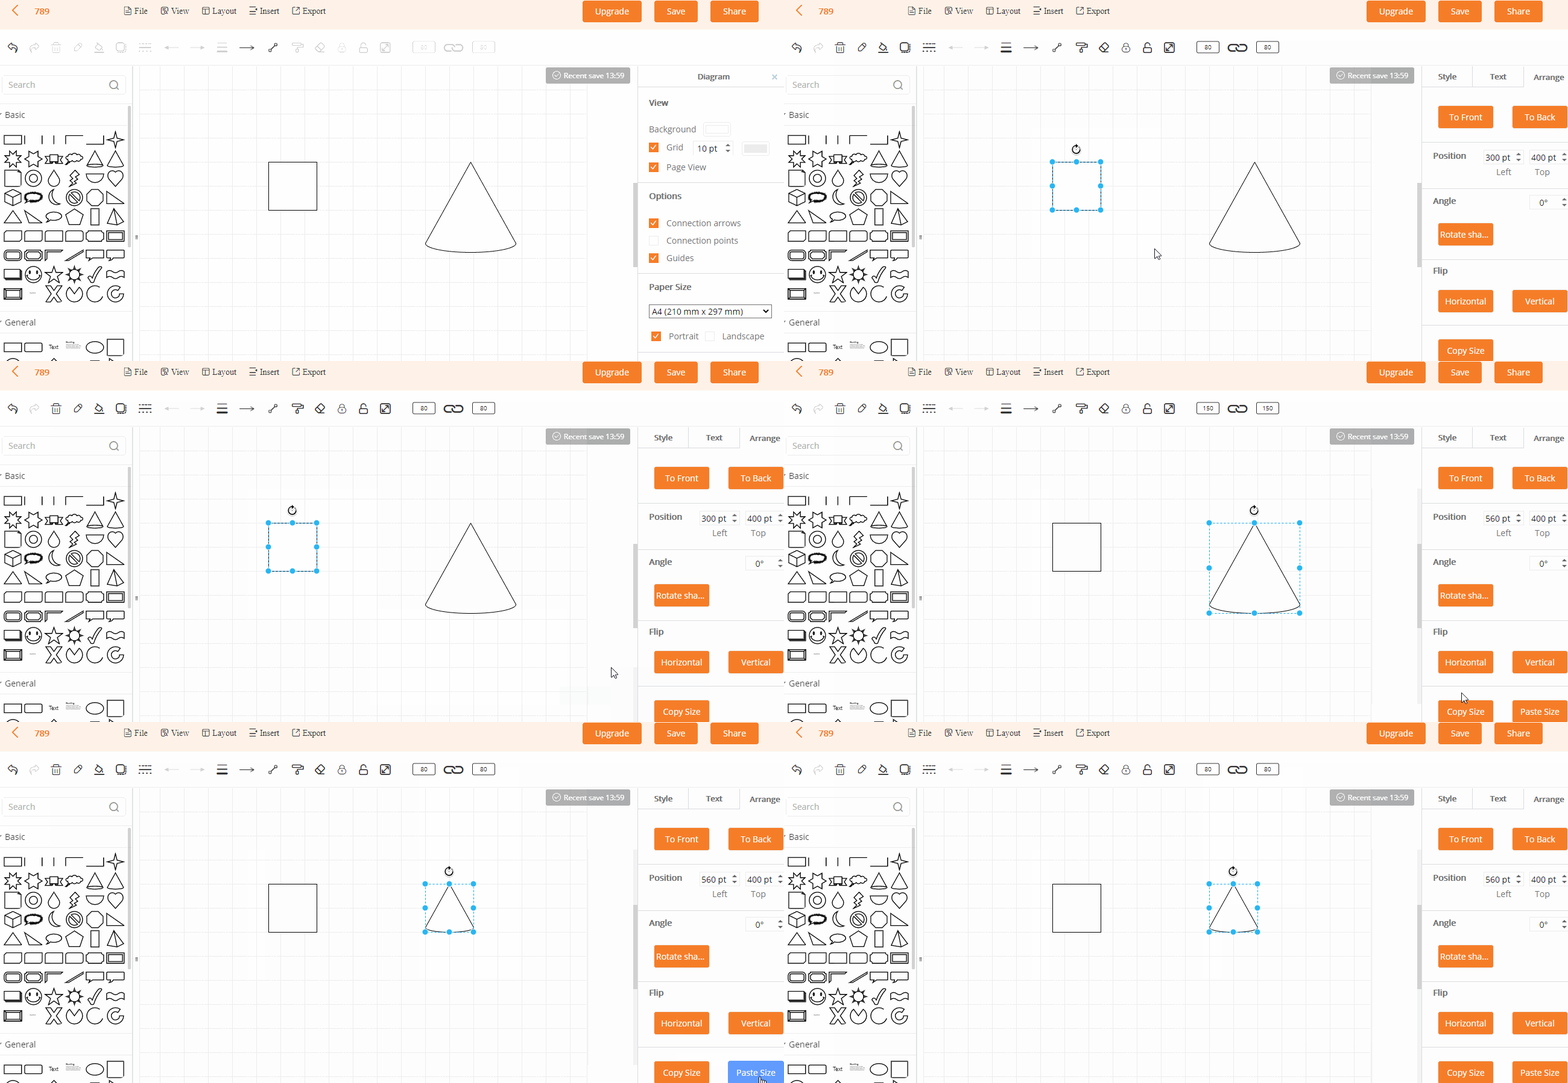
Select the target shape, click “Copy Size”. Select another shape and then click “Paste Size”.
5.1.7. Search
Enter keywords in the search bar to quickly find the shapes you need.
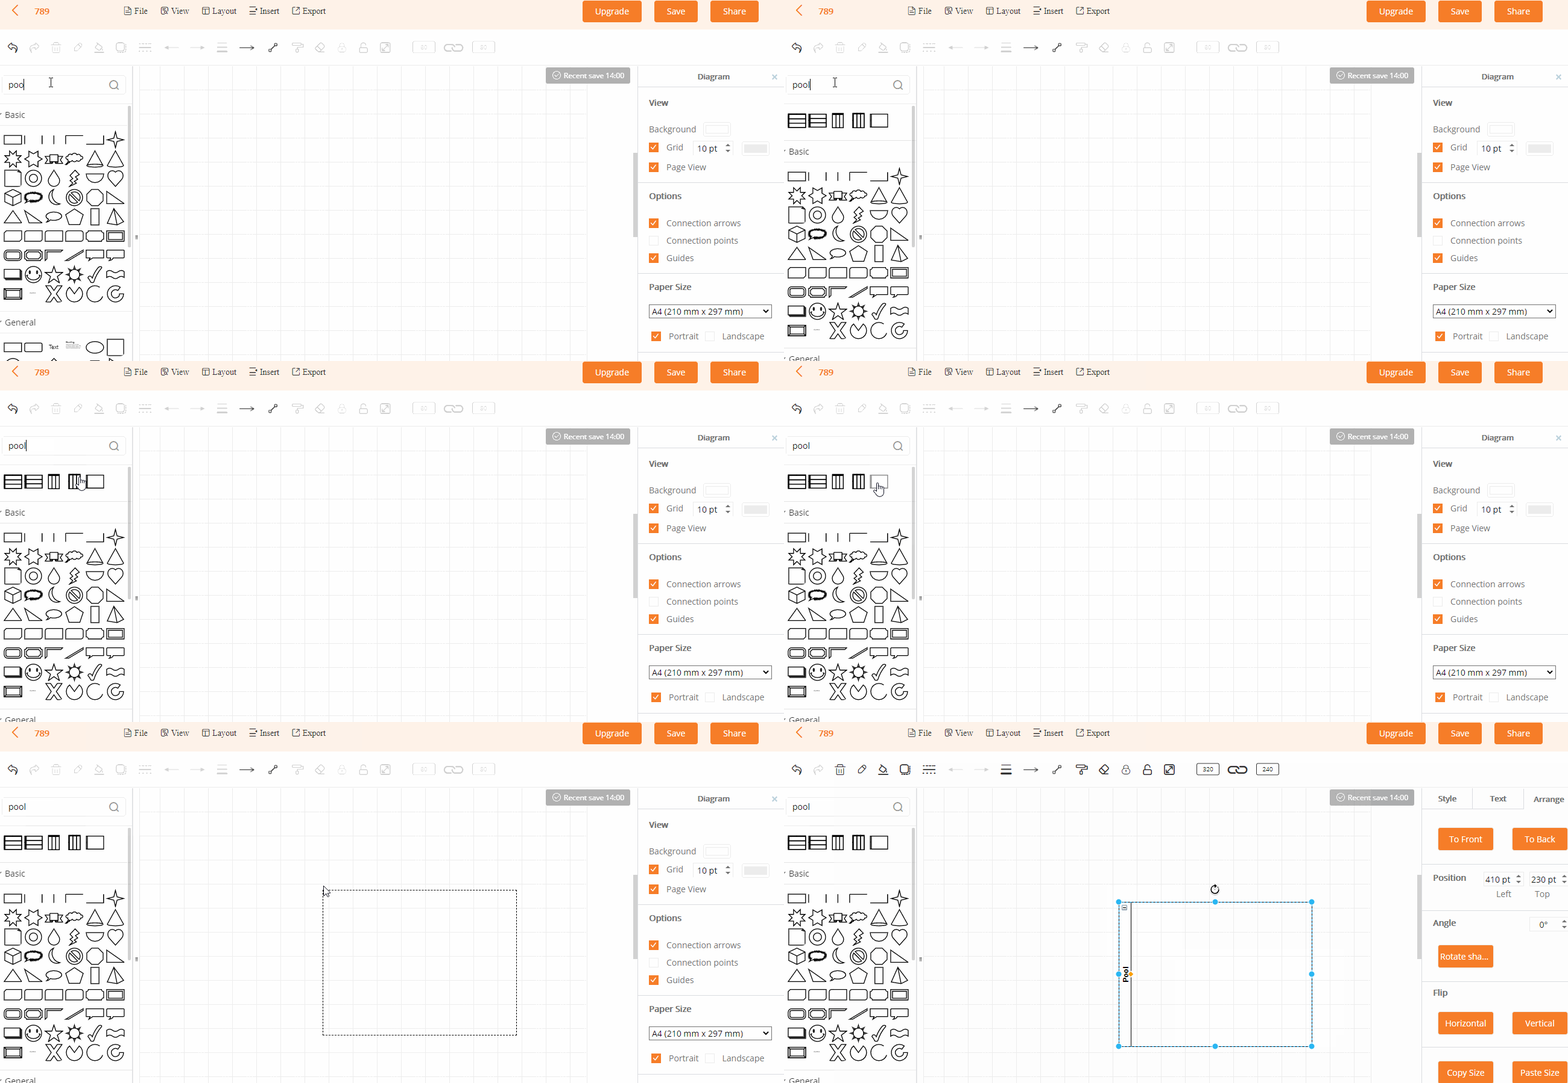
5.1.8. Lock
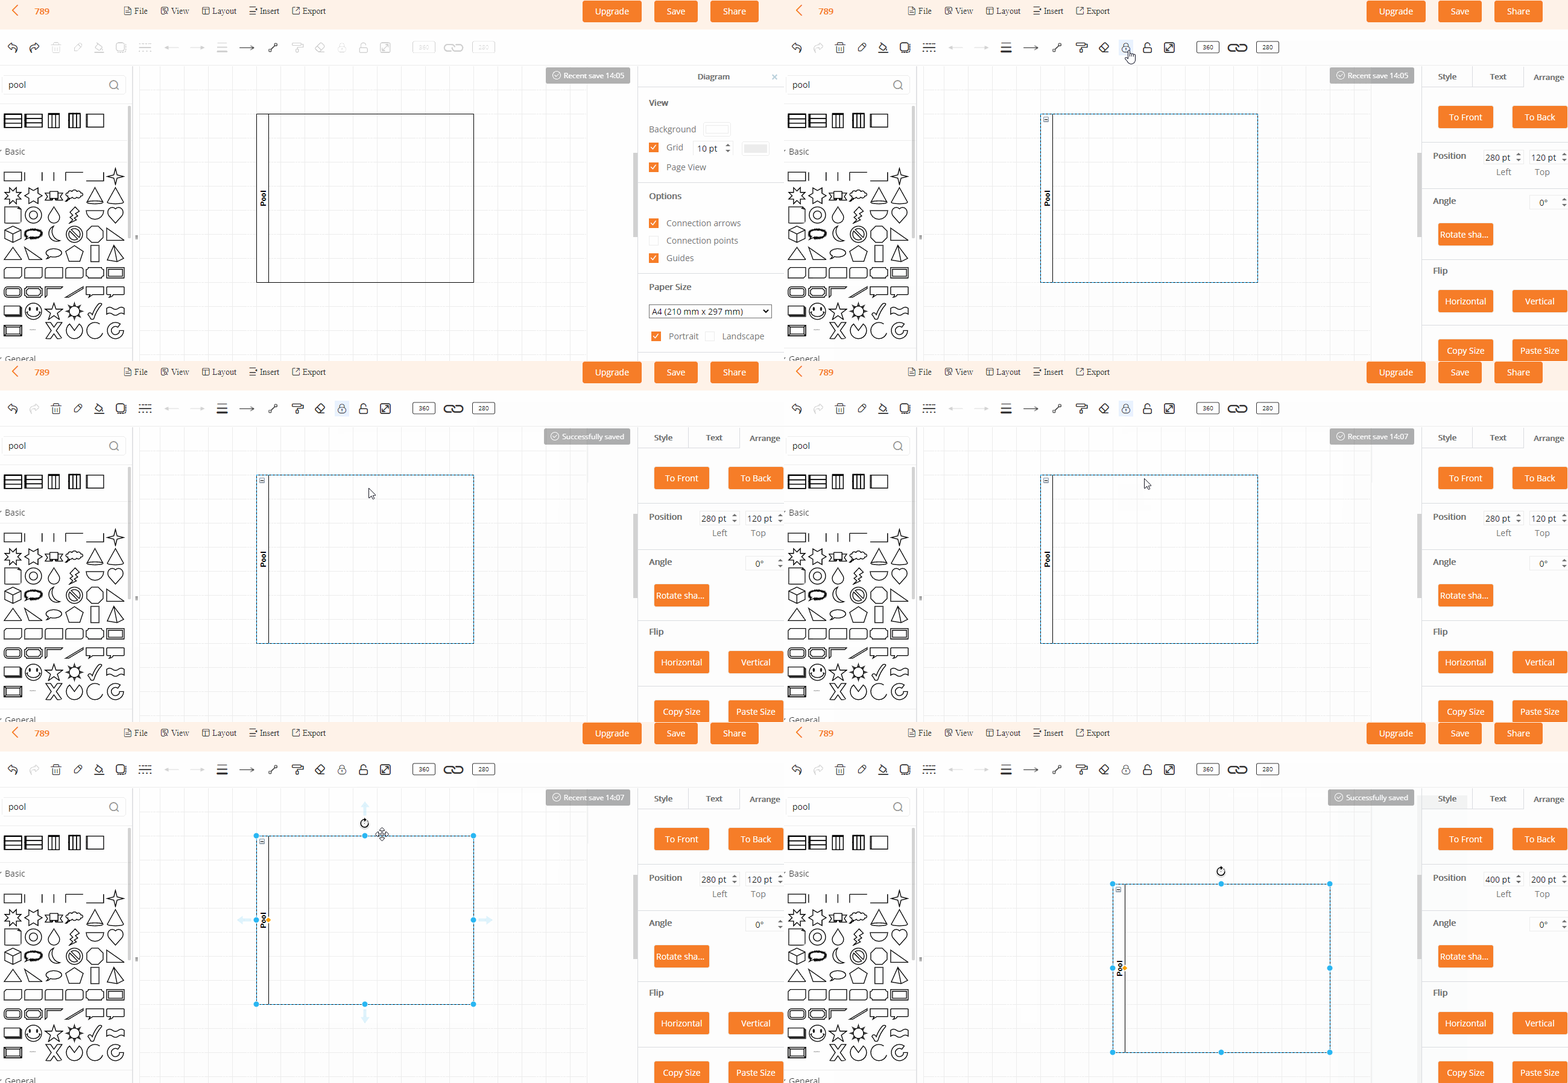
Select the shape in the canvas, and click “Lock” at the top toolbar. The shape will be locked and cannot be moved with the mouse. If you want to move it, click “Unlock”.
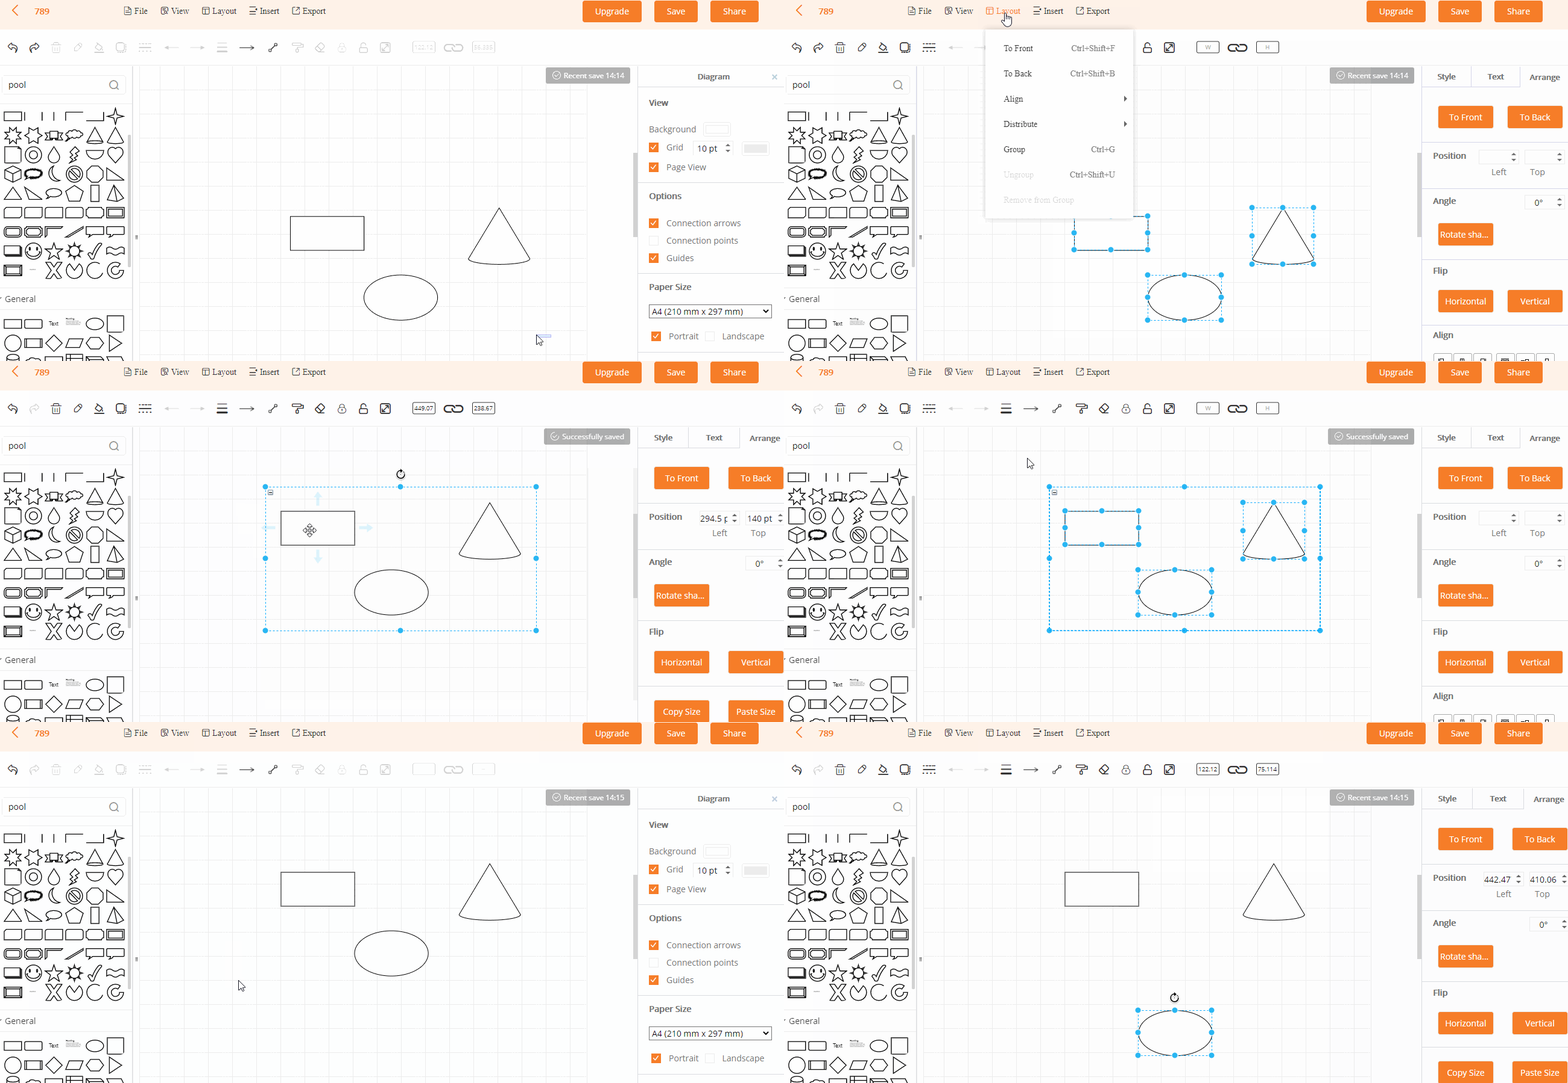
5.1.9. Group
Select multiple shapes, click “Group” at the top toolbar to combine multiple shapes into a whole, and click “Ungroup” to cancel the combination. You can also use the shortcut “Ctrl+G” to group, and “Ctrl+Shift+U” to ungroup.
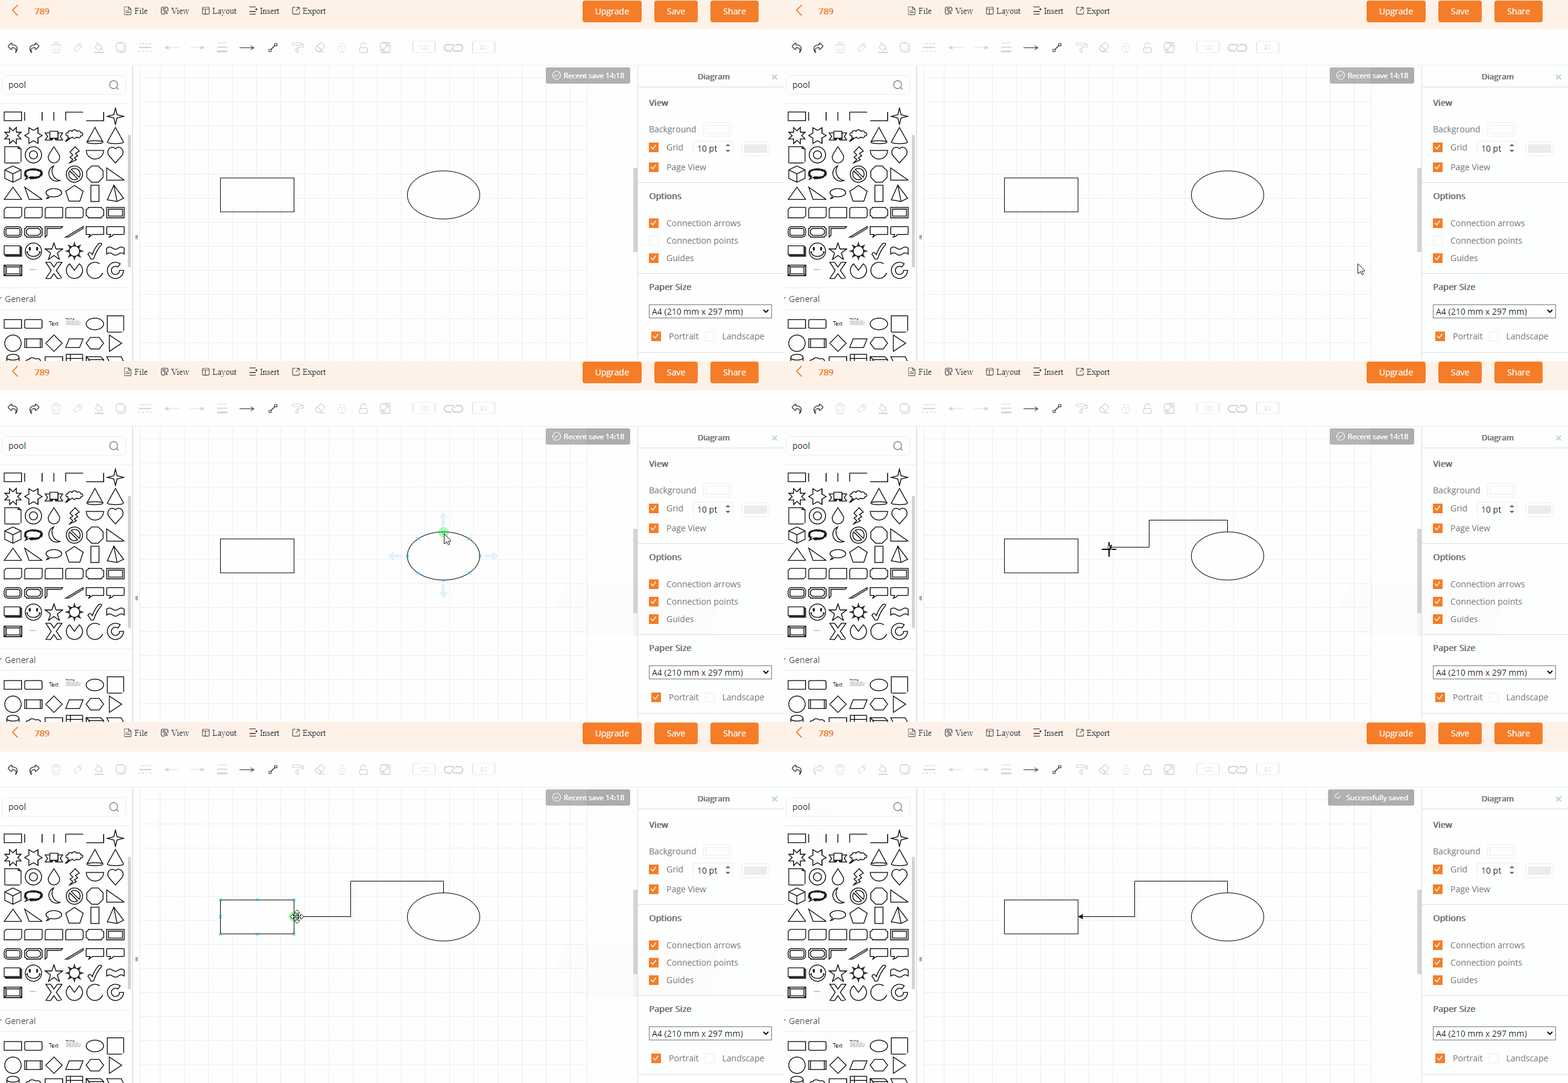
5.1.10. Connection Point
Tick “Connection Point” in the right toolbar. Click a shape and drag a connector to another shape.
5.2. Import
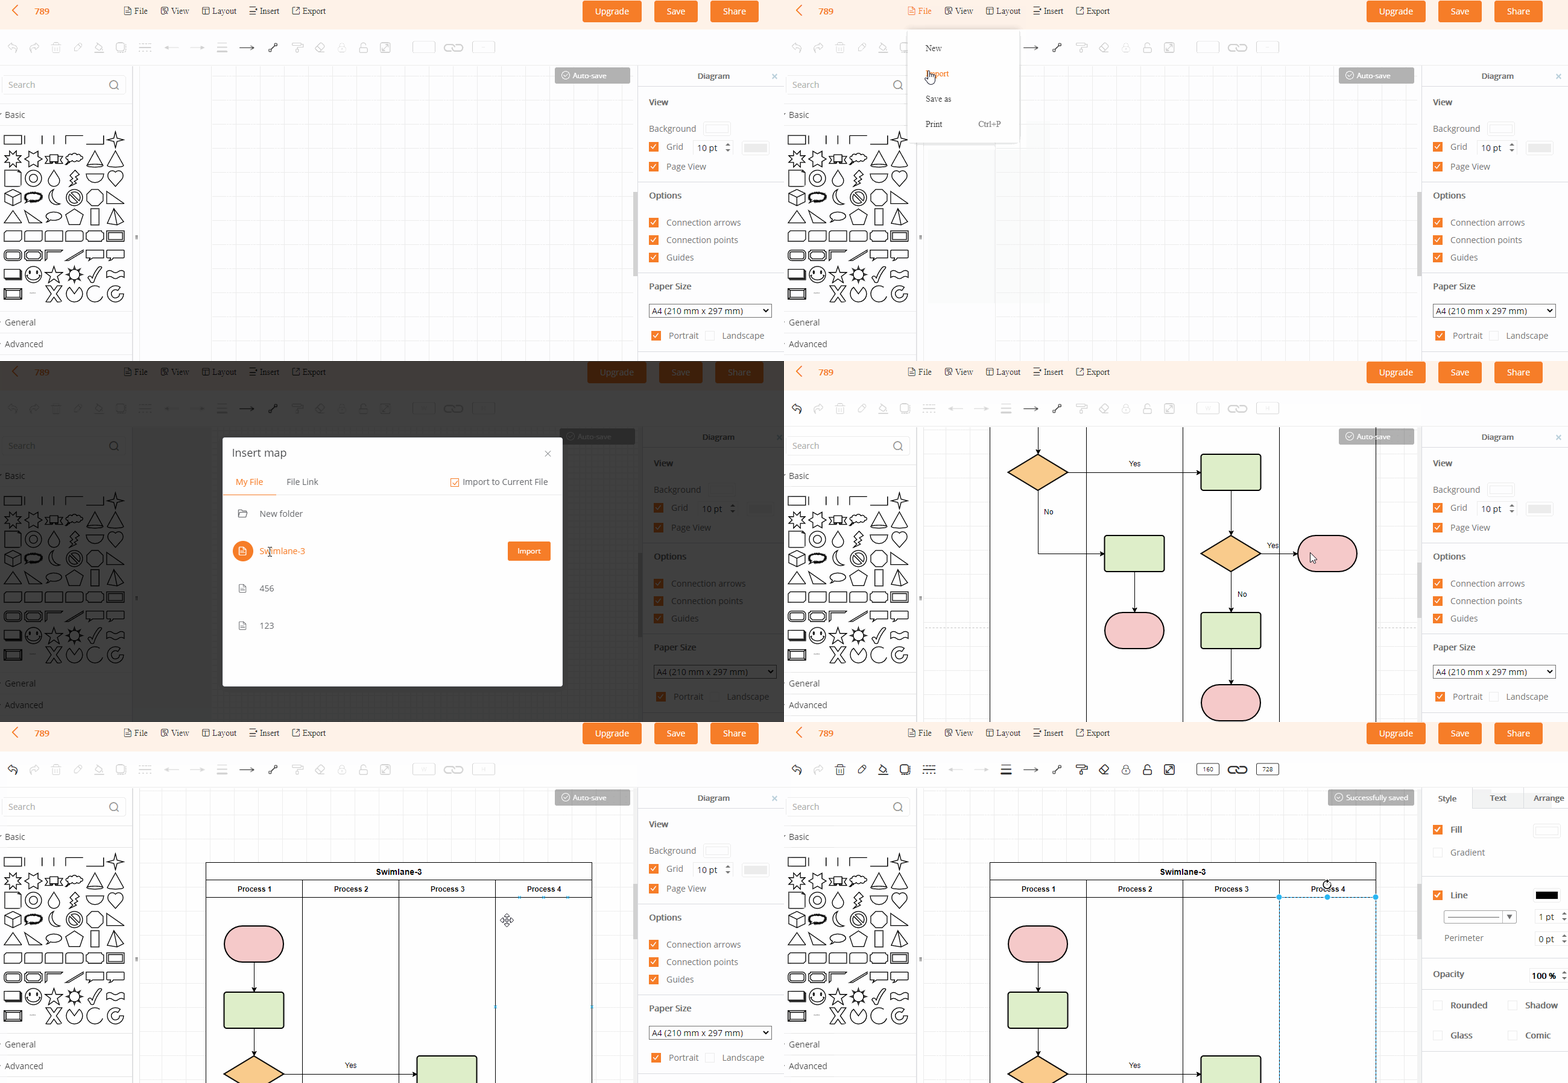
Move to “File” option and select “Import” in the upper toolbar, and choose a file to import.
5.3. Connector
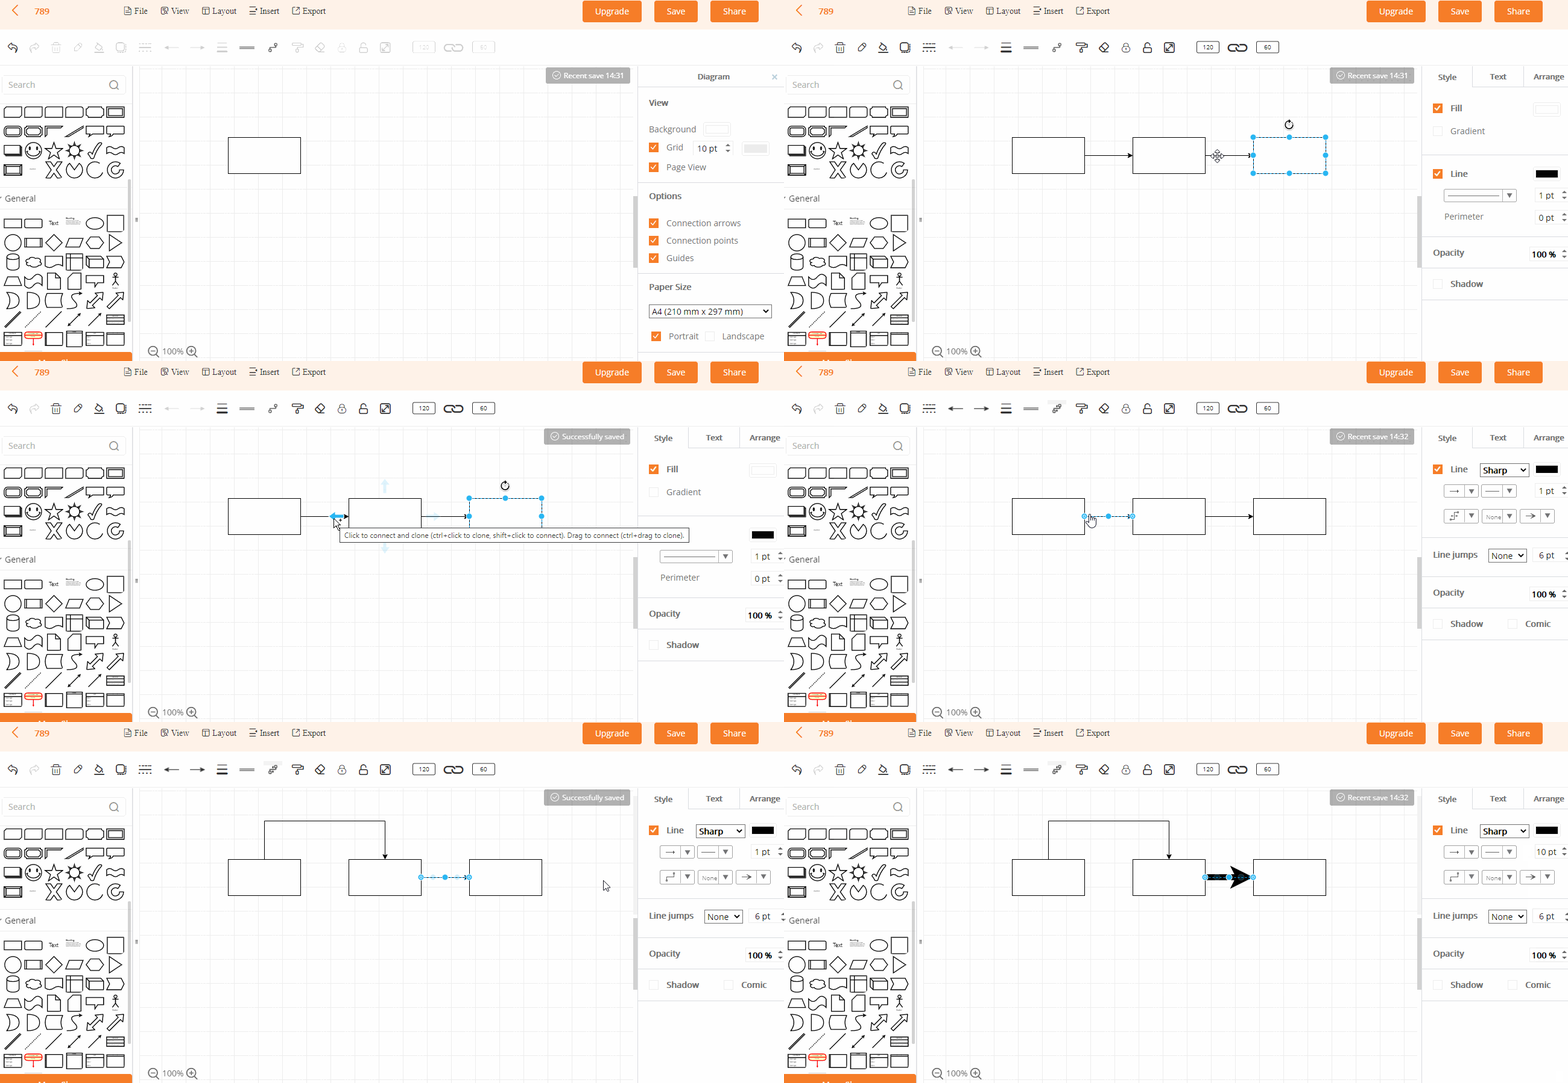
After selecting a connector, you can customize the line direction, width, style.
5.4. Format Painter
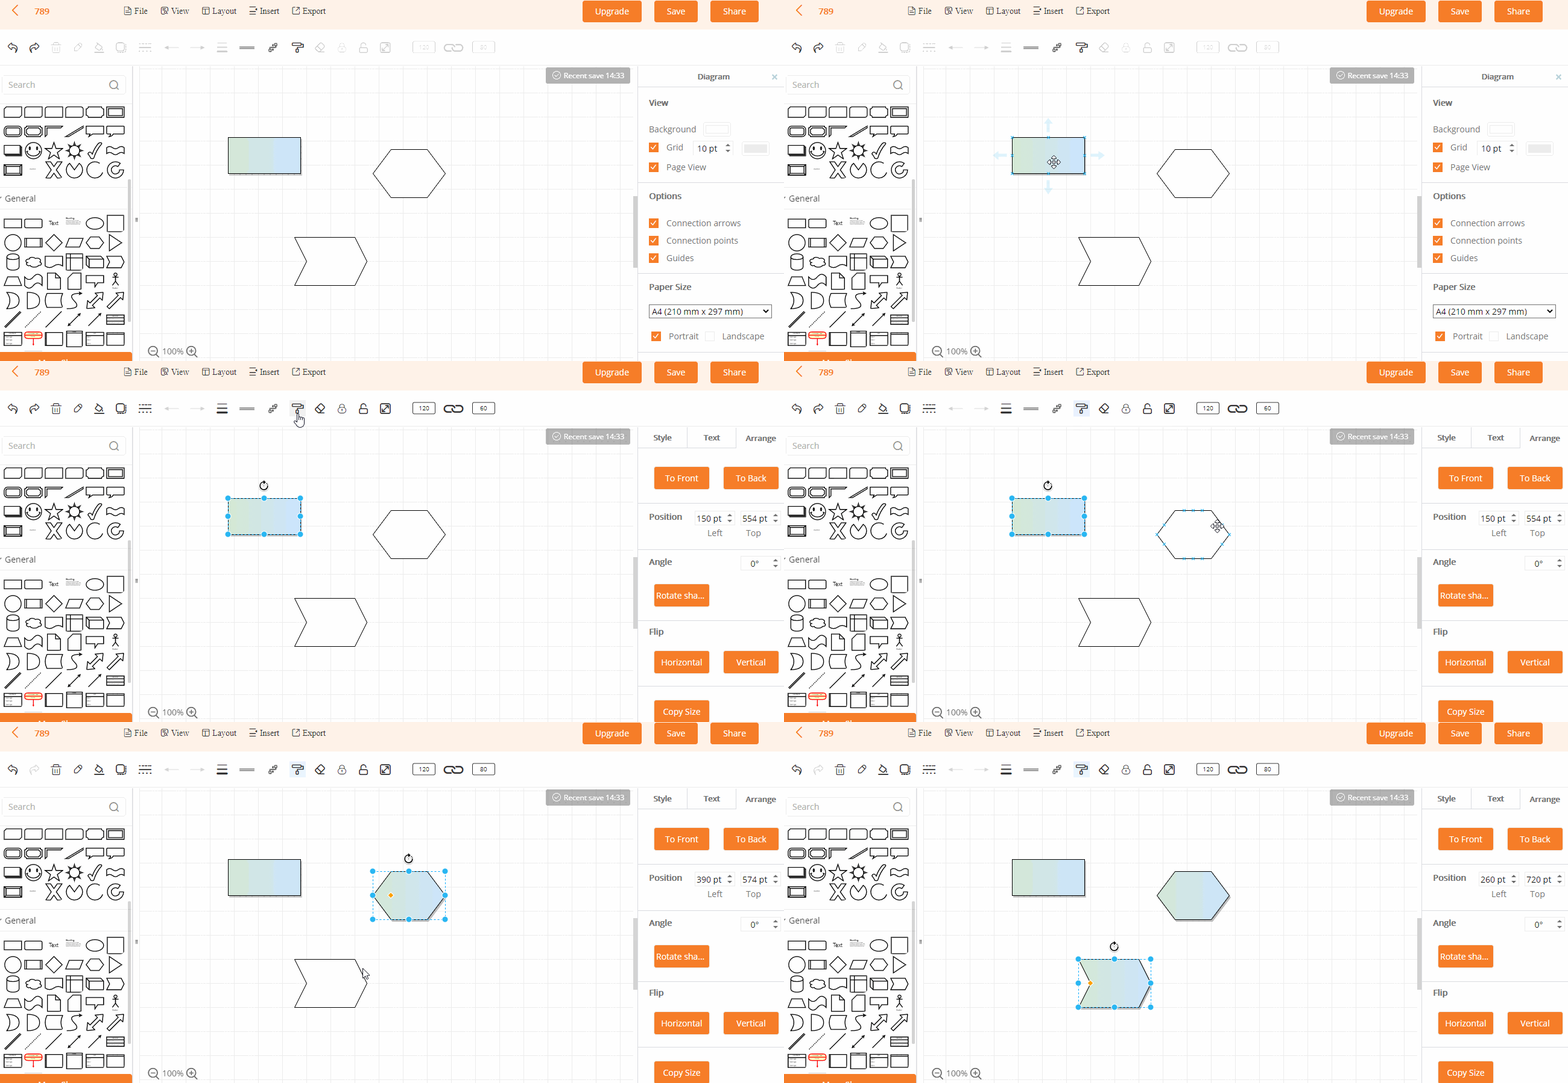
Select the shape, click “Format Painter”, and then select other graphics, you can apply the fill color, border and other attributes of the first shape to other shapes.
5.5. Remove Format
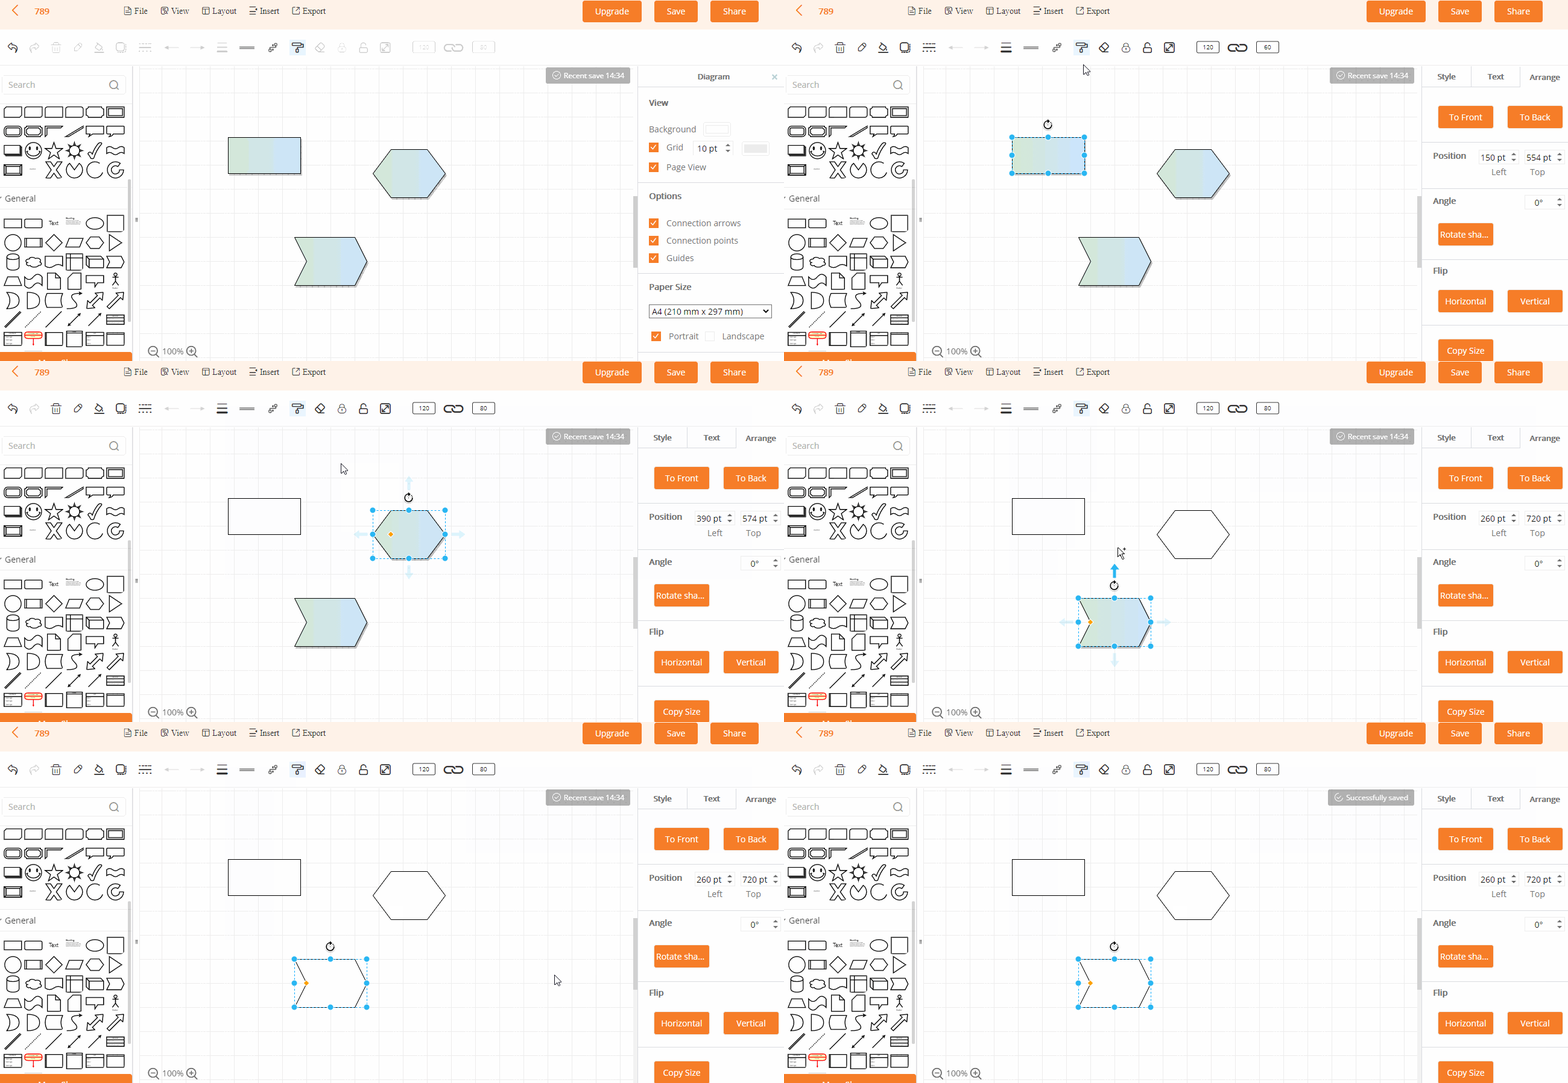
Select the shape and click “Remove Format” on the upper toolbar to clear all the shape formats, including fill, border and other attributes.
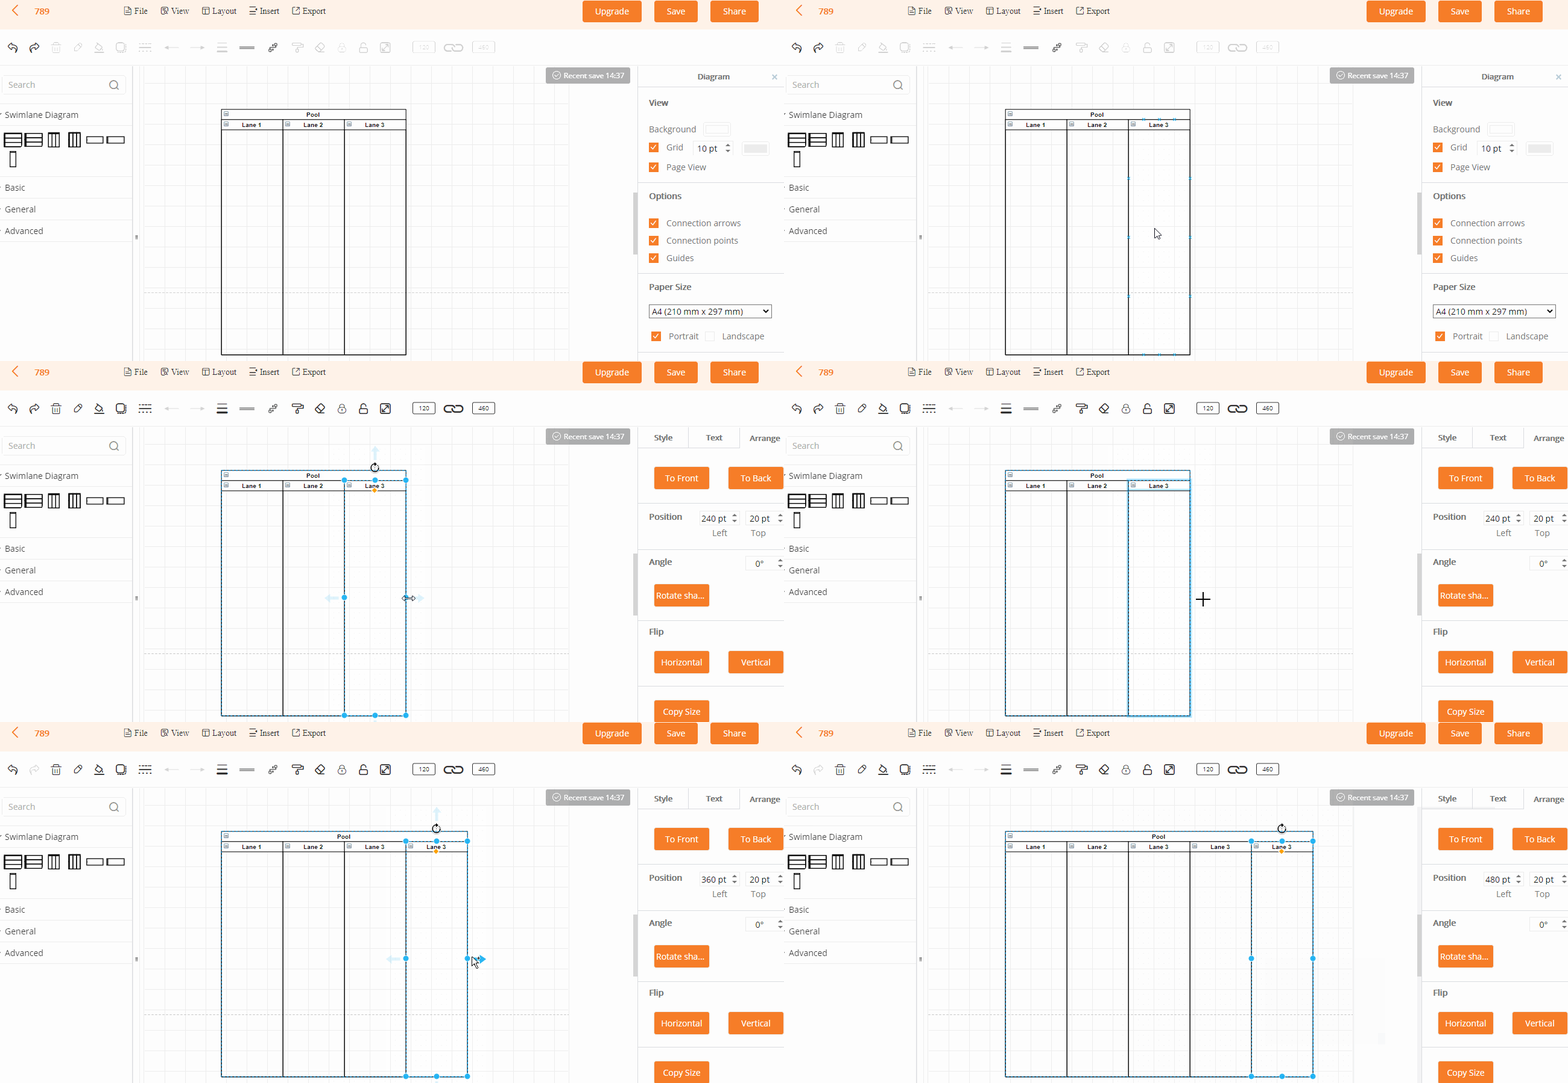
5.6. Add Swimlane
Select a swimlane in the shape library, and directly drag it to the canvas. If you want to add a swimlane, you can select a single lane and click the blue arrow on the side.
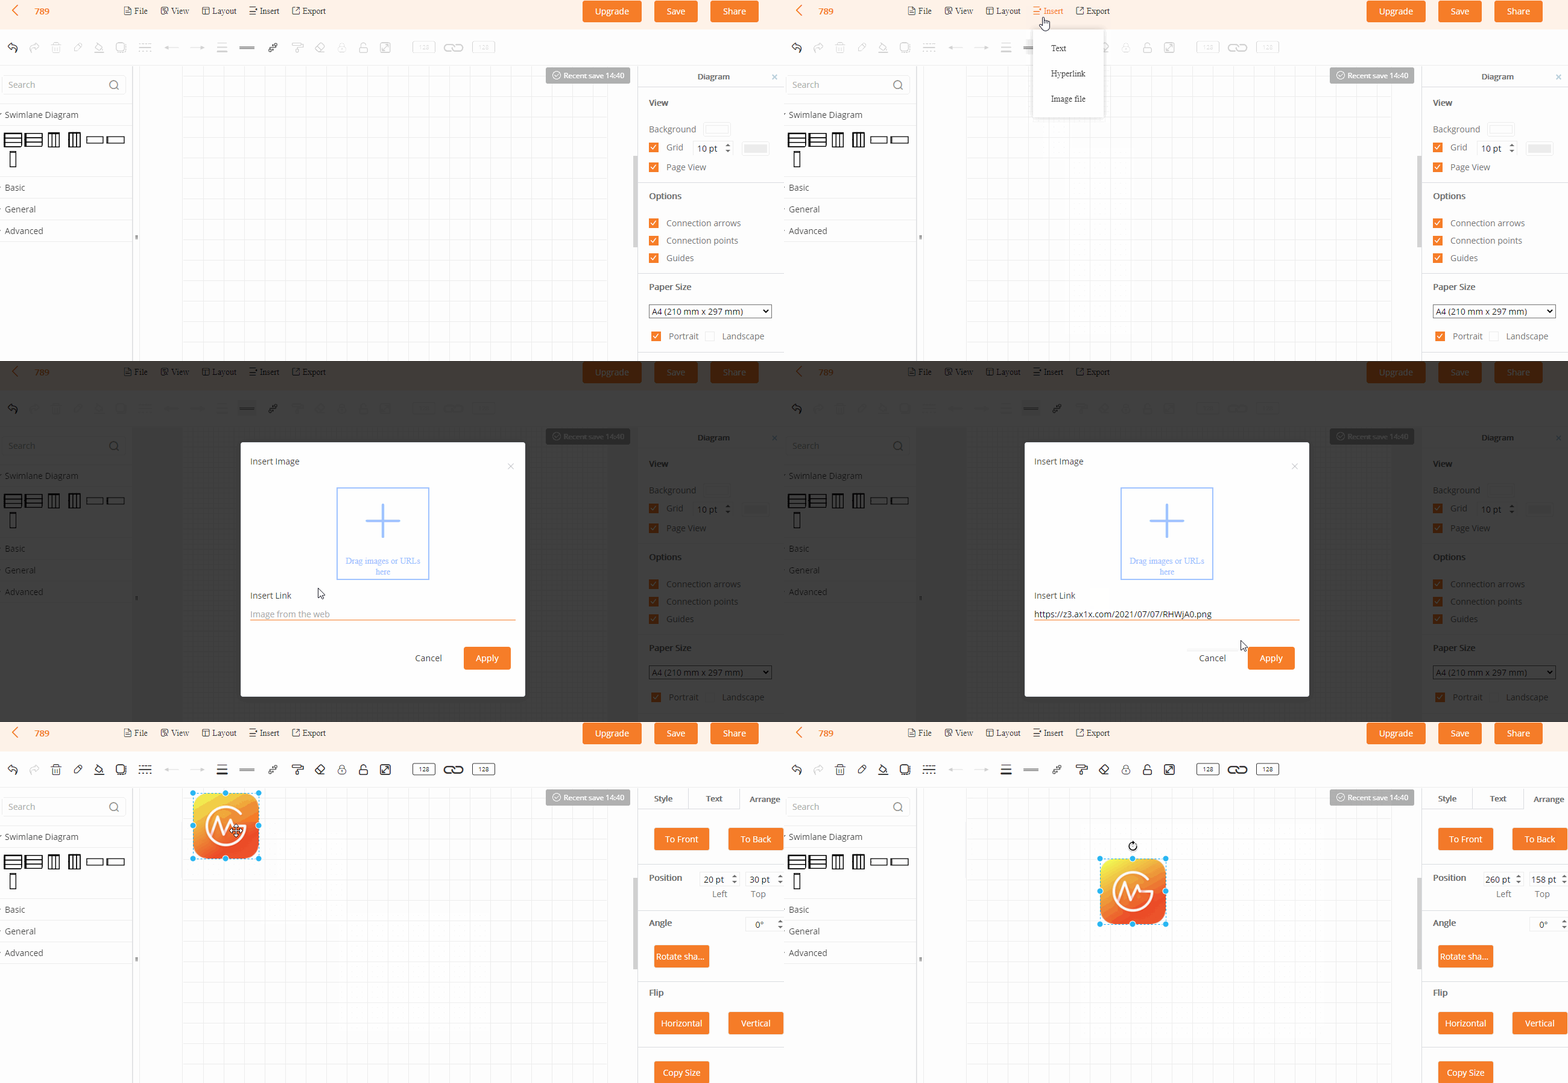
5.7. Insert Image
Click “Insert” on the upper toolbar, and you can insert rich text such as images, links, and text in the flowchart.
5.8. Export
Click “Export” to export the flowchart as image and PDF format.

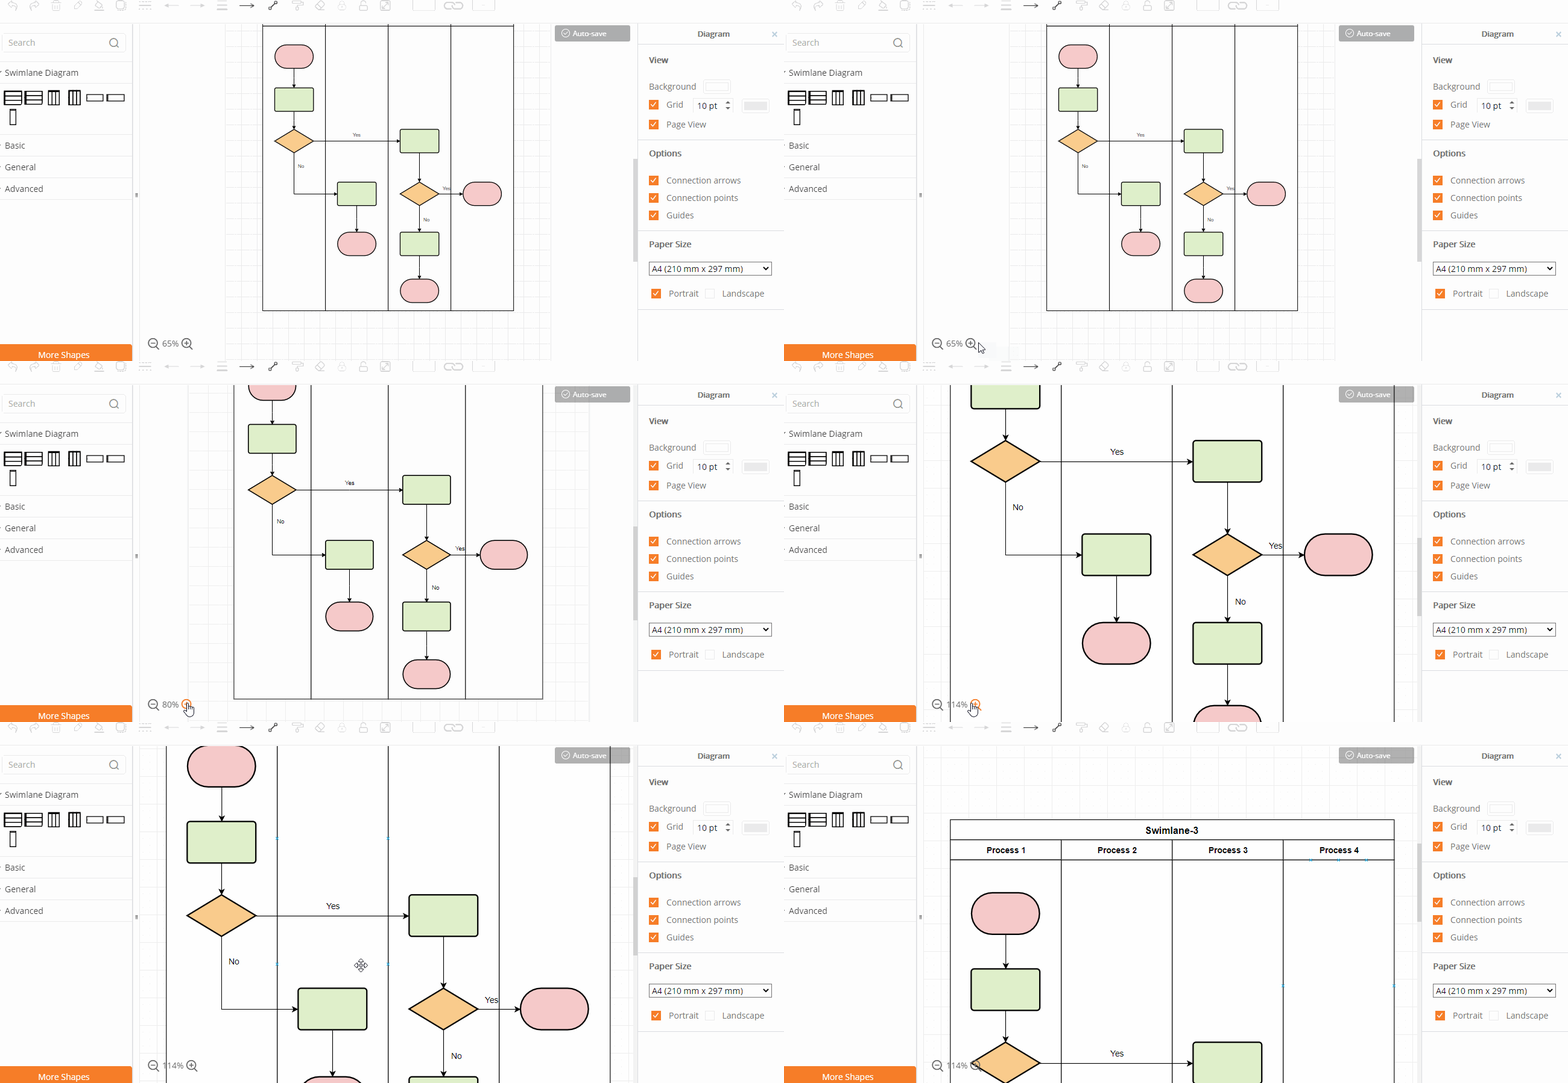
5.9. Improve Picture Quality
If you want to print a flowchart, the shapes will be blurred if they are too small. You can enlarge the chart to increase the resolution.
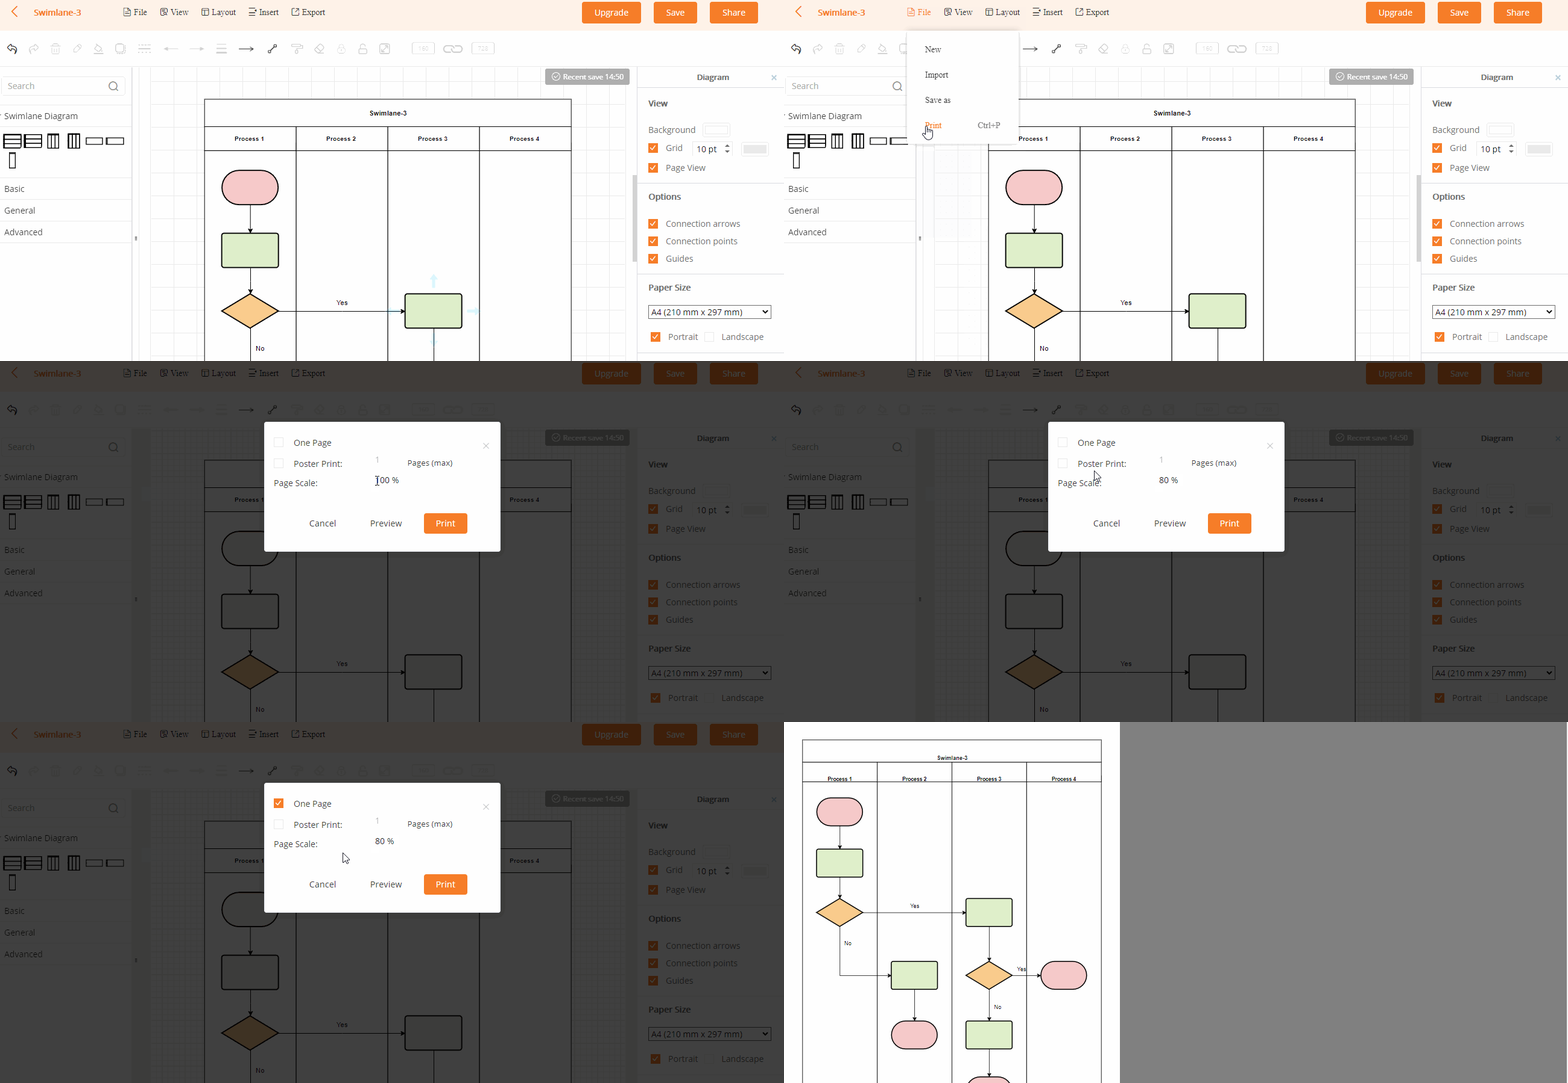
5.10. Print
Click “File” and “Print” in the upper toolbar, and then select the number of copies and layout to print out the flowchart.
6. Contact Us
Join Telegram Channel
Please refer to the manual guide of GitMind as above, if you have any questions in using the service or have any other suggestions, please contact our support center or join our Telegram channel.
Leave a Comment
Comment (0)