
Use GitMind anywhere with our iOS and Android apps. Capture ideas, share files and manage tasks on the go with GitMind Mobile App. This article will explain to you how to use GitMind on the mobile phone to make a mind map.
GitMind Mobile App User Guide
Download App
Click the button below to download different versions of mobile apps directly. In addition, you can also download and install apps by searching for “GitMind” in the App Store and Google Play Store.
New Mind Map
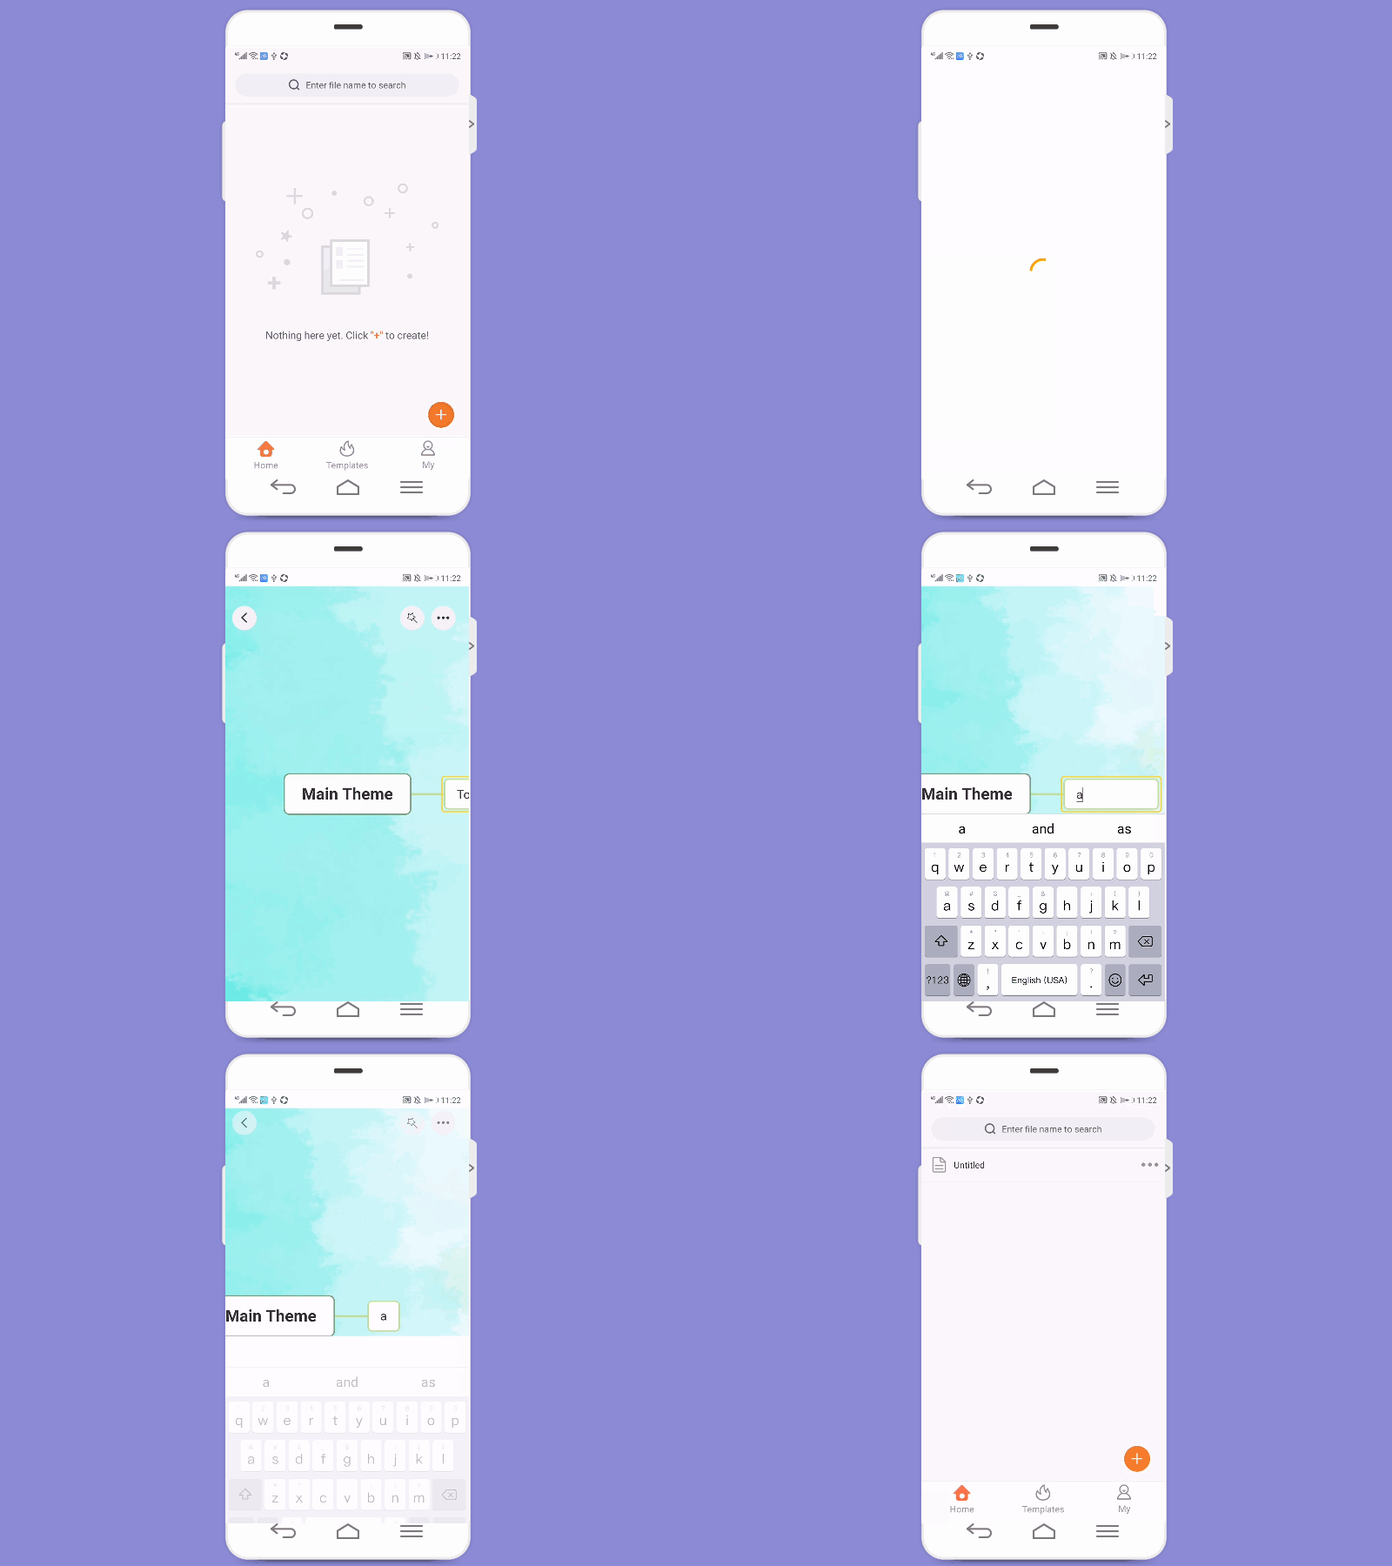
Open the GitMind mobile app, log in to your account and click the orange “+” button in the lower right corner on the homepage interface to create a new mind map.
Search File
On the home page interface, enter the file name in the search bar at the top to quickly search for keywords-related files in your account.

File Management
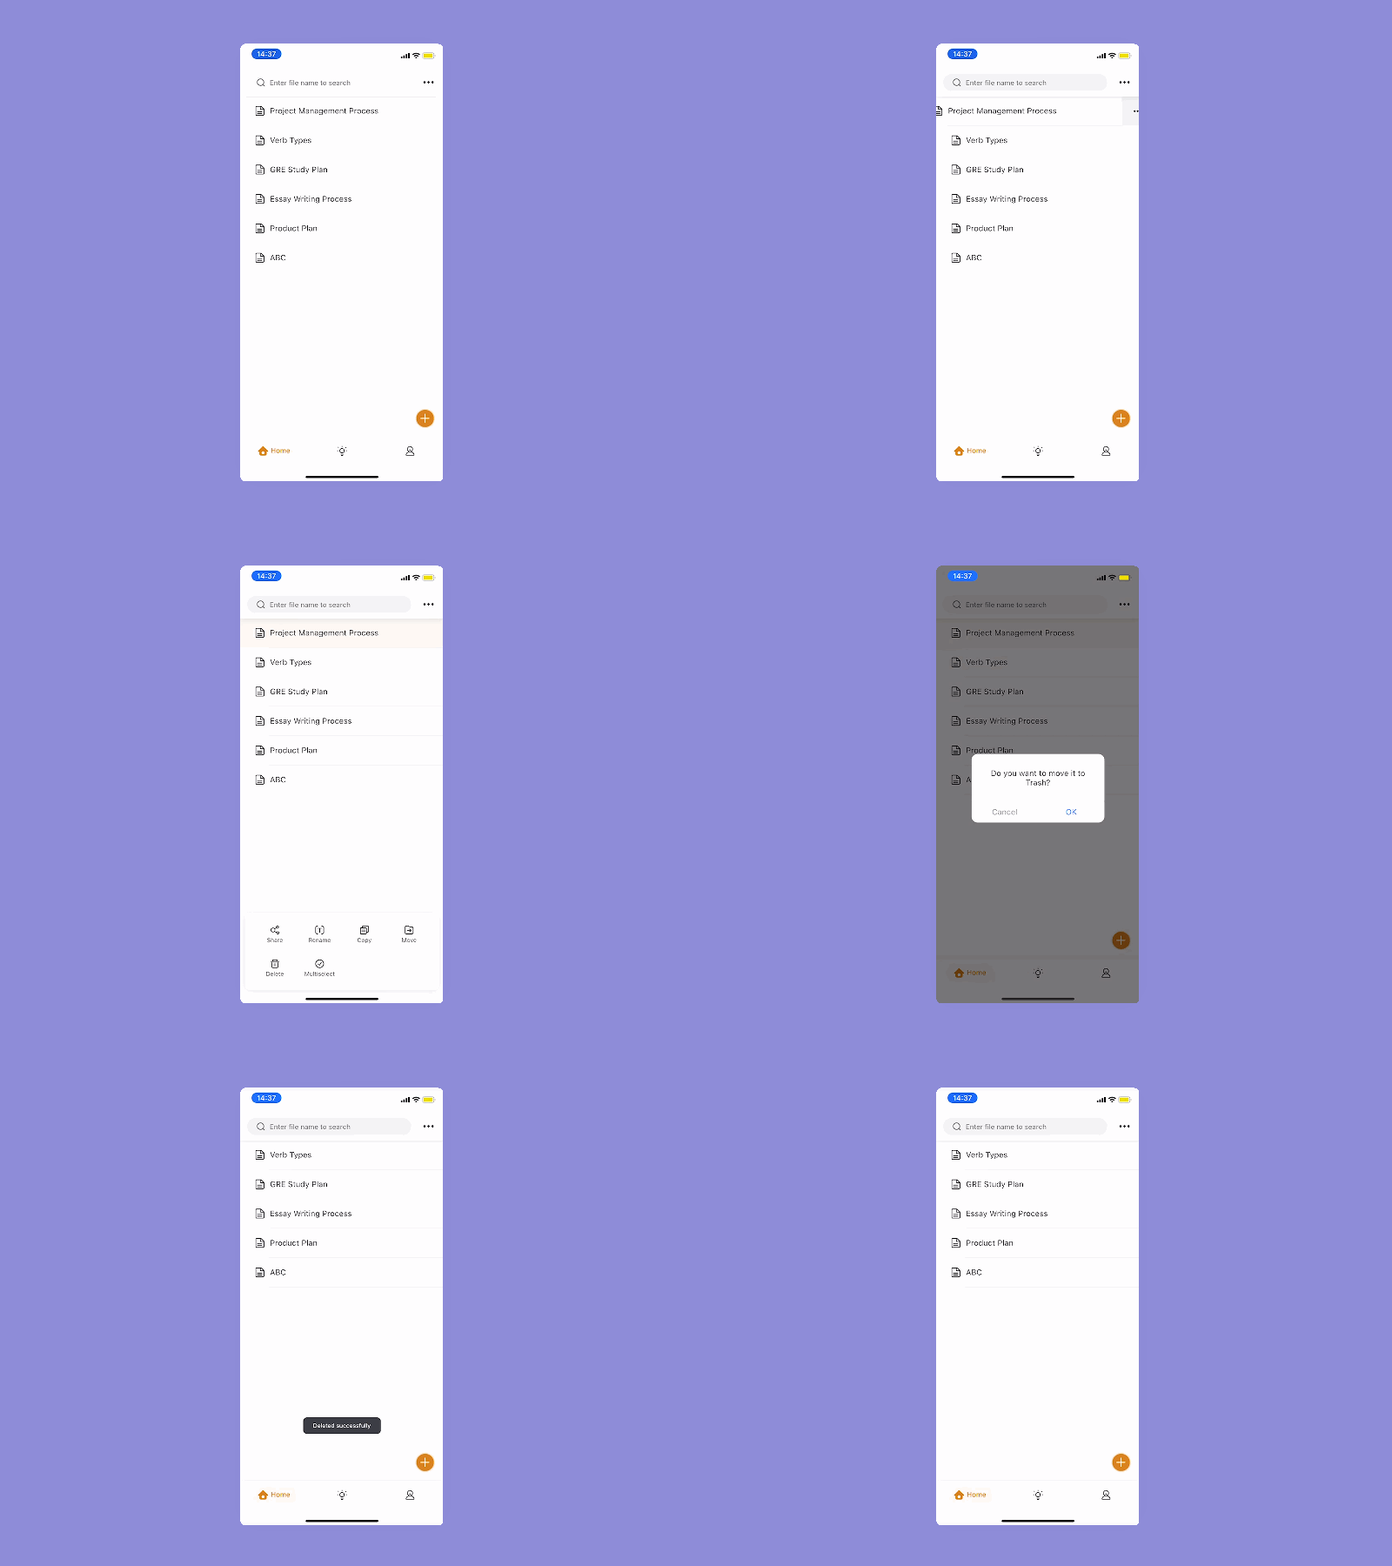
On the home page interface, swipe left on the file and click “…” to view more options, including Share, Rename, Copy, Move, Delete, and Multiselect options. You can select “Delete” in the pop-up box to quickly delete the file. If you need to retrieve it, click “My” and go to the Trash to restore the file.
Use Templates
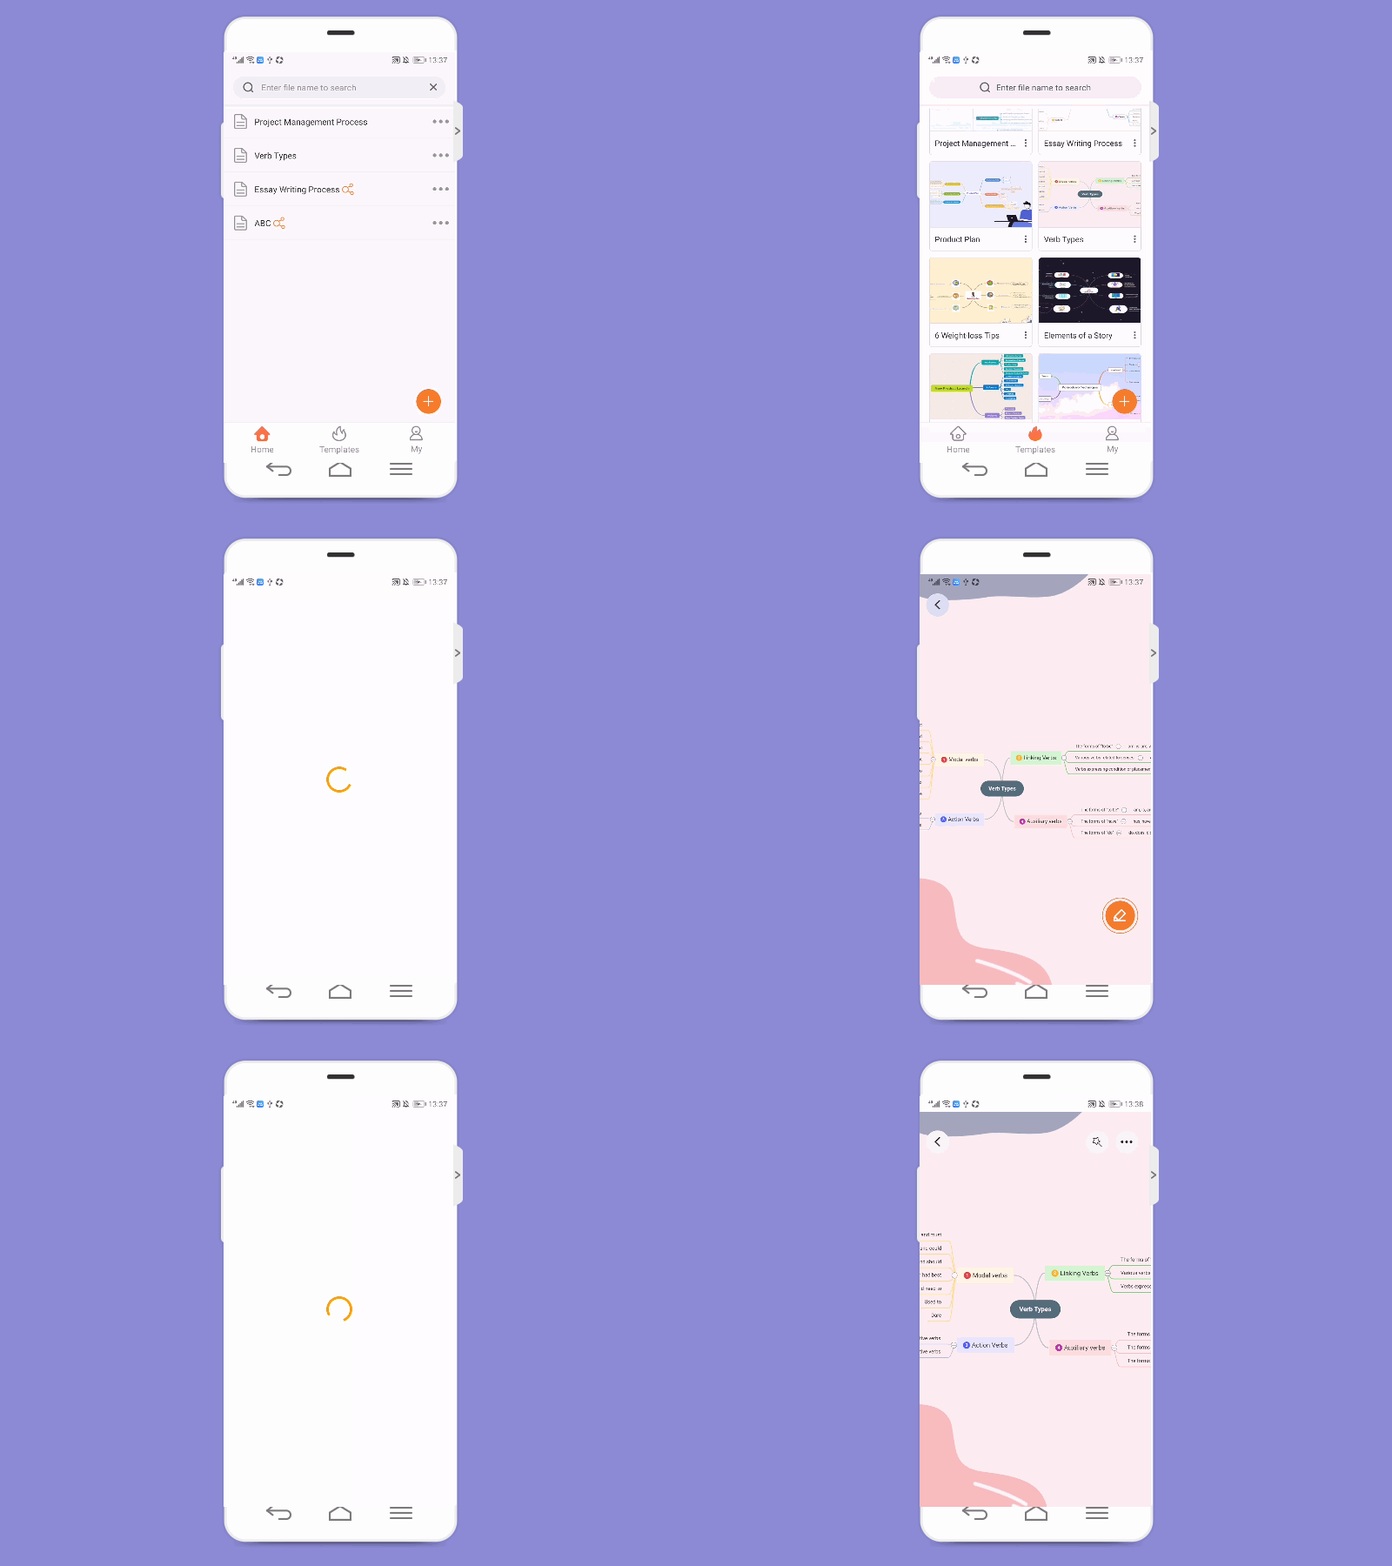
Open the APP, click on “Templates”, select the template you like, open it and click the “Edit” button in the lower right corner to use this template.
Keyboard Shortcuts
If you want to connect a Bluetooth keyboard for editing, you can use the following shortcut keys to improve efficiency.
Insert subnode: Tab
Insert node: Enter
Delete node: Delete
Move: Up/Down/Left/Right
Undo: Ctrl/Cmd + Z
Copy: Ctrl/Cmd + C
Paste: Ctrl/Cmd + V
Cut: Ctrl/Cmd + X
Linefeed: Shift/Ctrl + Enter
Select multiple nodes: Hold Ctrl/Cmd key
Replace node: You can drag and drop the node with your mouse.
Redivide node: If you cover the node B with node A, the node A will be the subnode of the node B.
Insert Node
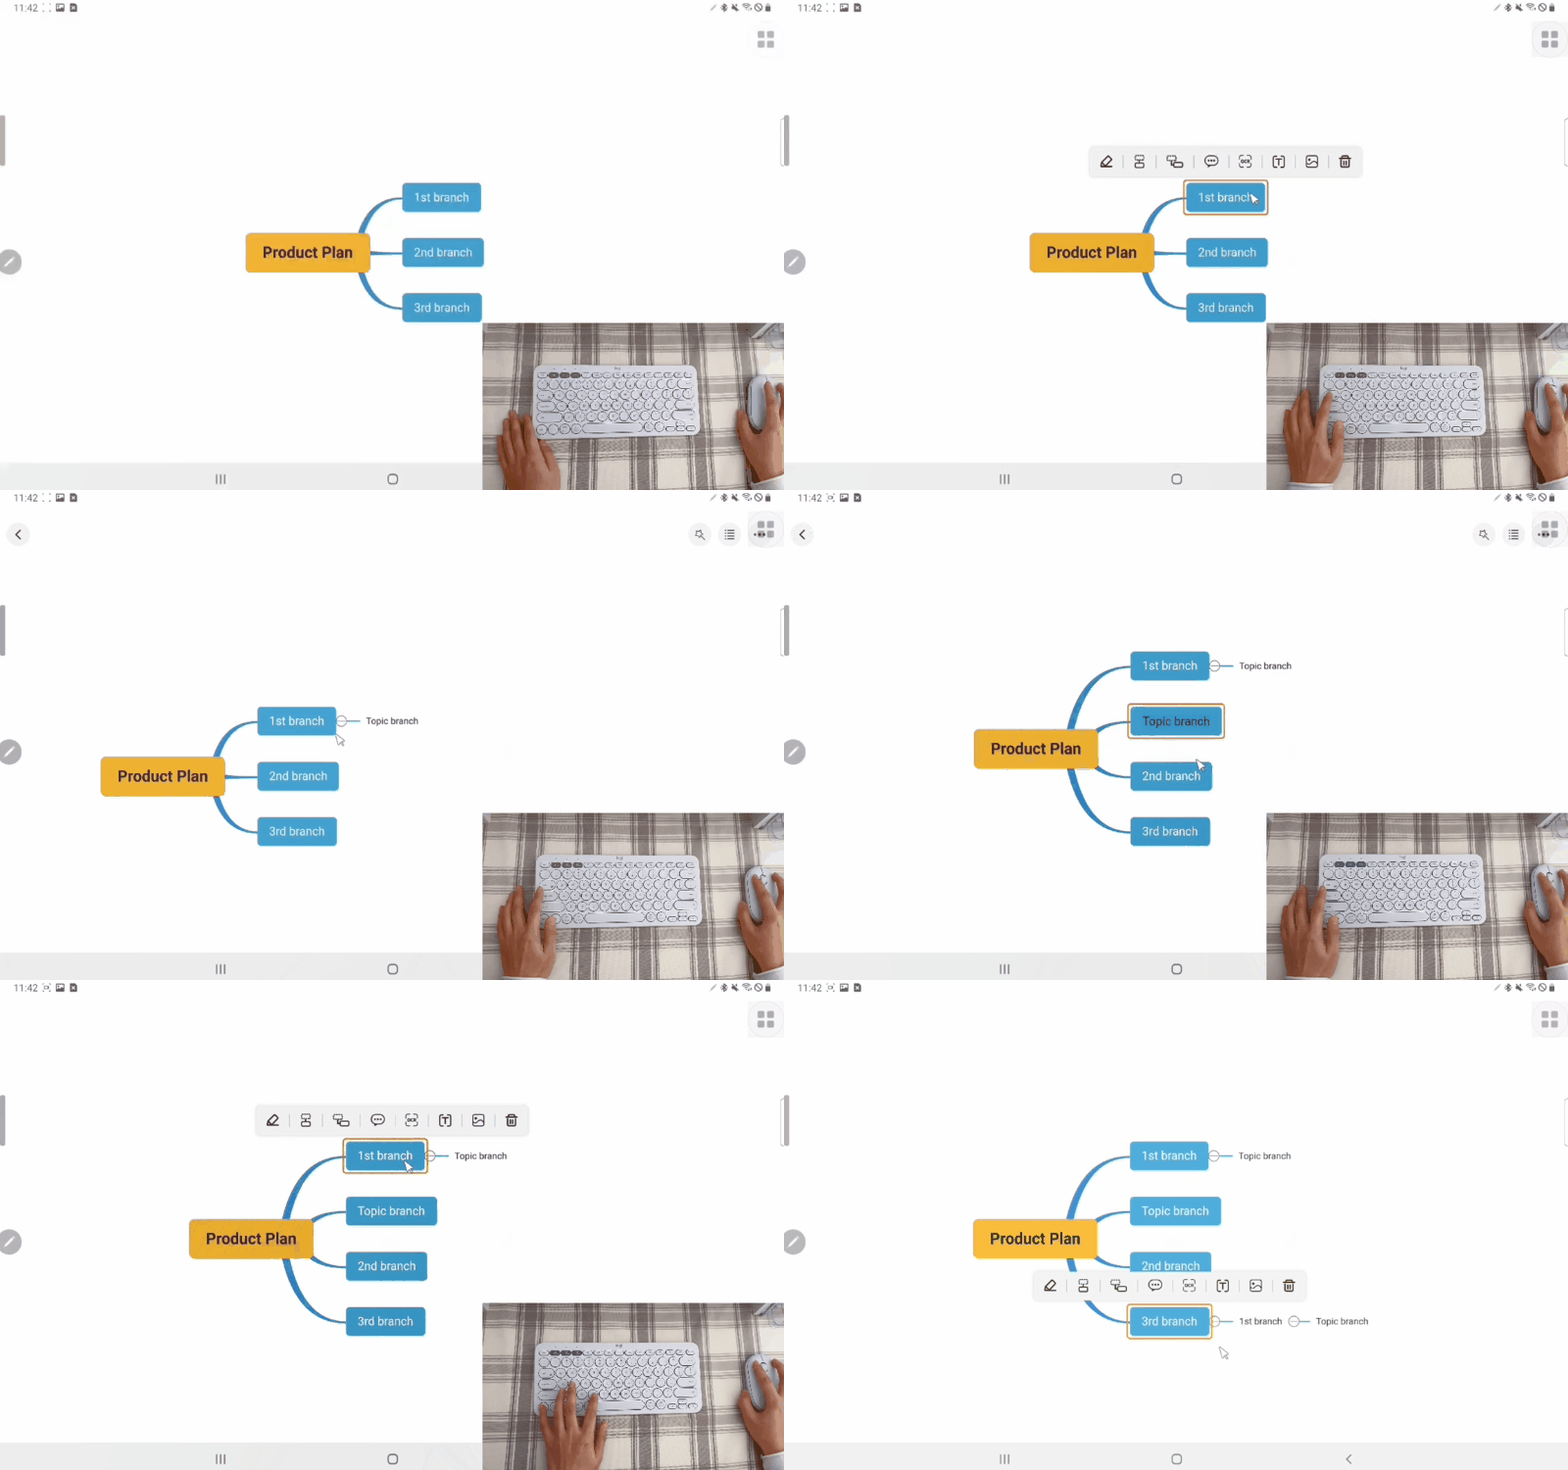
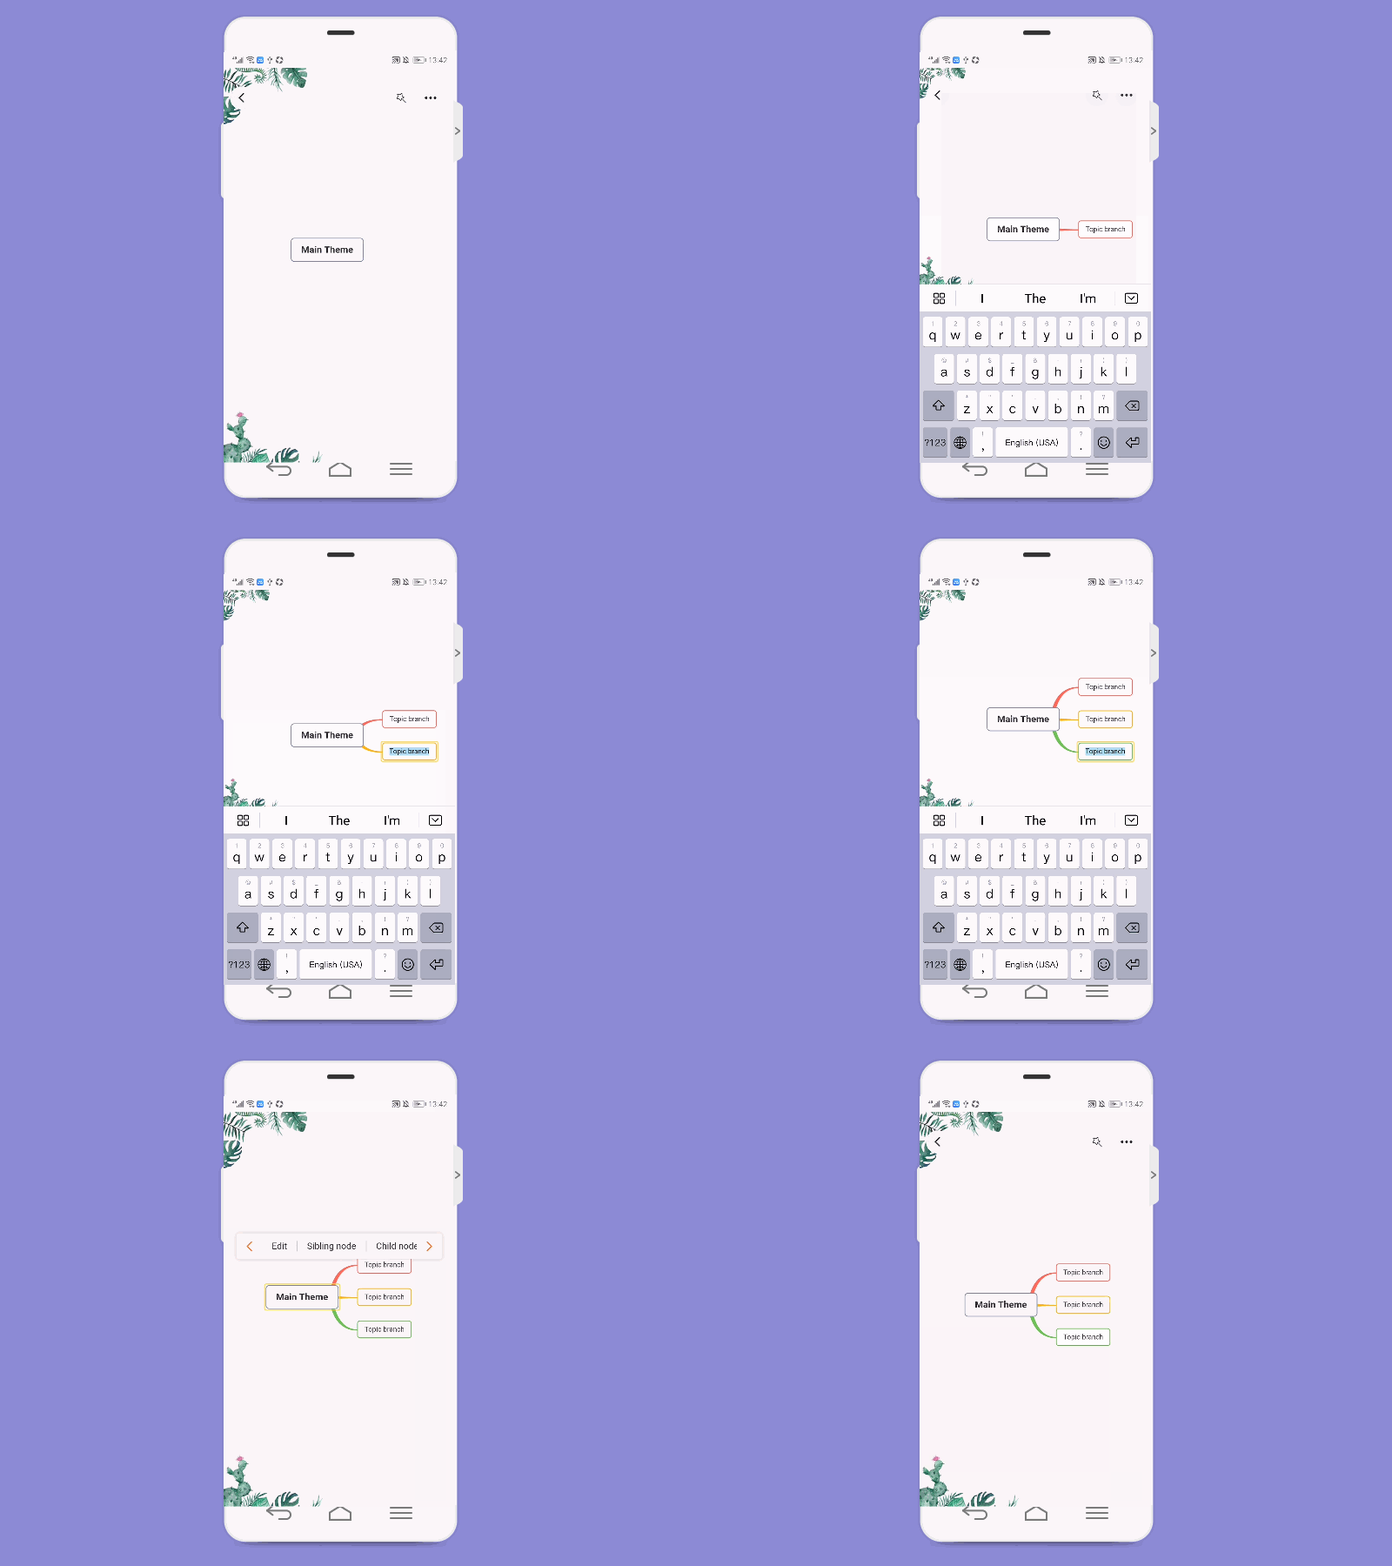
Open the file, and select the central theme, it will automatically pop up some floating buttons such as “Edit”, “Sibling node”, “Child node”, “Format” and “Delete”. Click “Child node” to insert a subnode, and click “Sibling node” to insert a node.
Move Node
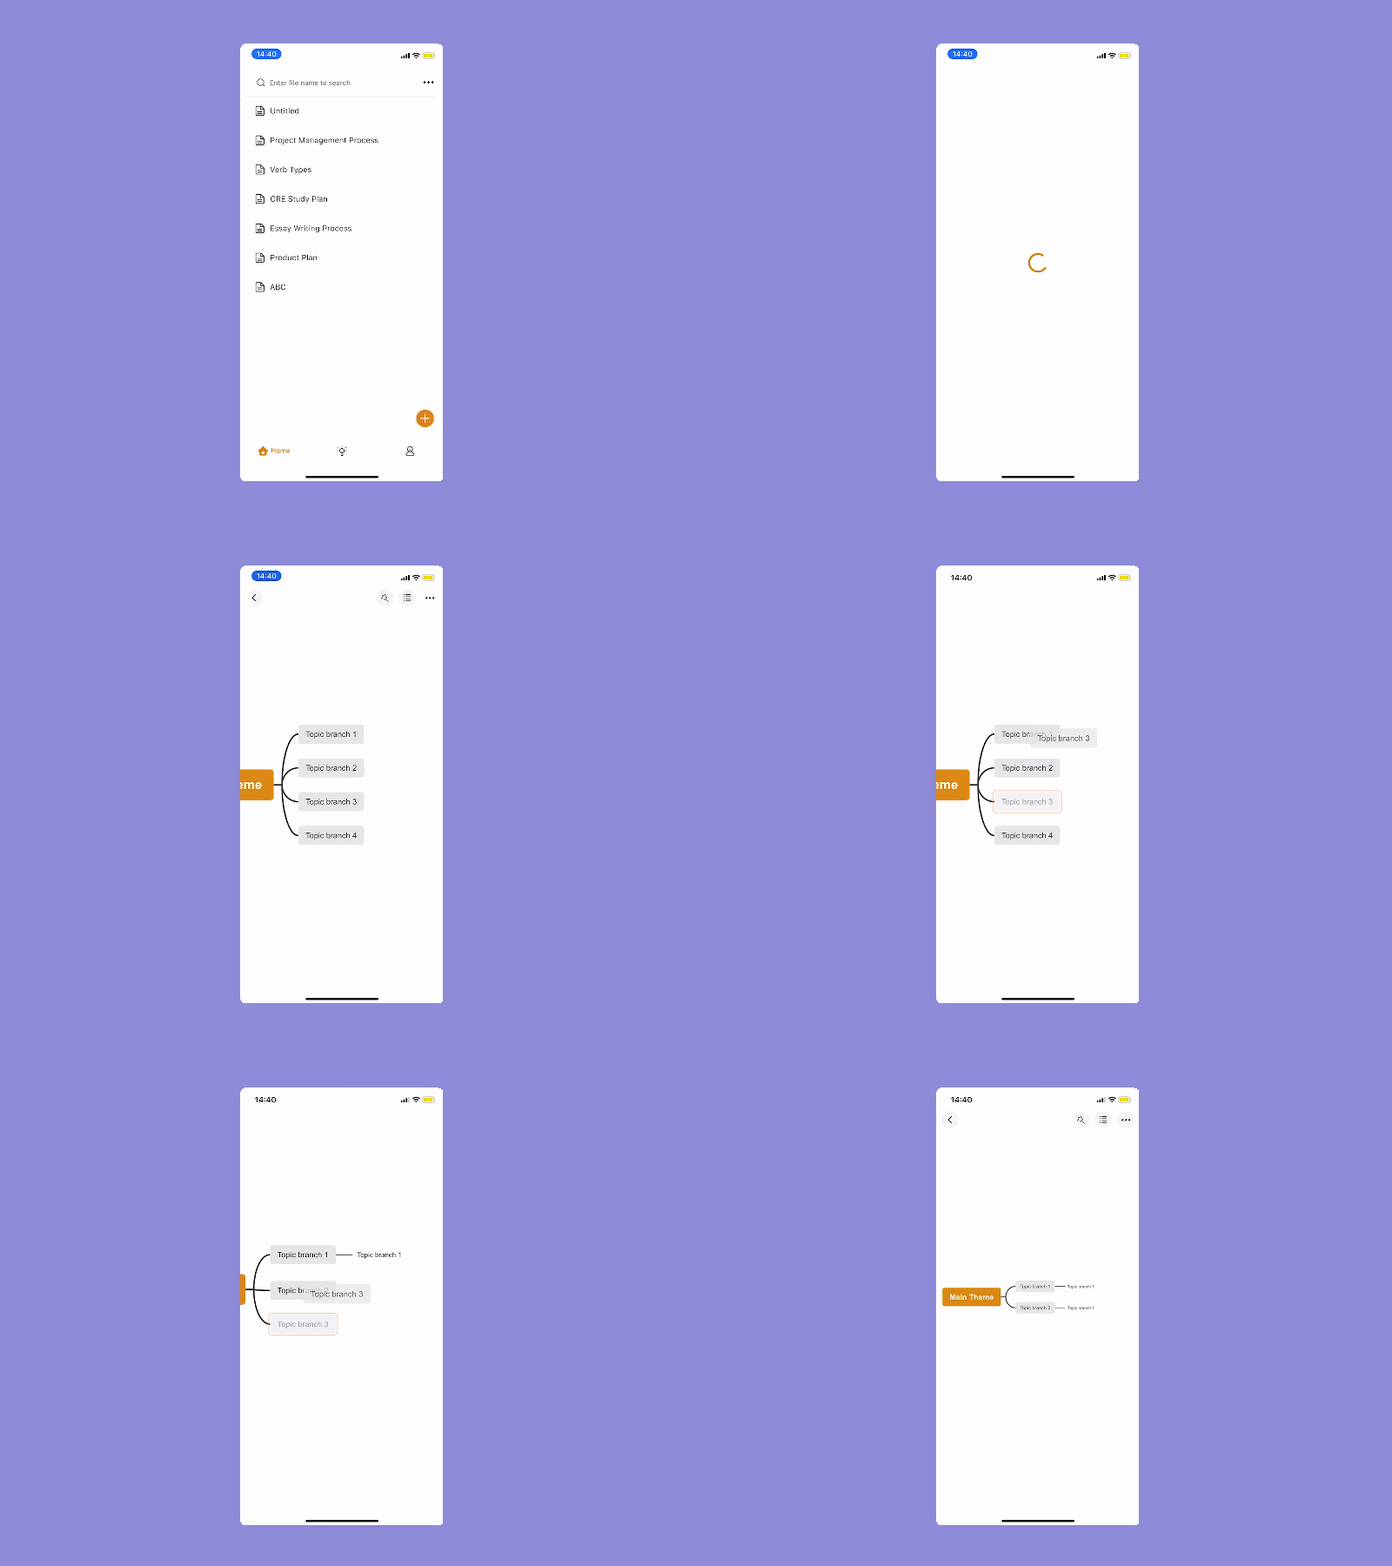
Select a node, drag and drop to replace it.
GitMind AI
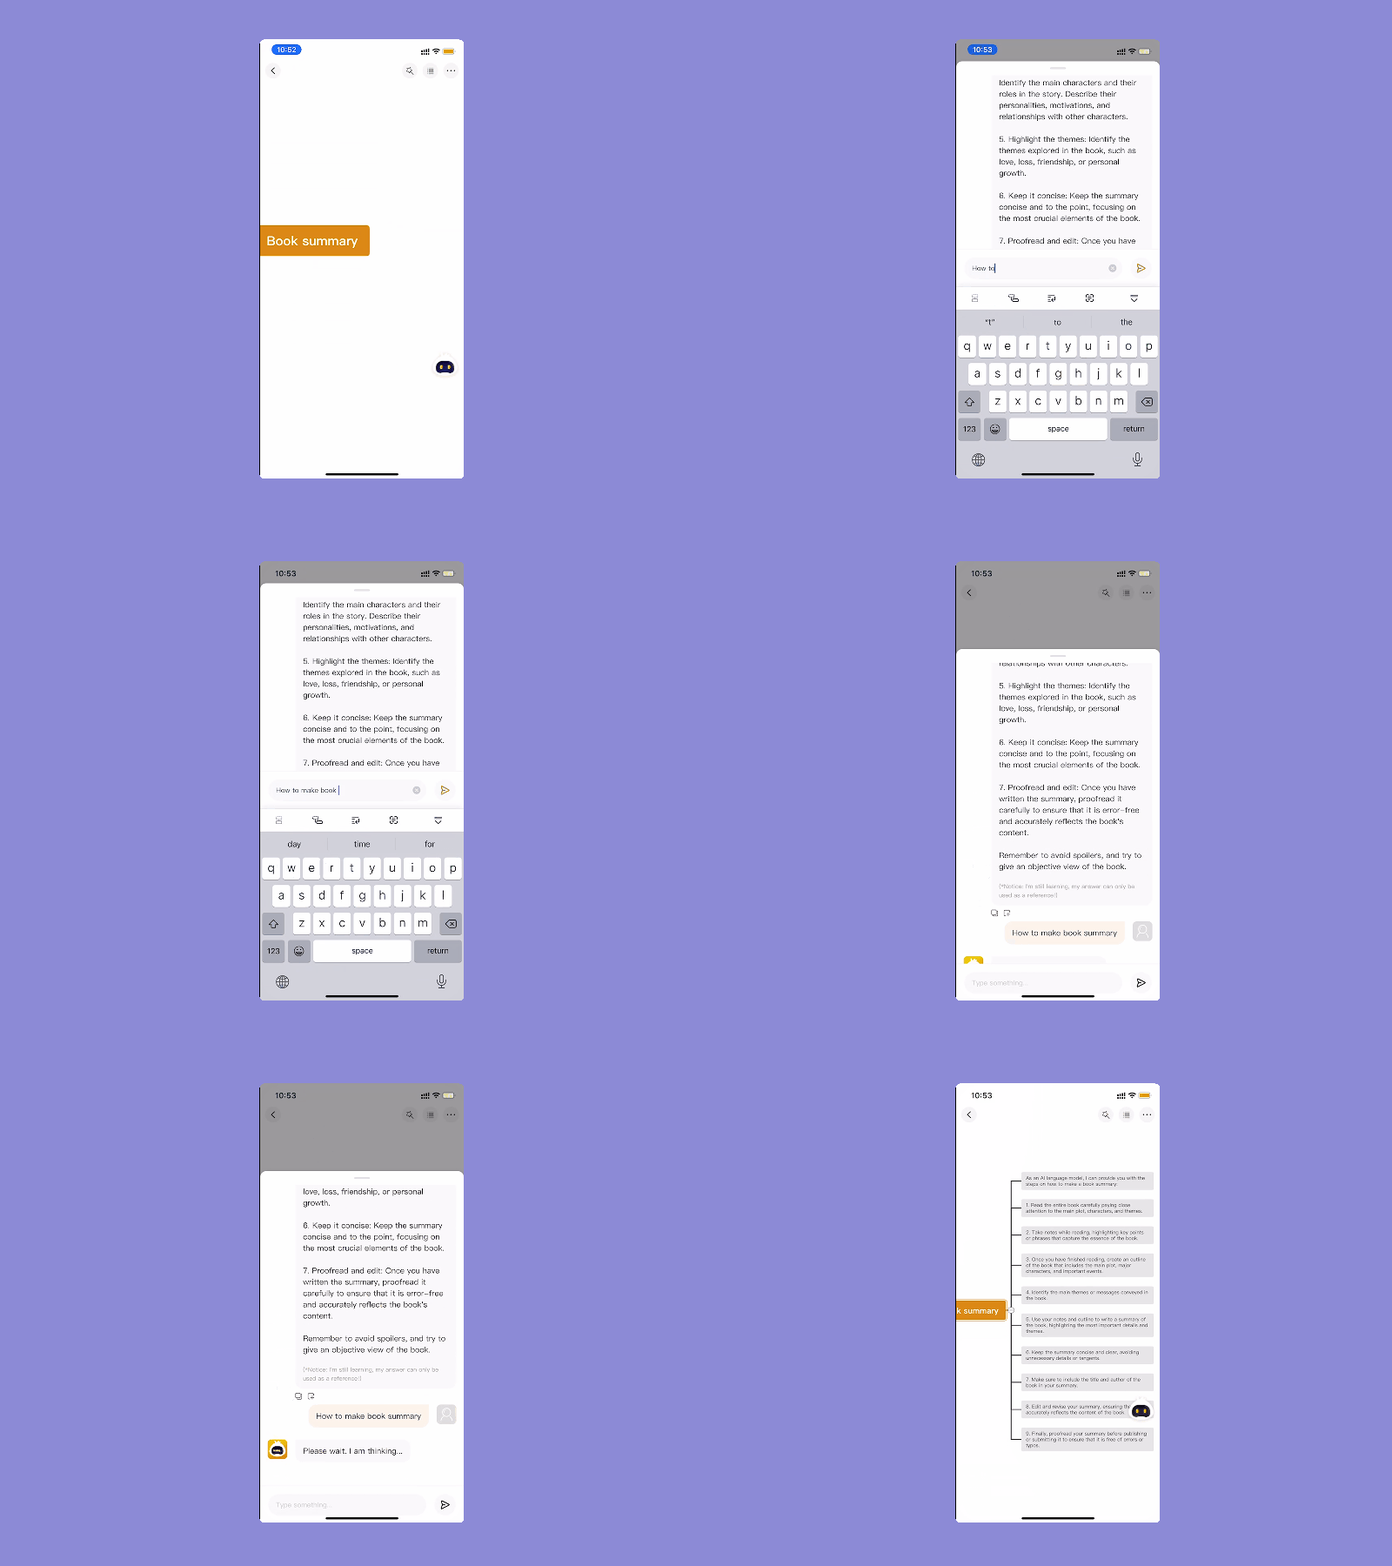
Open the mind map file, and click GitMind AI in the bottom right corner. enter your question in the dialog box. Click the Copy button below the answer and insert the answer into the mind map with one click.
Edit Node
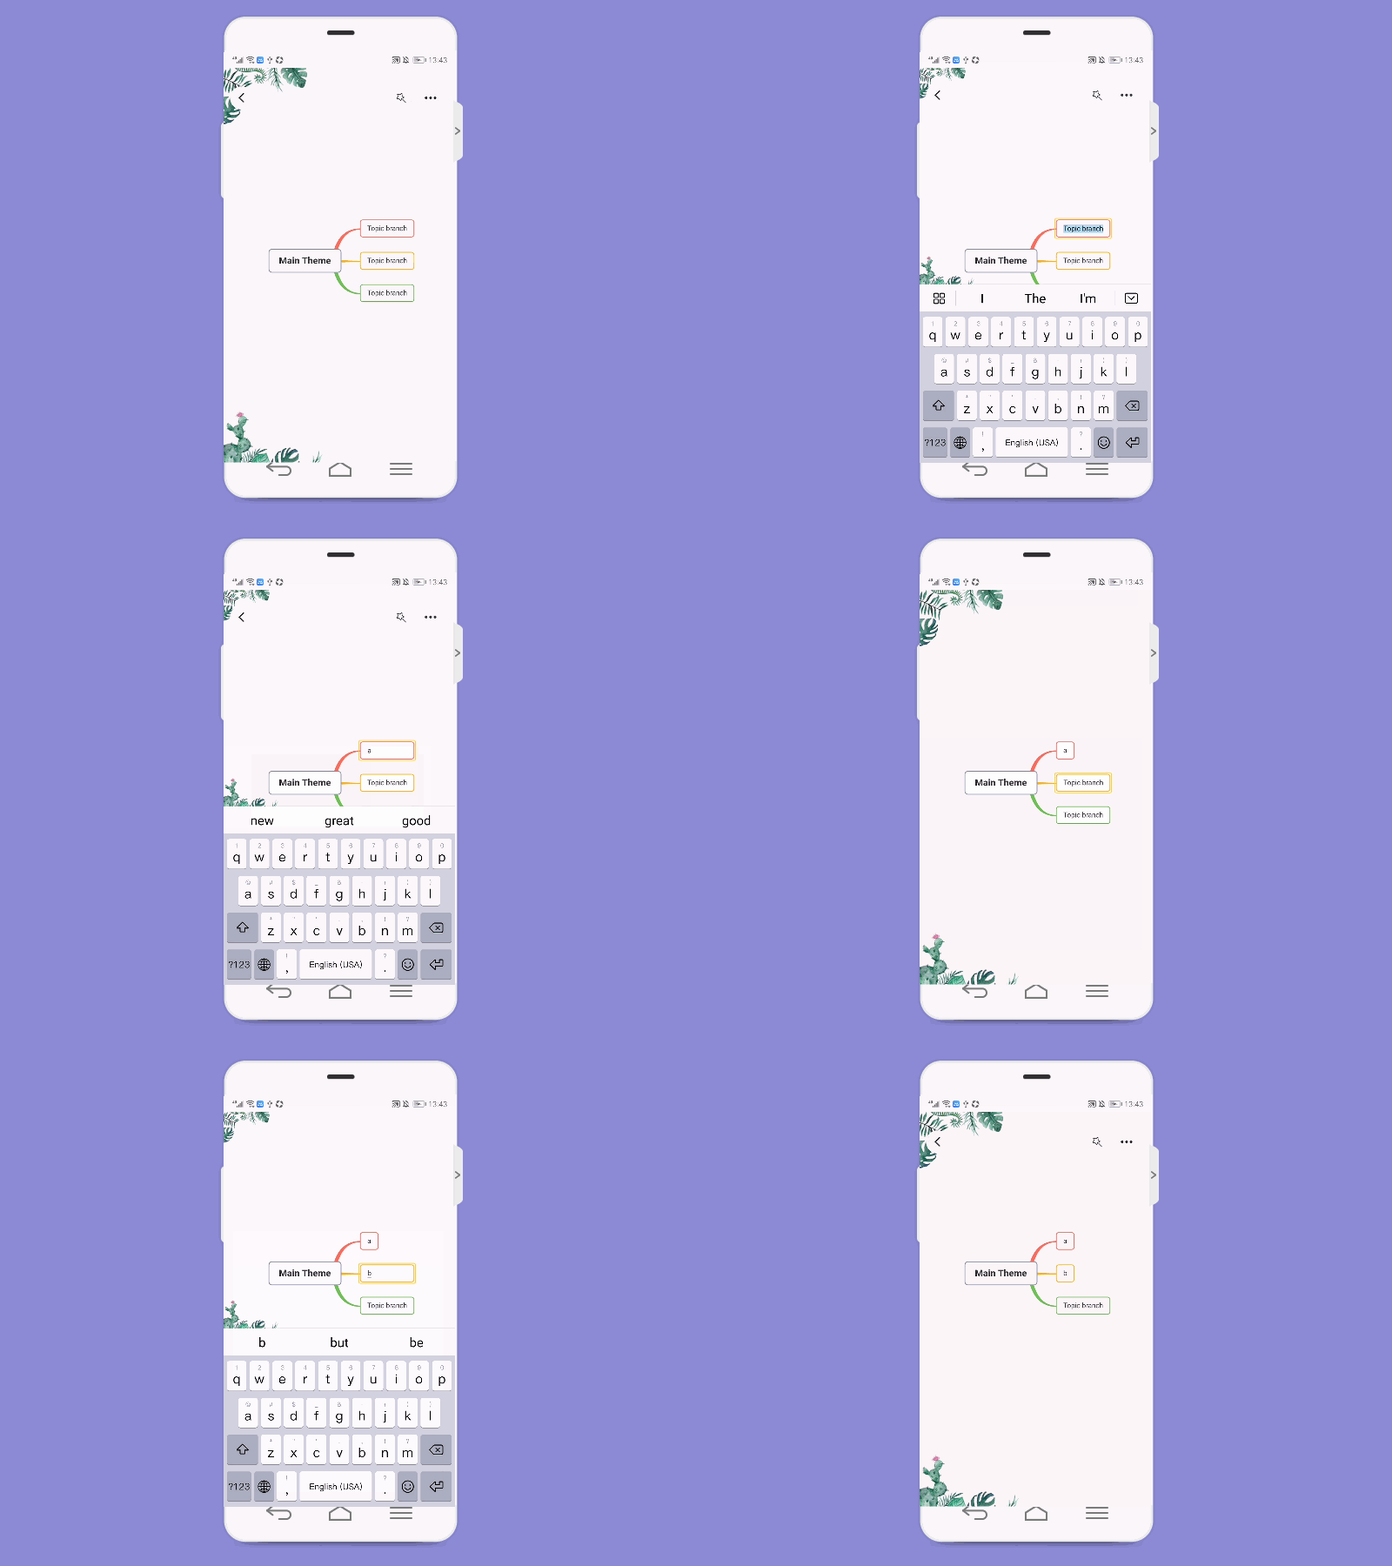
Open the file, select the target node, and click “Edit” to quickly edit the text.
Use Apple Pencil to enter text
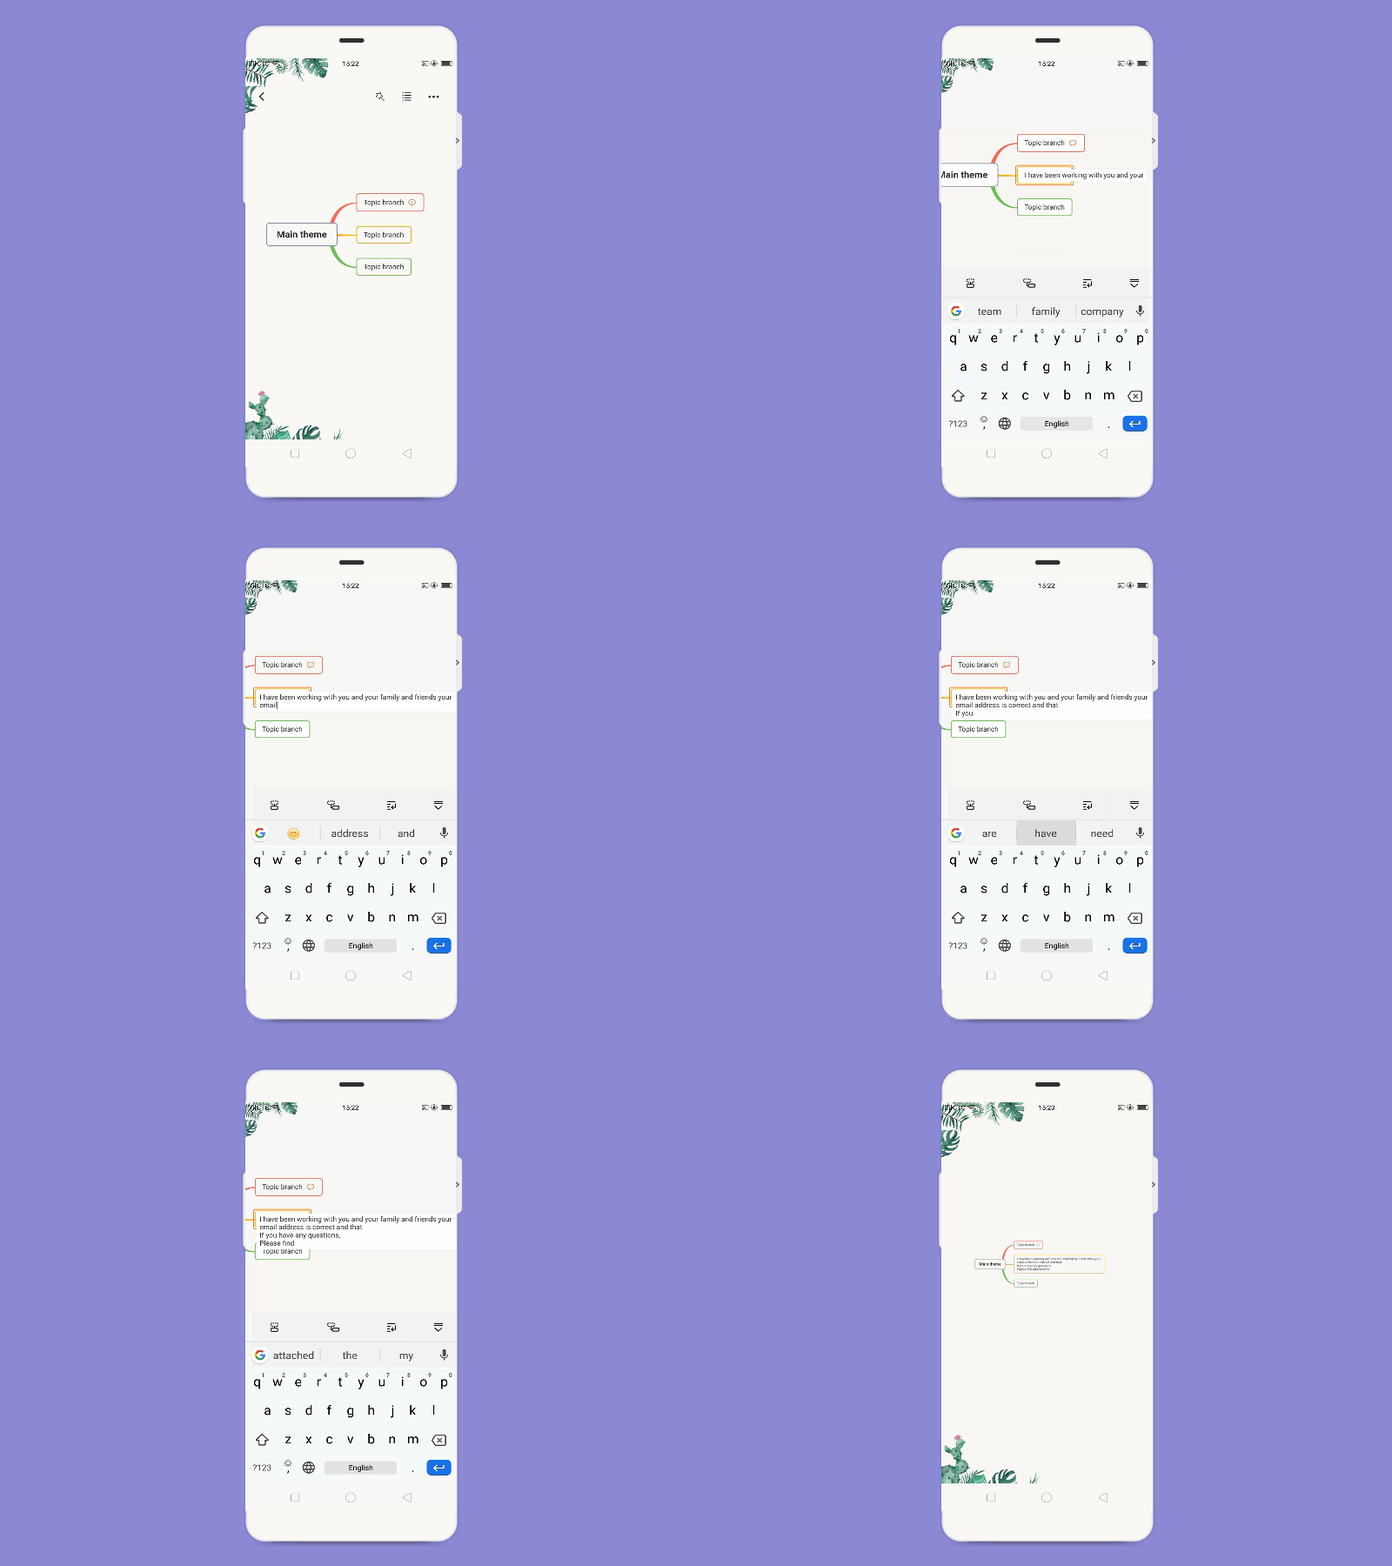
Turn on the Scribble function. Double-click the node to enter the editing status, and then write in the blank space near the node using apple pencil. It automatically converts your handwriting into typed text.
Wrap Text
The text will wrap automatically when it reaches a certain width.
You can also click the linefeed key floating above the keyboard to manually wrap text.
Format
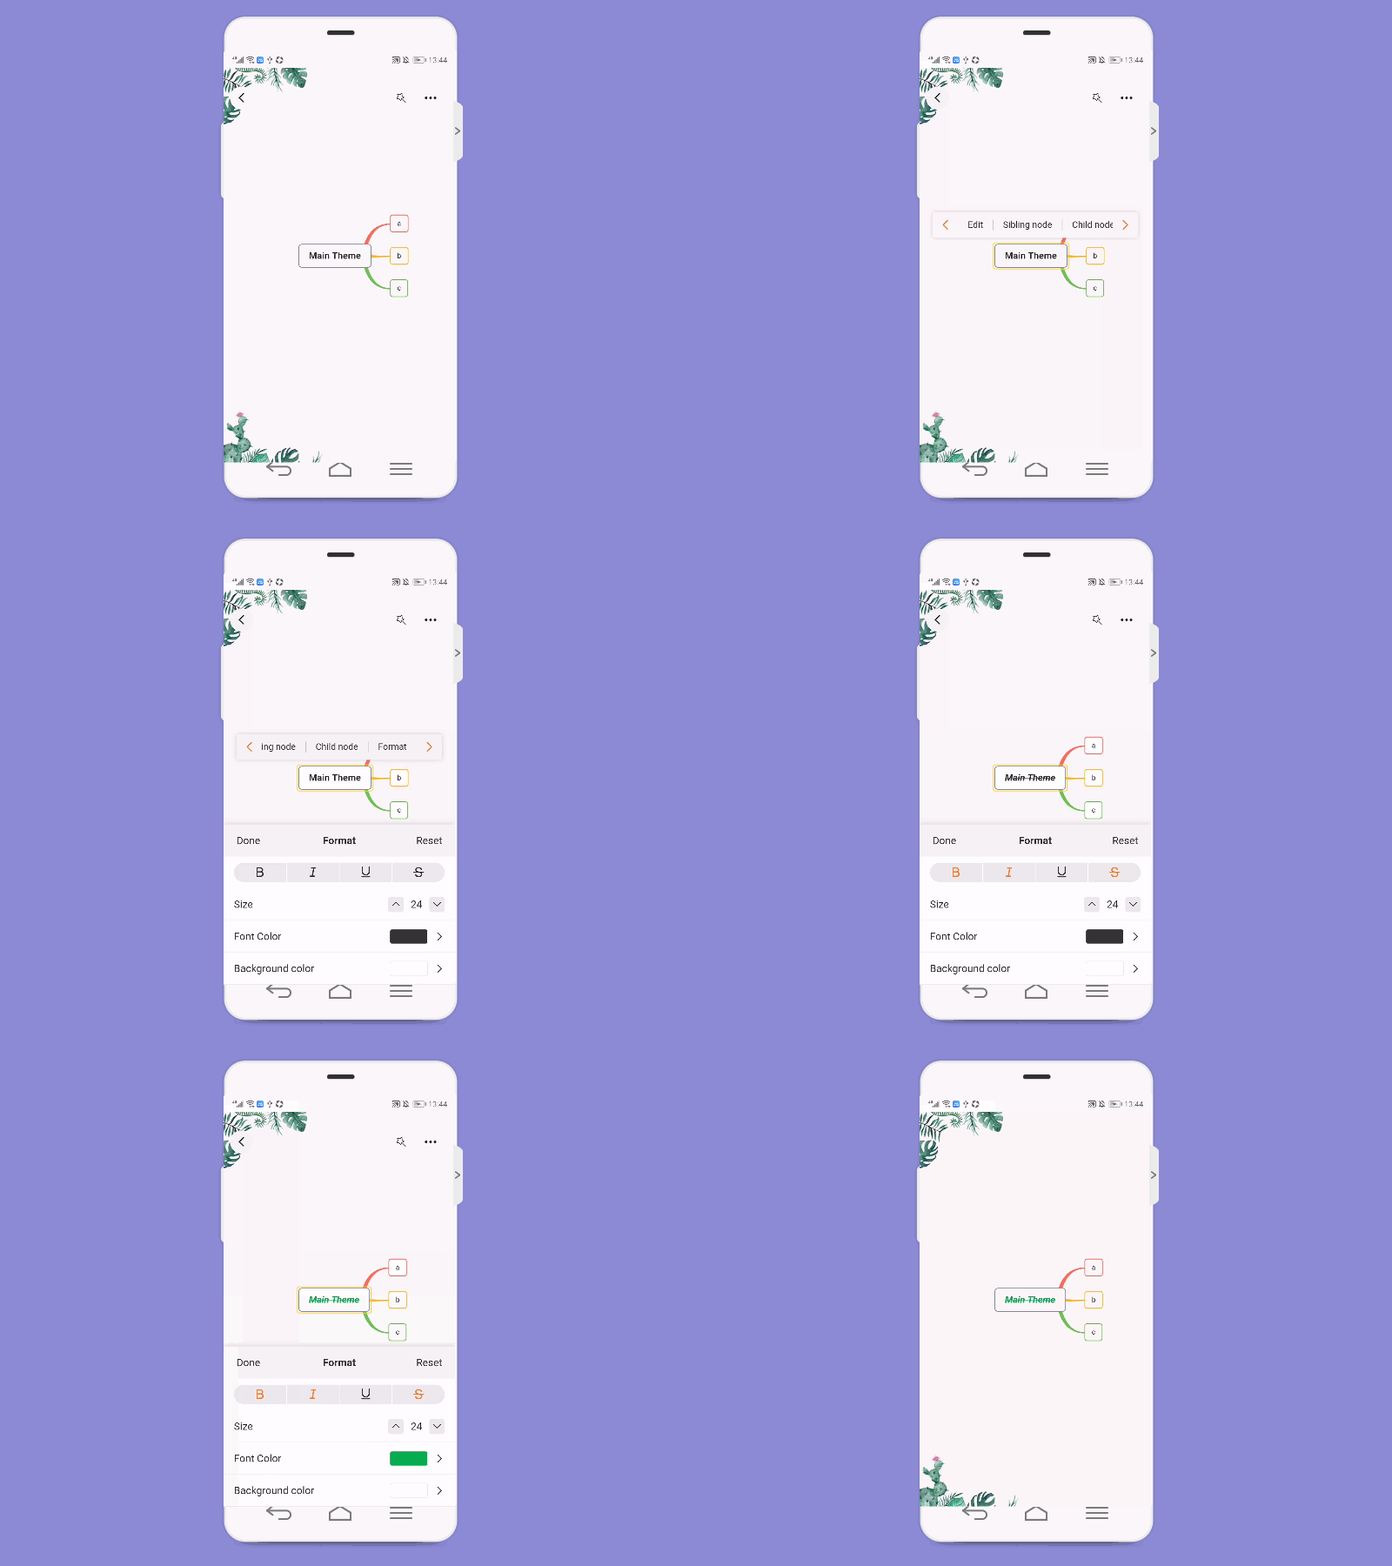
Open the file, select the target node, and click “Format”. In the pop-up window, you can bold, add underline, add strikethrough, adjust the font size, change font and background color.
Edit Relationship
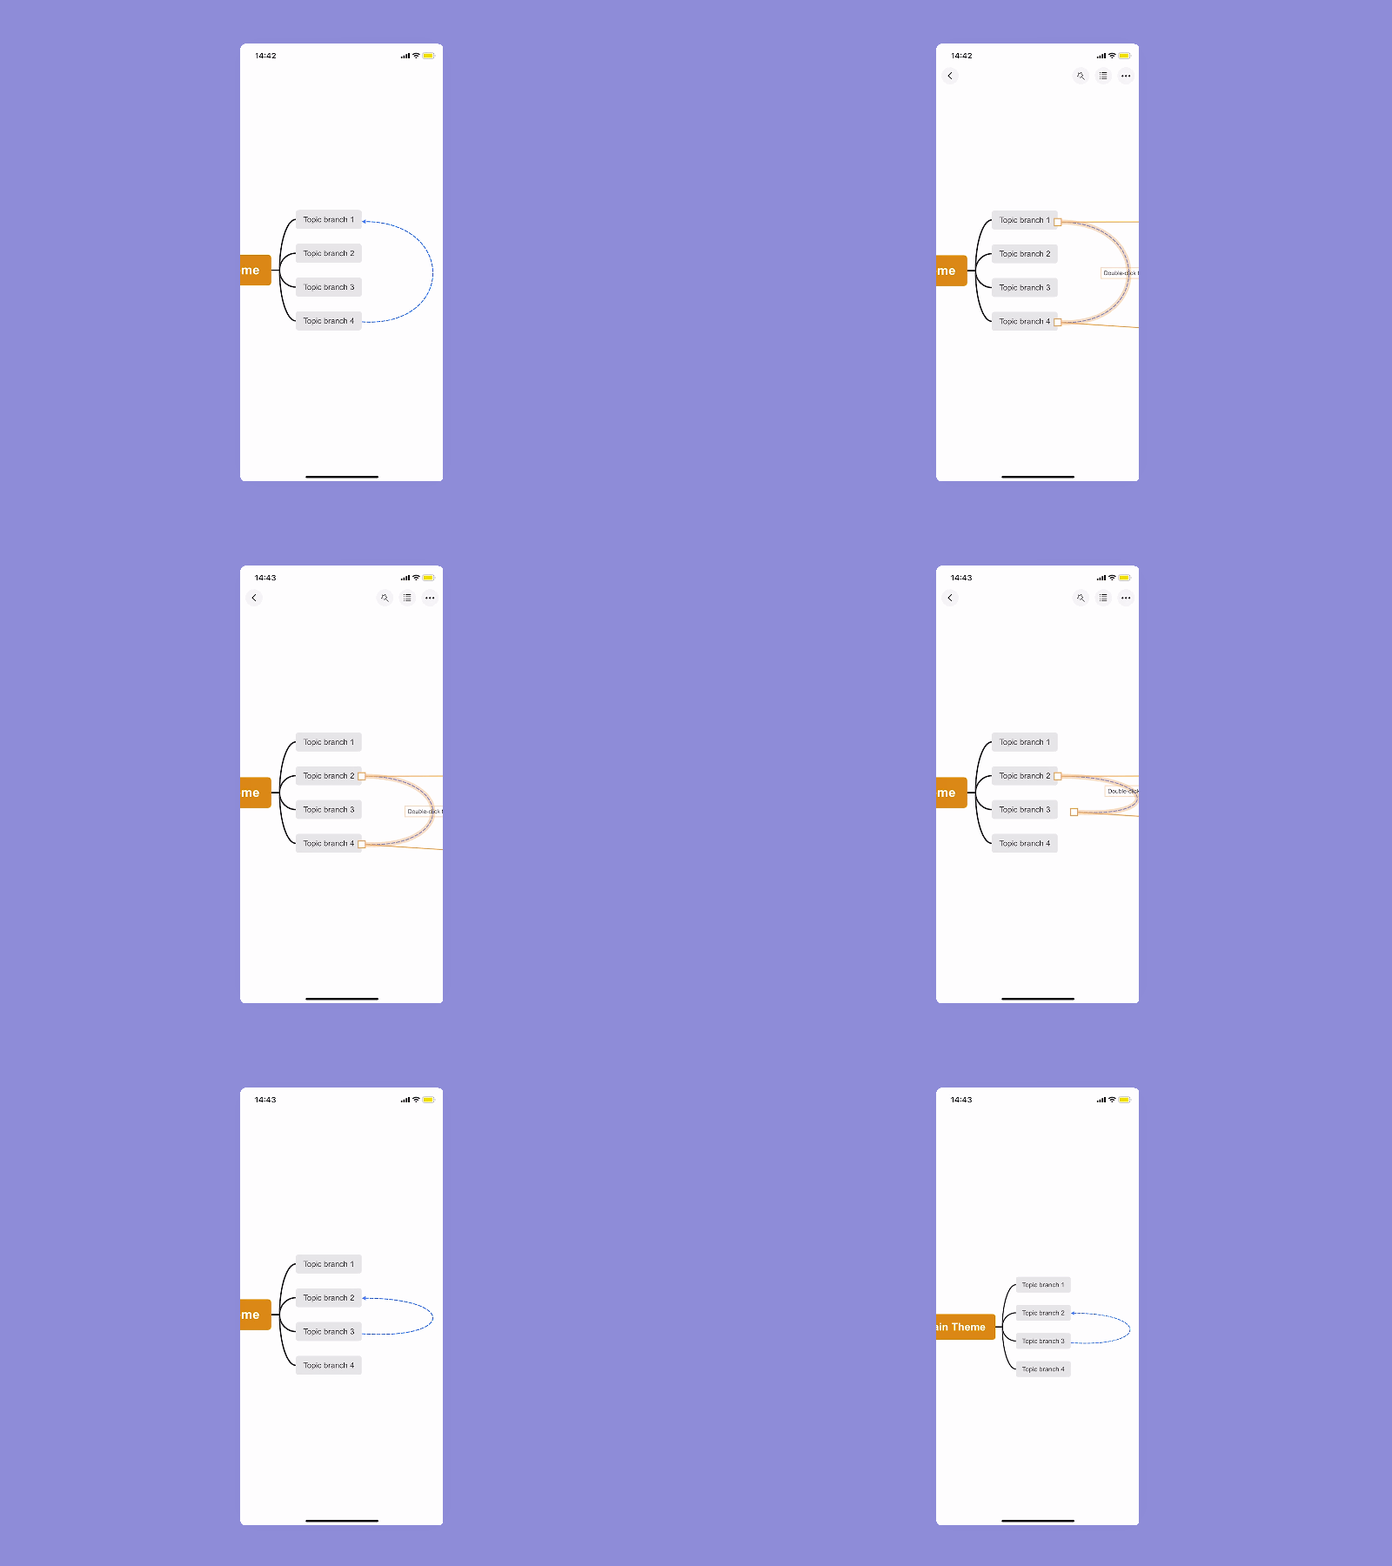
Drag the start knot and end knot to adjust the relationship position.
Add Summary
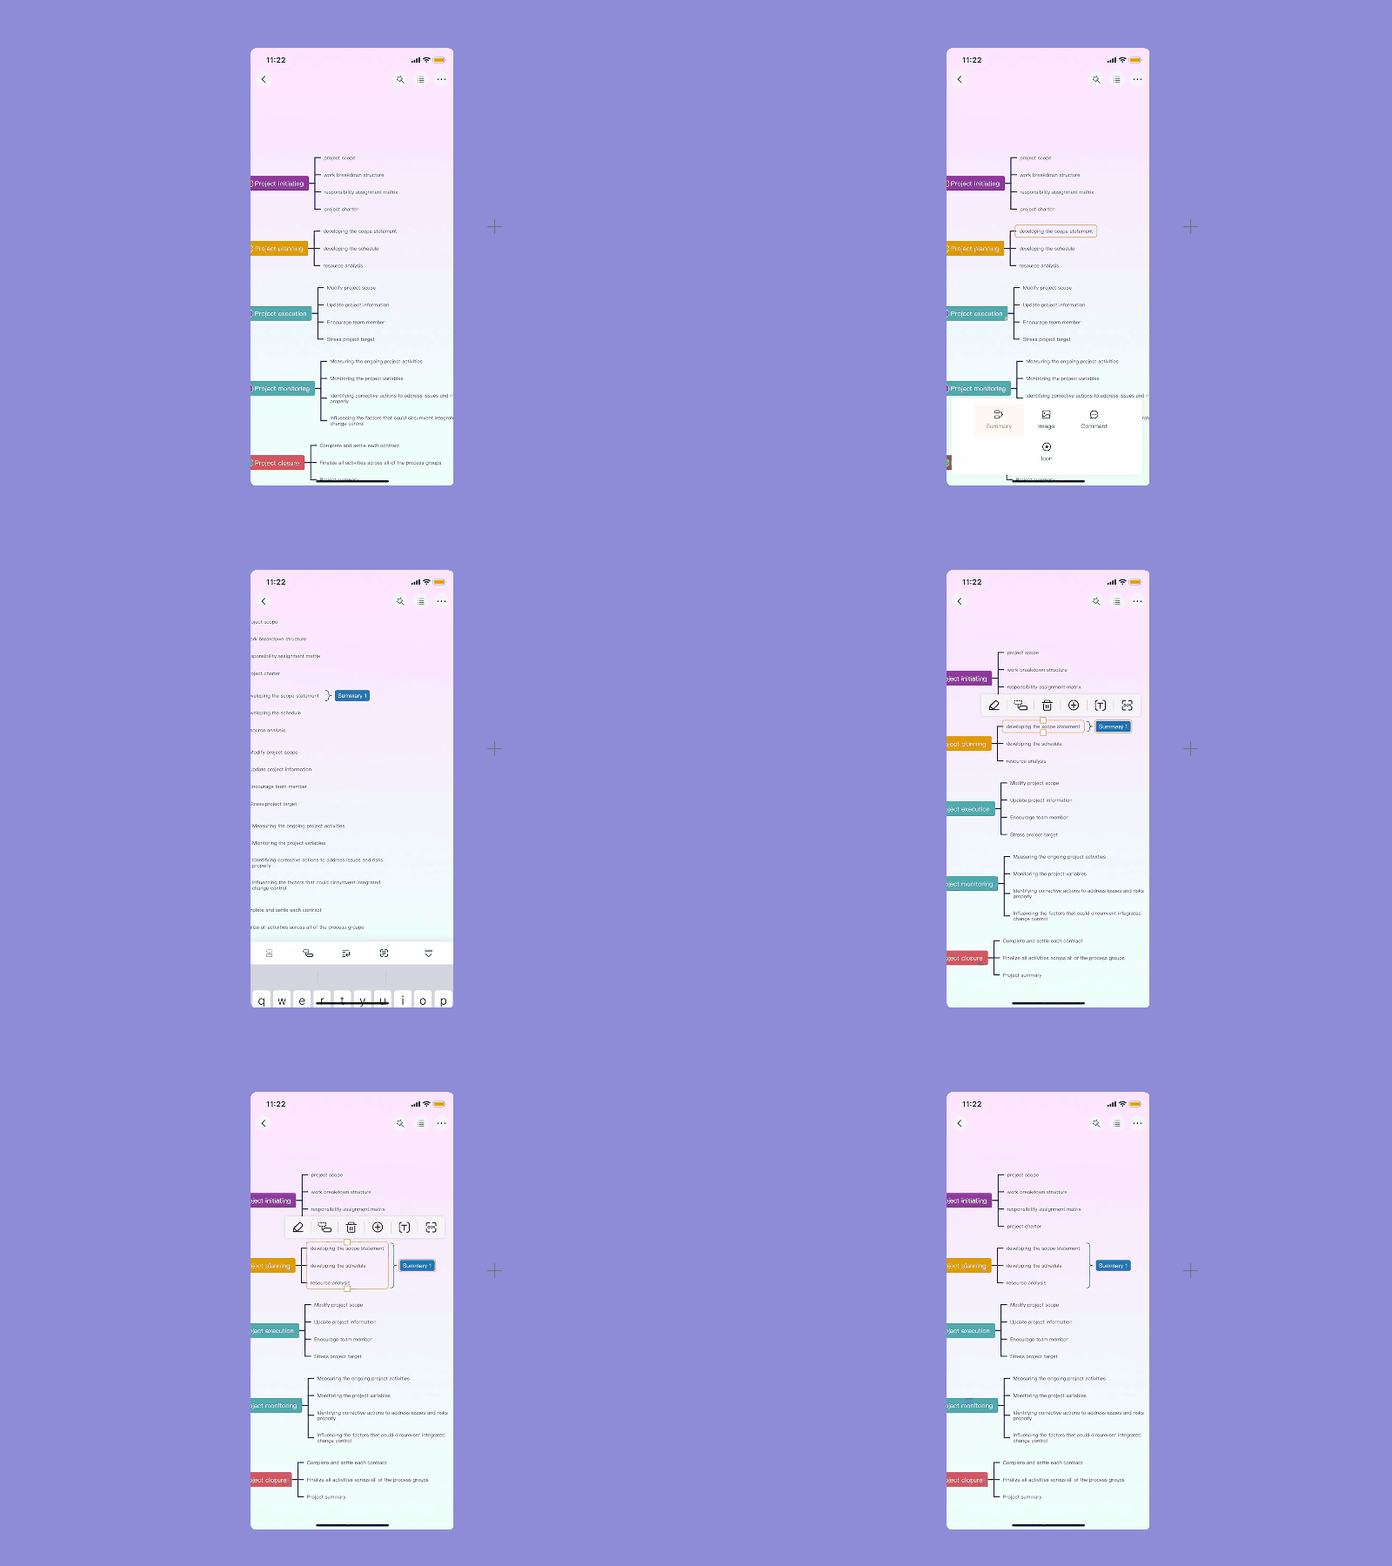
Open a mind map, select the node, click “+” button and select “Summary” option. Choose the Summary, and drag the yellow borders of the frame to adjust the summary range.
Insert Icon
Click on the node and hit “+” option to insert an icon in the node.
![]()
Comment
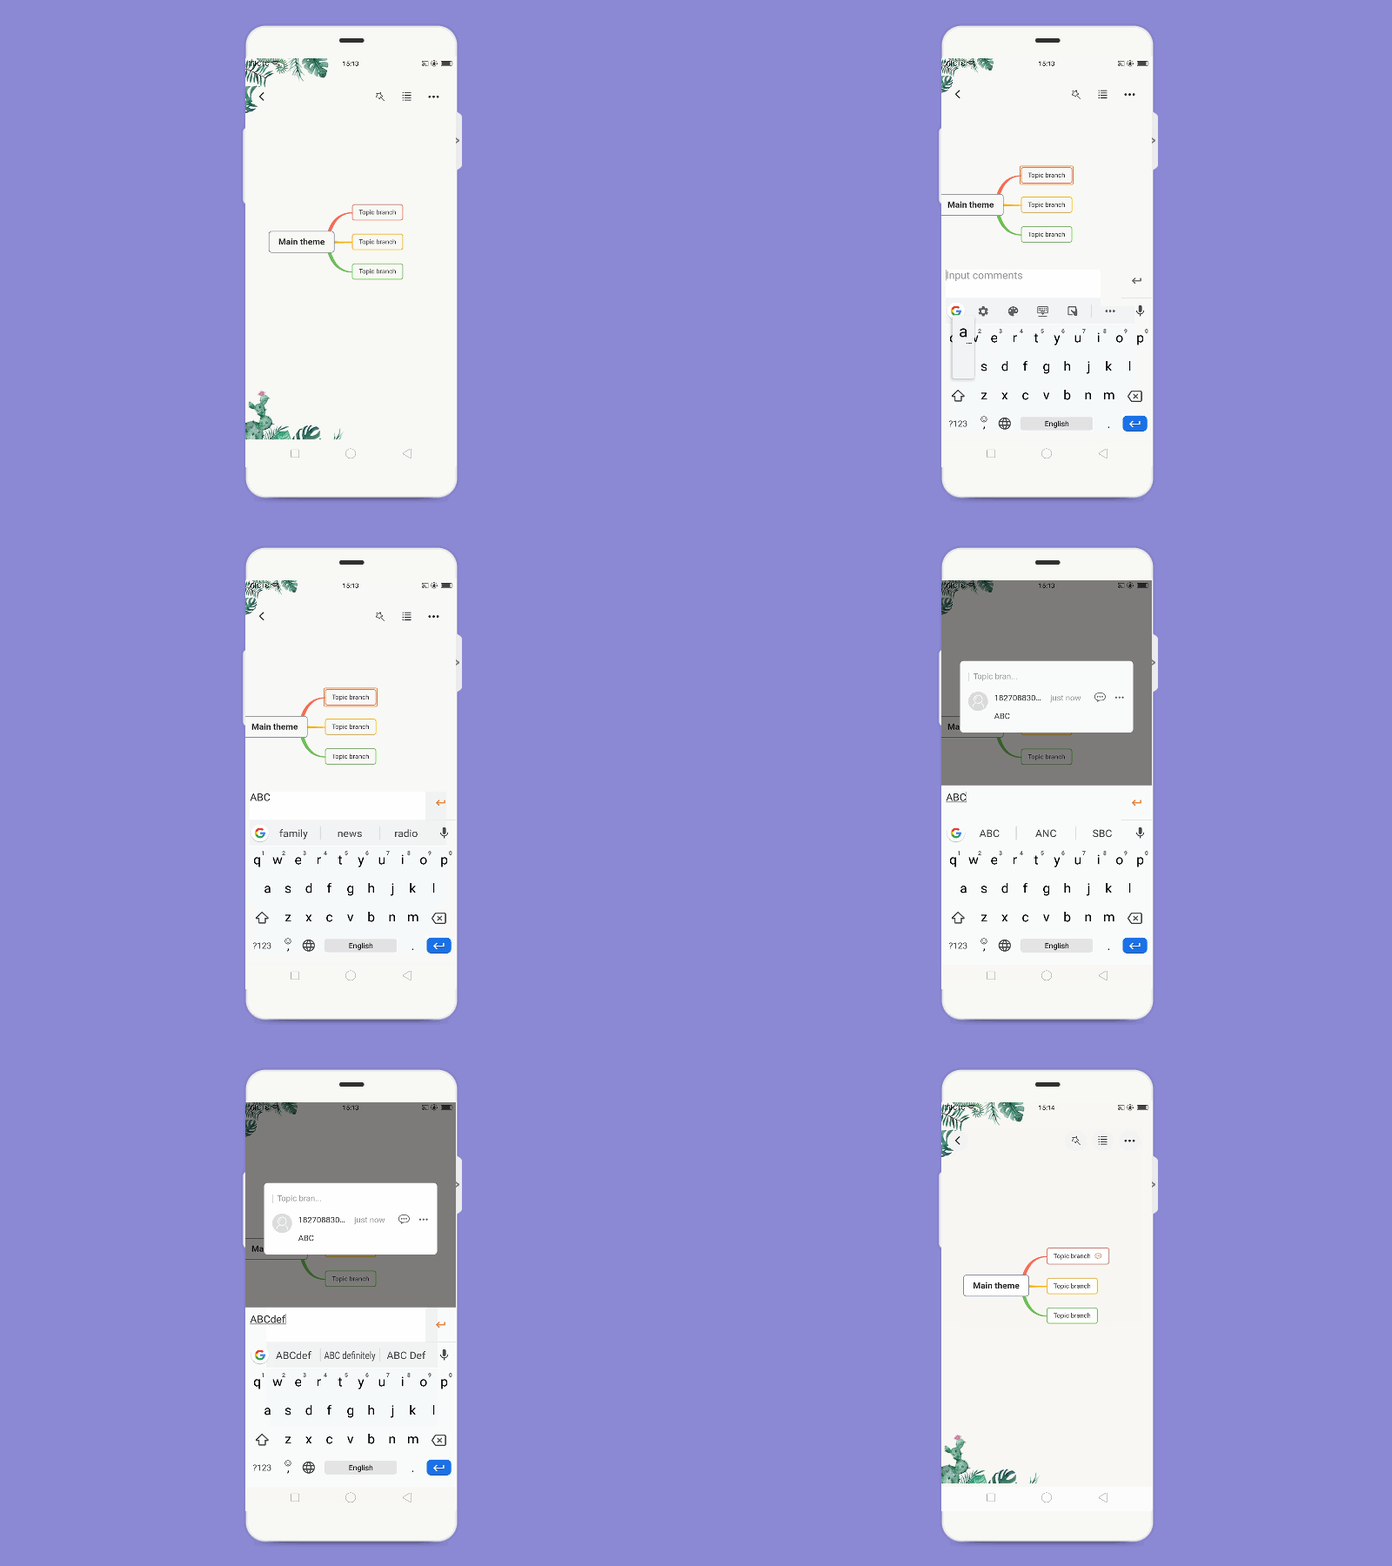
Click the target node, and then tap the comment icon at the floating toolbar. You can also edit and delete it after publishing. Everyone can comment on your mind map via the share link.
Insert Image
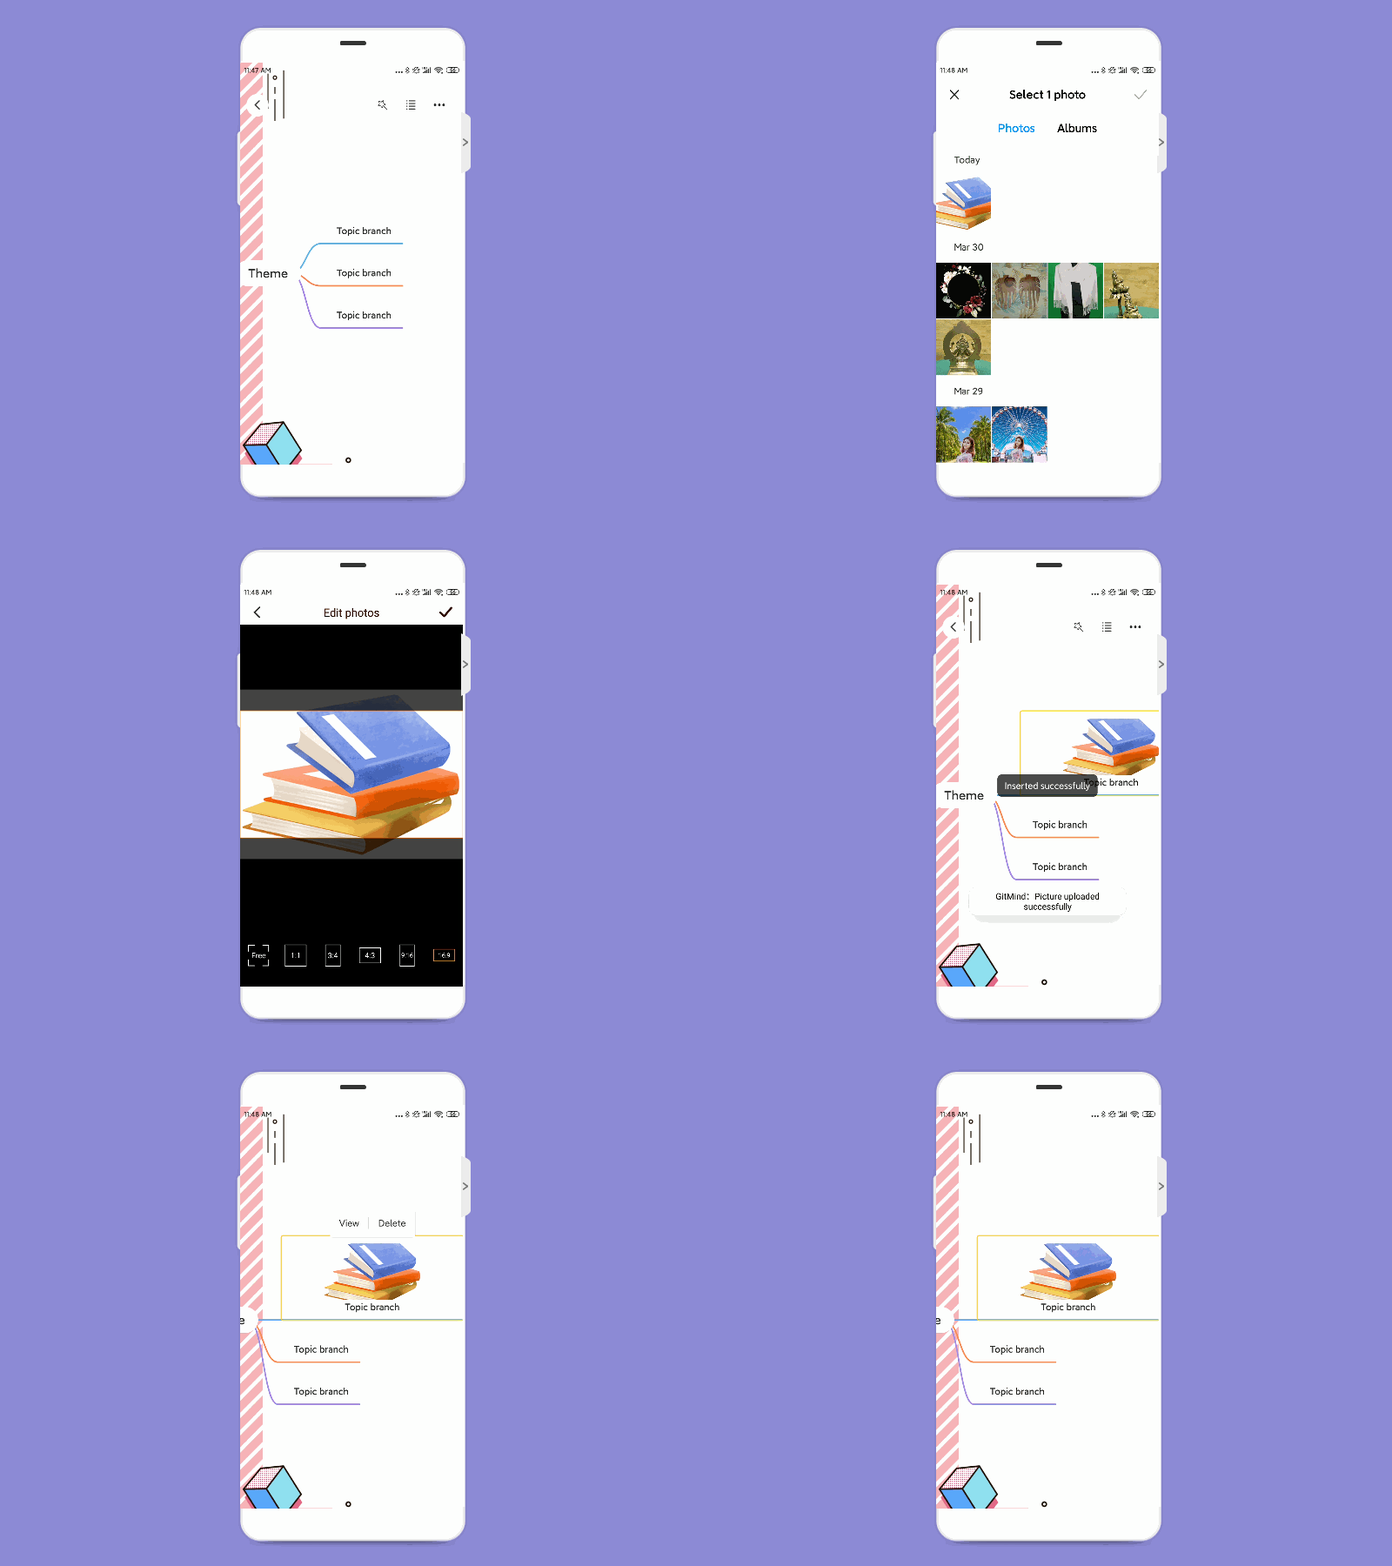
Select the target node, click the image icon in the floating toolbar, then you can choose local pictures to insert. Tab the image to view or delete it.
Change Theme
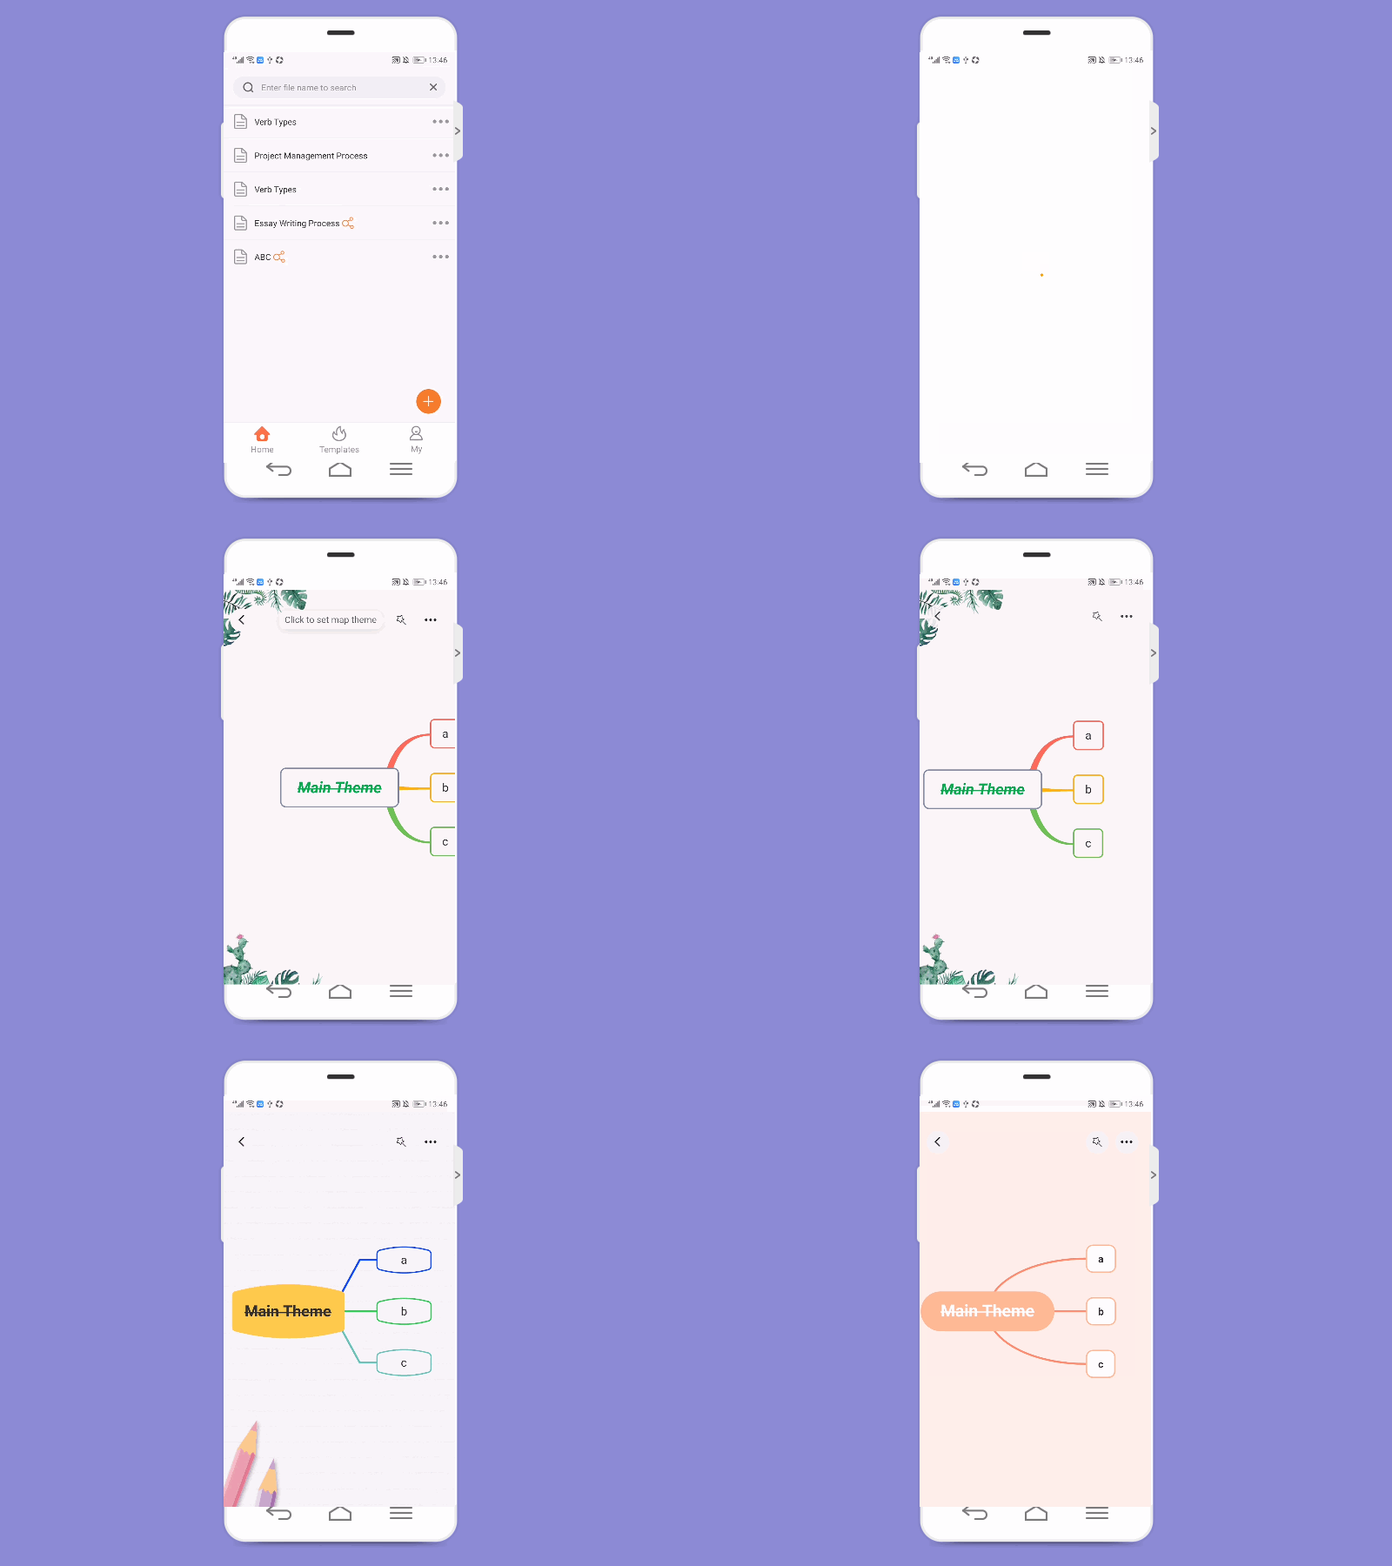
Open the file and click the wand icon in the upper right corner to quickly change the theme.
Switch Layout
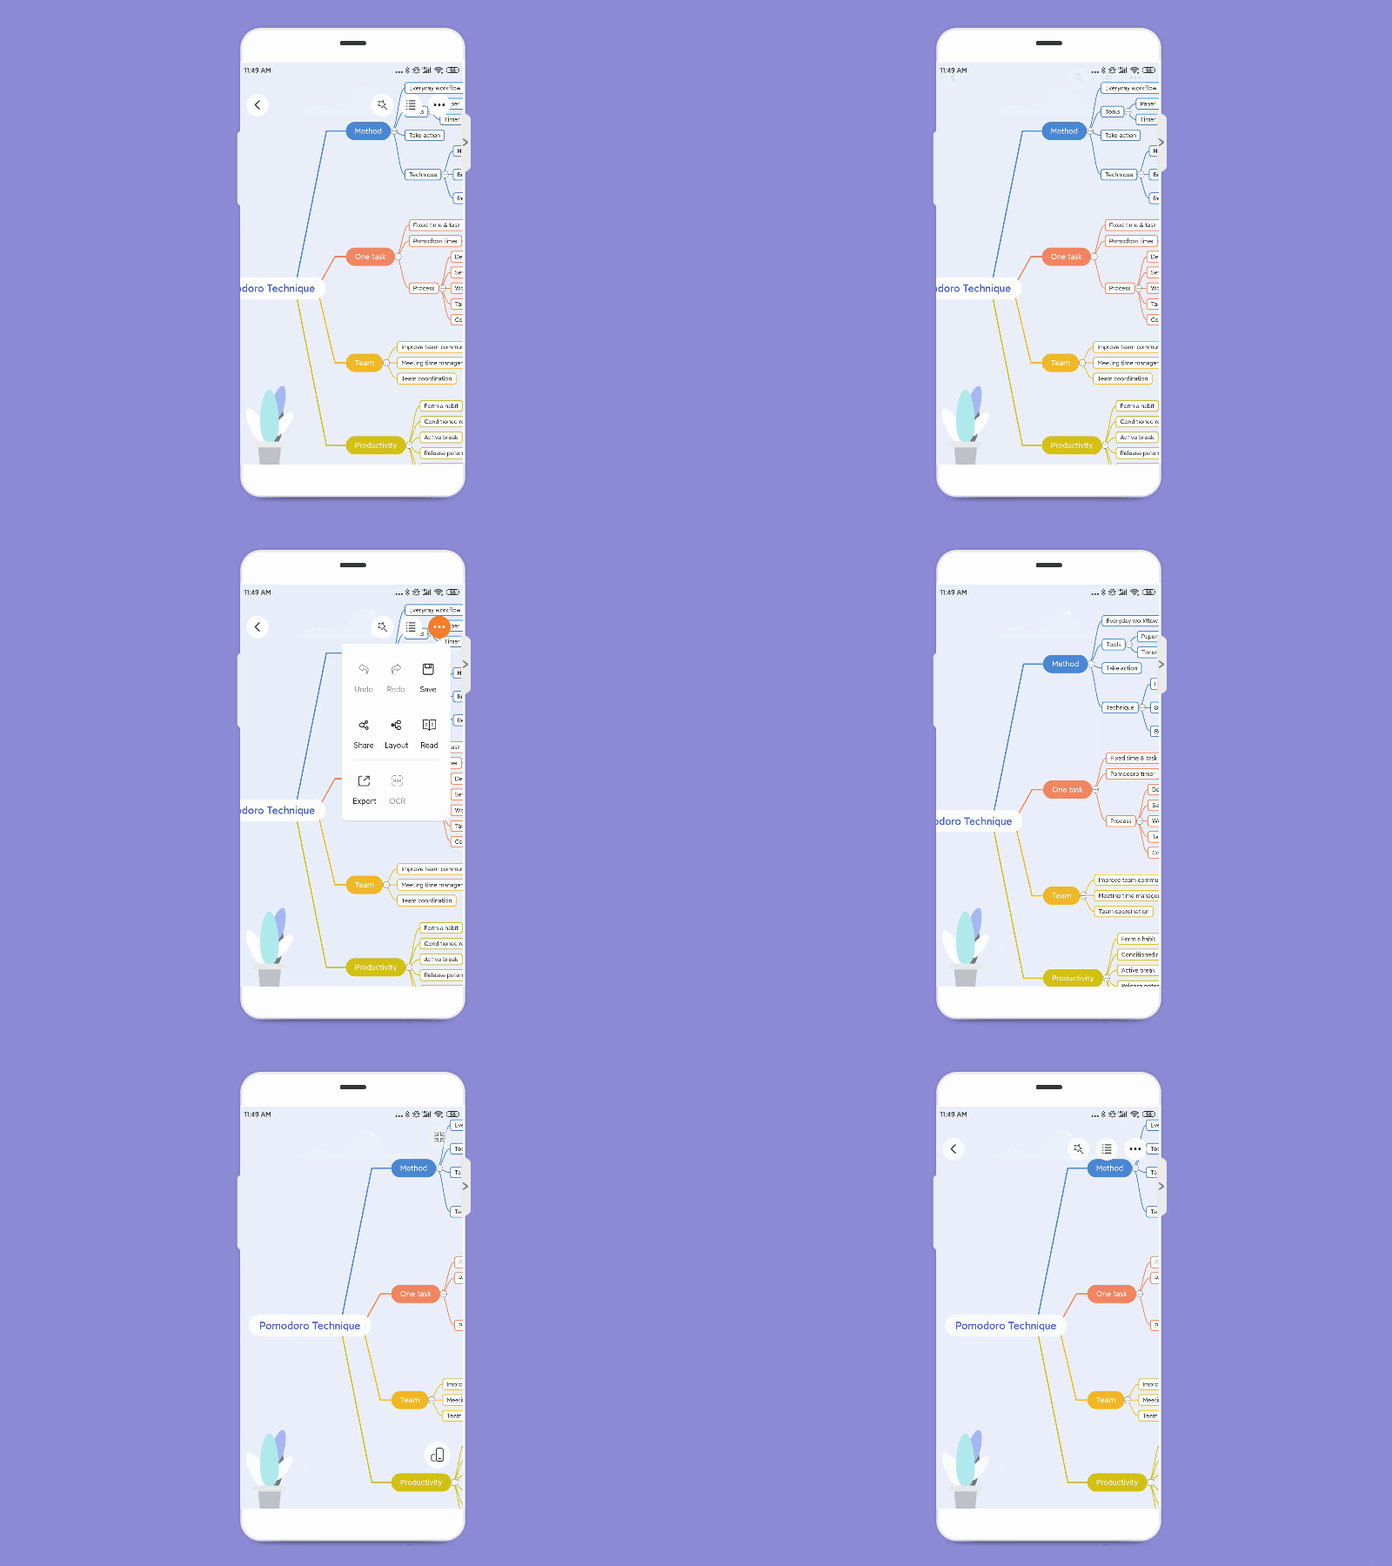
Open the file, open the pop-up window in the upper right corner, and click “Layout” to switch between 7 layouts.

Outline Mode
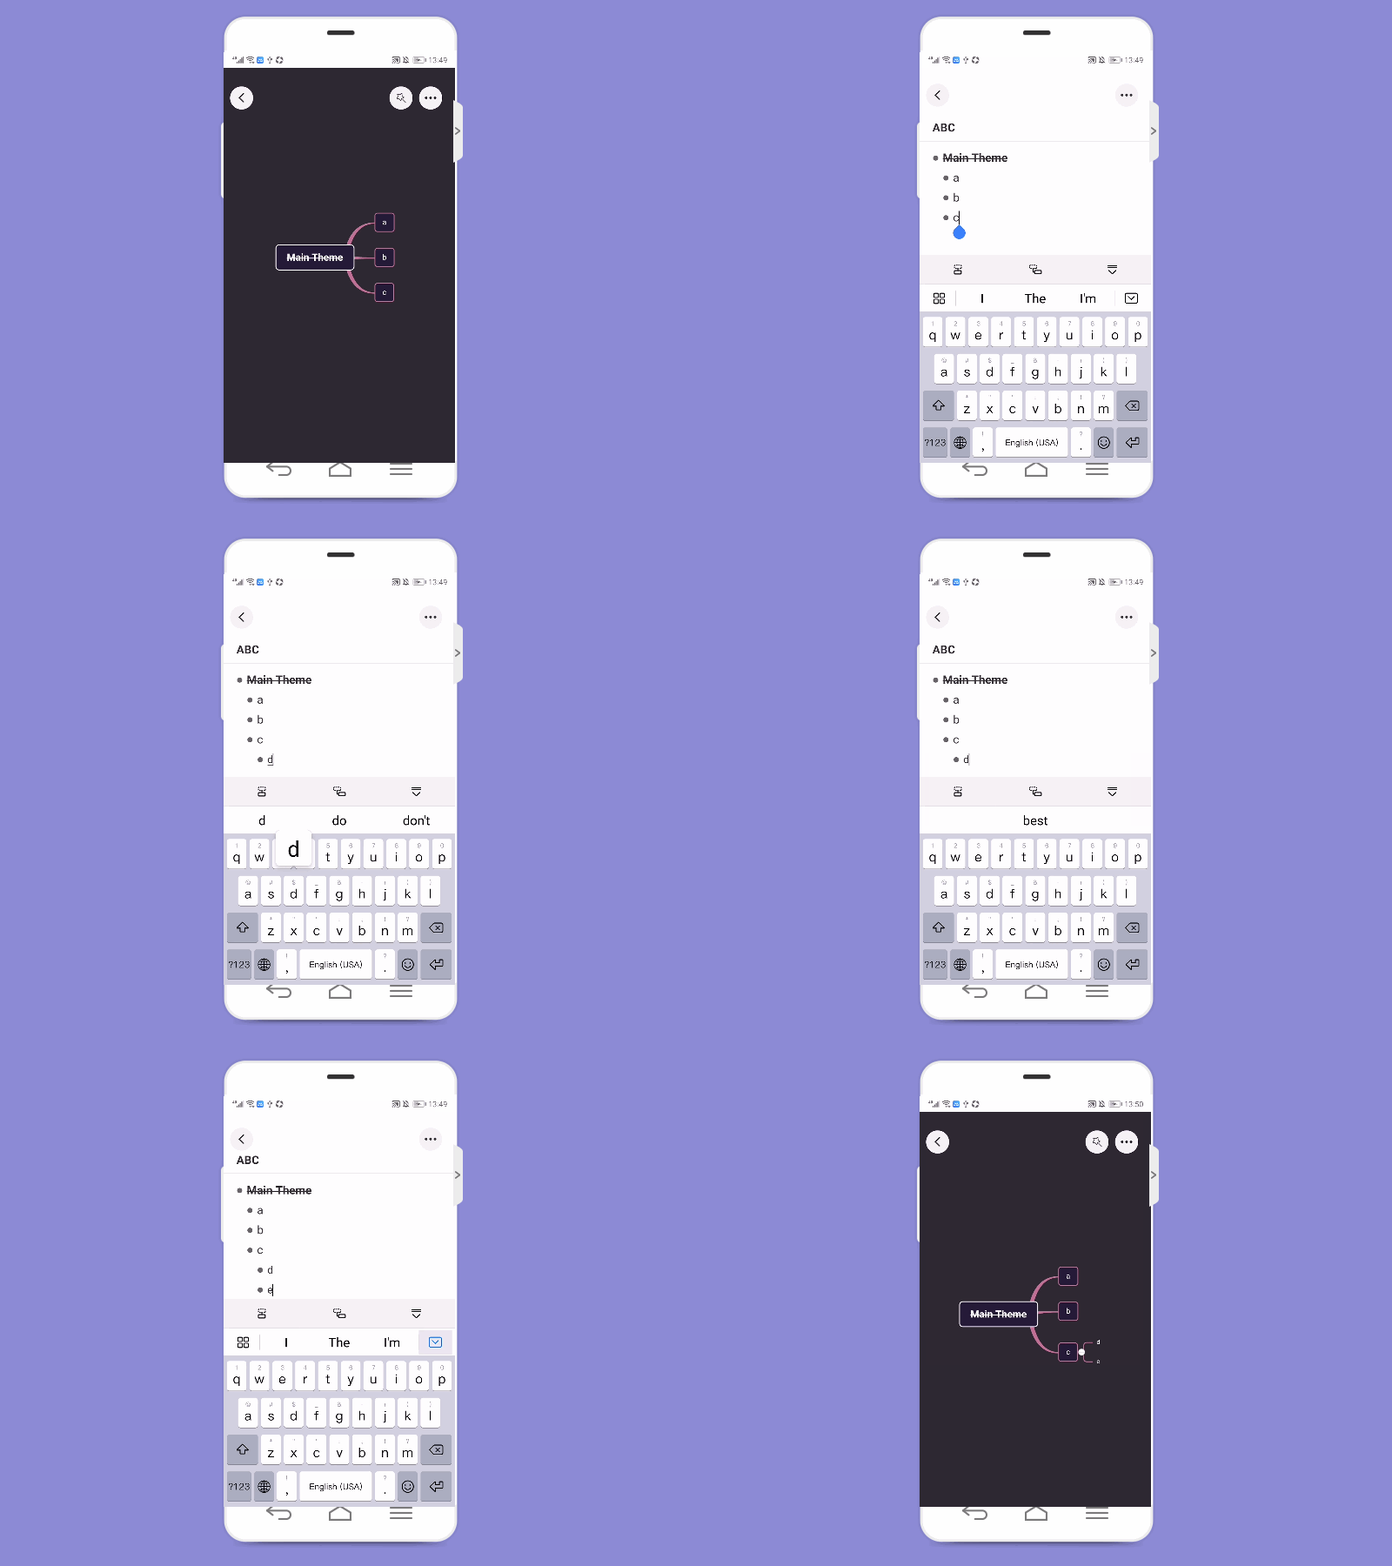
Open the file, open the pop-up window in the upper right corner, and click “Outline” to enter the outline mode. In the outline mode, click the corresponding button to add subnodes and sibling nodes.
Read Mode
Click the “…” button in the upper right corner to switch to “Read Mode”. In Read Mode, the mind map cannot be edited. You can click the horizontal screen switch button in the bottom right corner. You can also click the button in the upper right corner to exit the read mode.
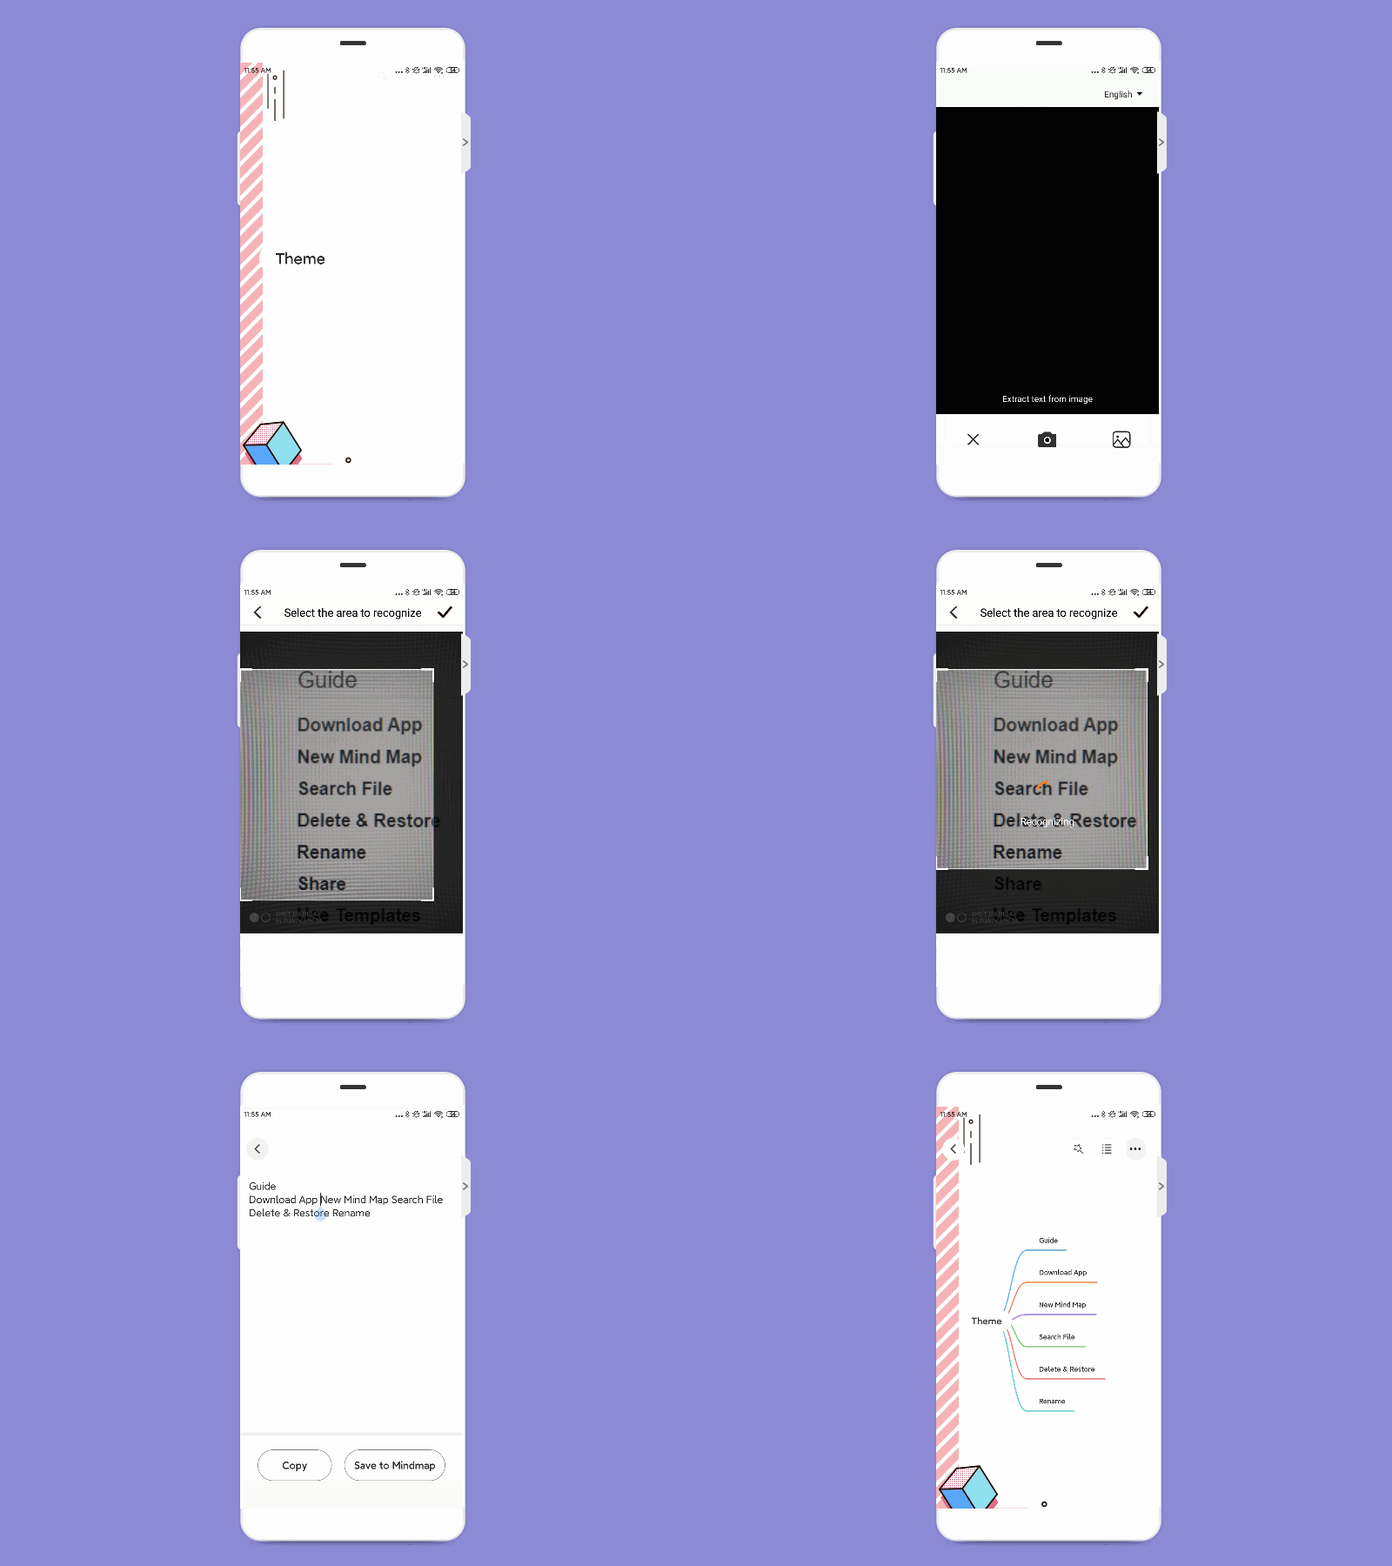
OCR
Select the target node, and click the “…” buttons in the upper right corner. Then press the “OCR” button. You can either take a photo or upload it from local photo albums. Please select the language you want to recognize, and adjust the text structure or save it to the mind map directly.
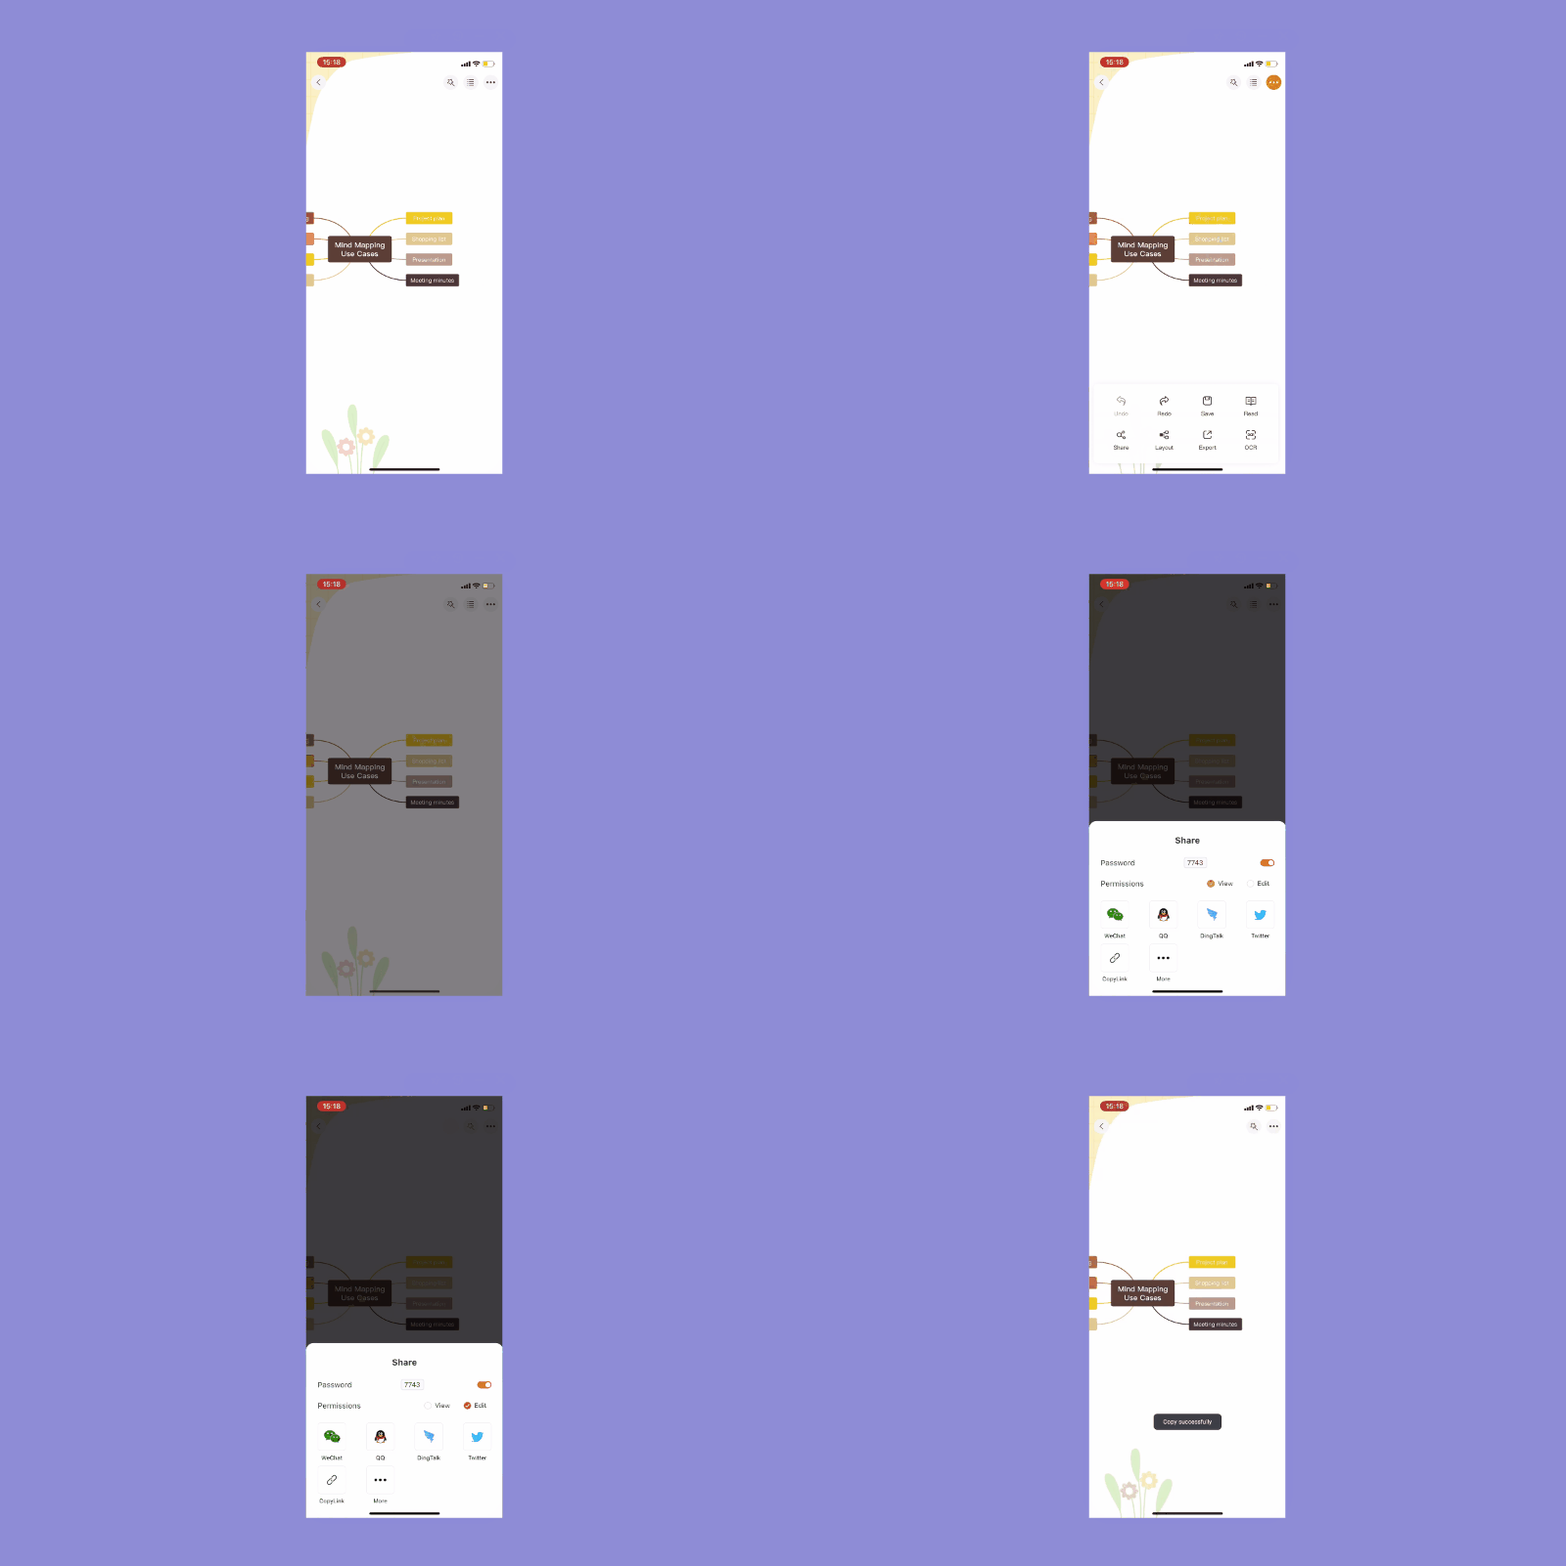
Share & Collaborate
You can also initiate share or collaboration on the mobile app. You can generate a password for your mind map, and also set viewing or editing permissions. Click “Copy Link” and send it to your colleagues and friends.
GitMind Planet
1. Create Planet
GitMind mobile app supports creating planets. GitMind planets can be used for team knowledge building, personal knowledge base and so on.
It’s very easy to create. Open GitMind, log in to your account, select Planet, and click + button to create your planet.
Note: Free accounts can only create a planet. Pro accounts can create up to 5 planets.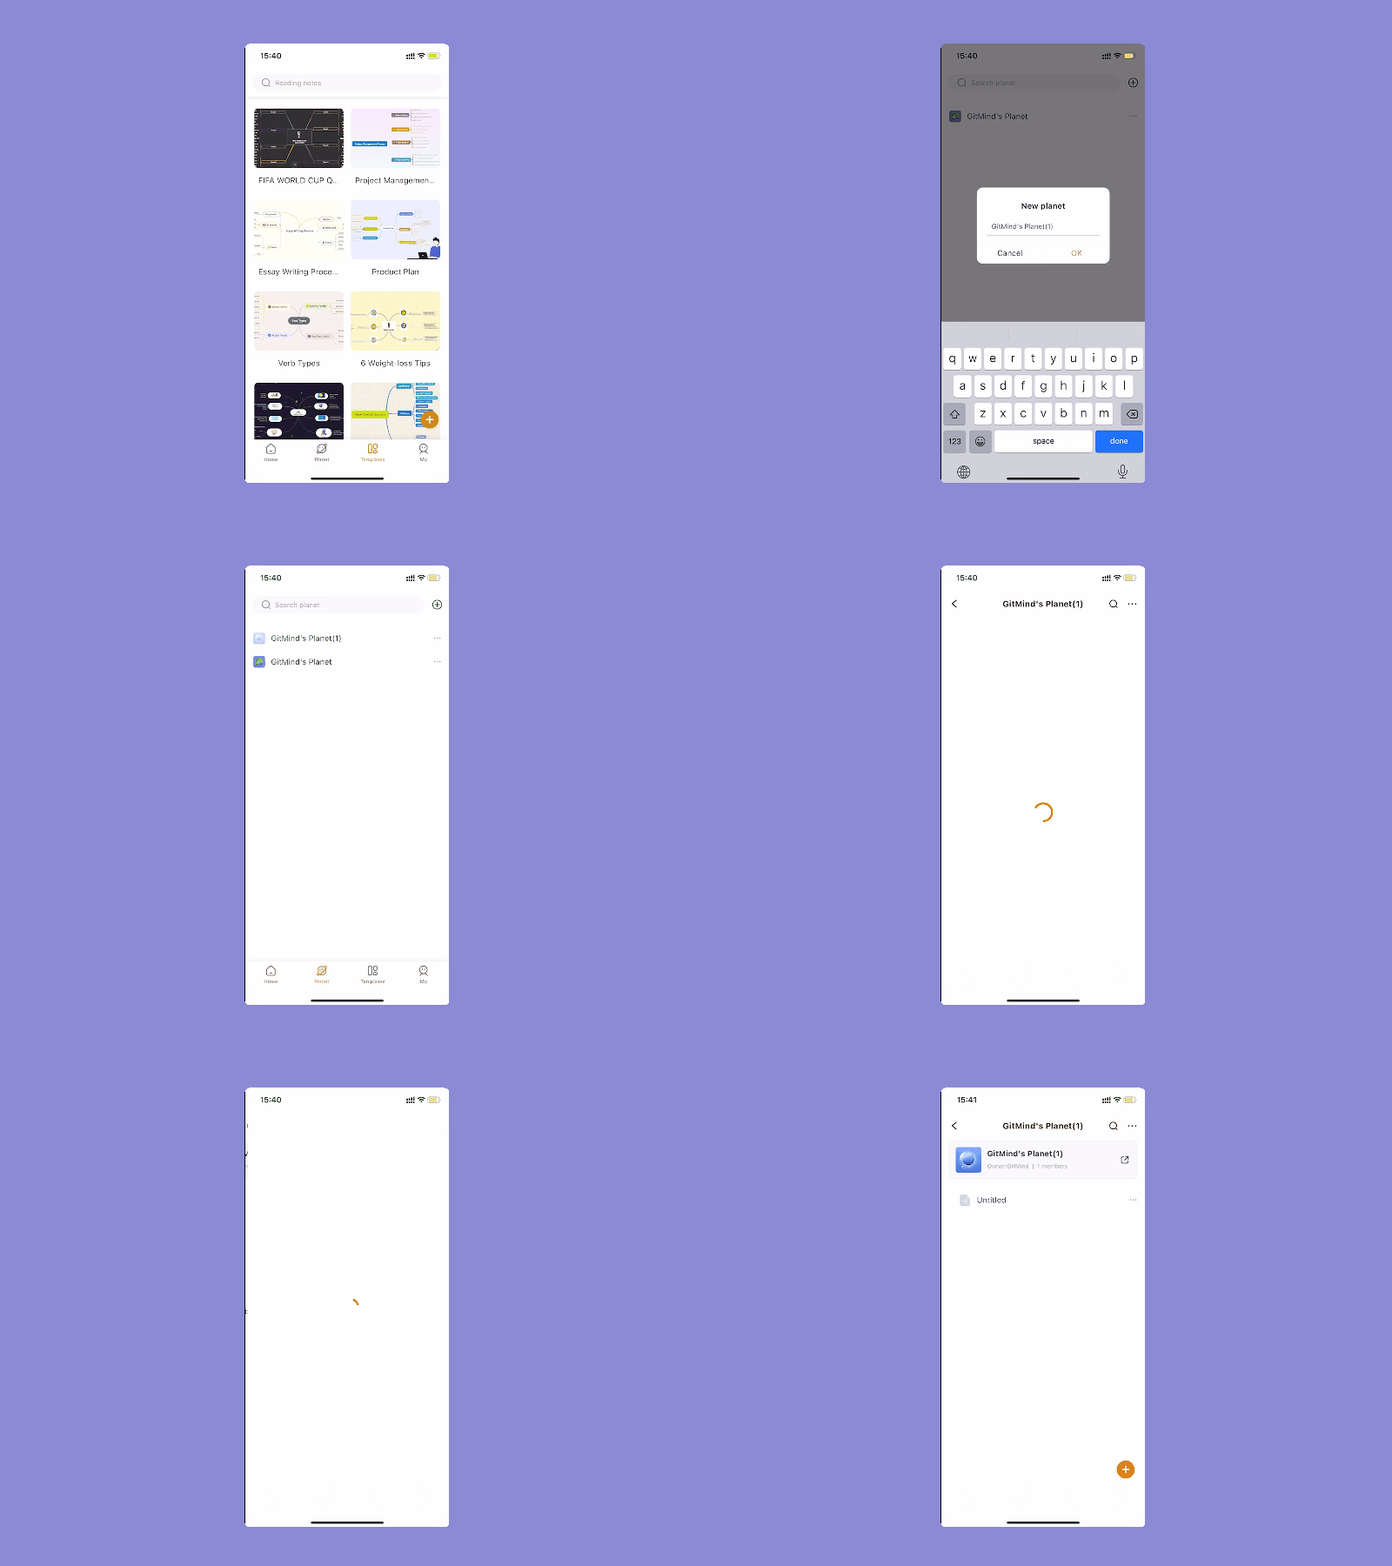
2. Planet Settings
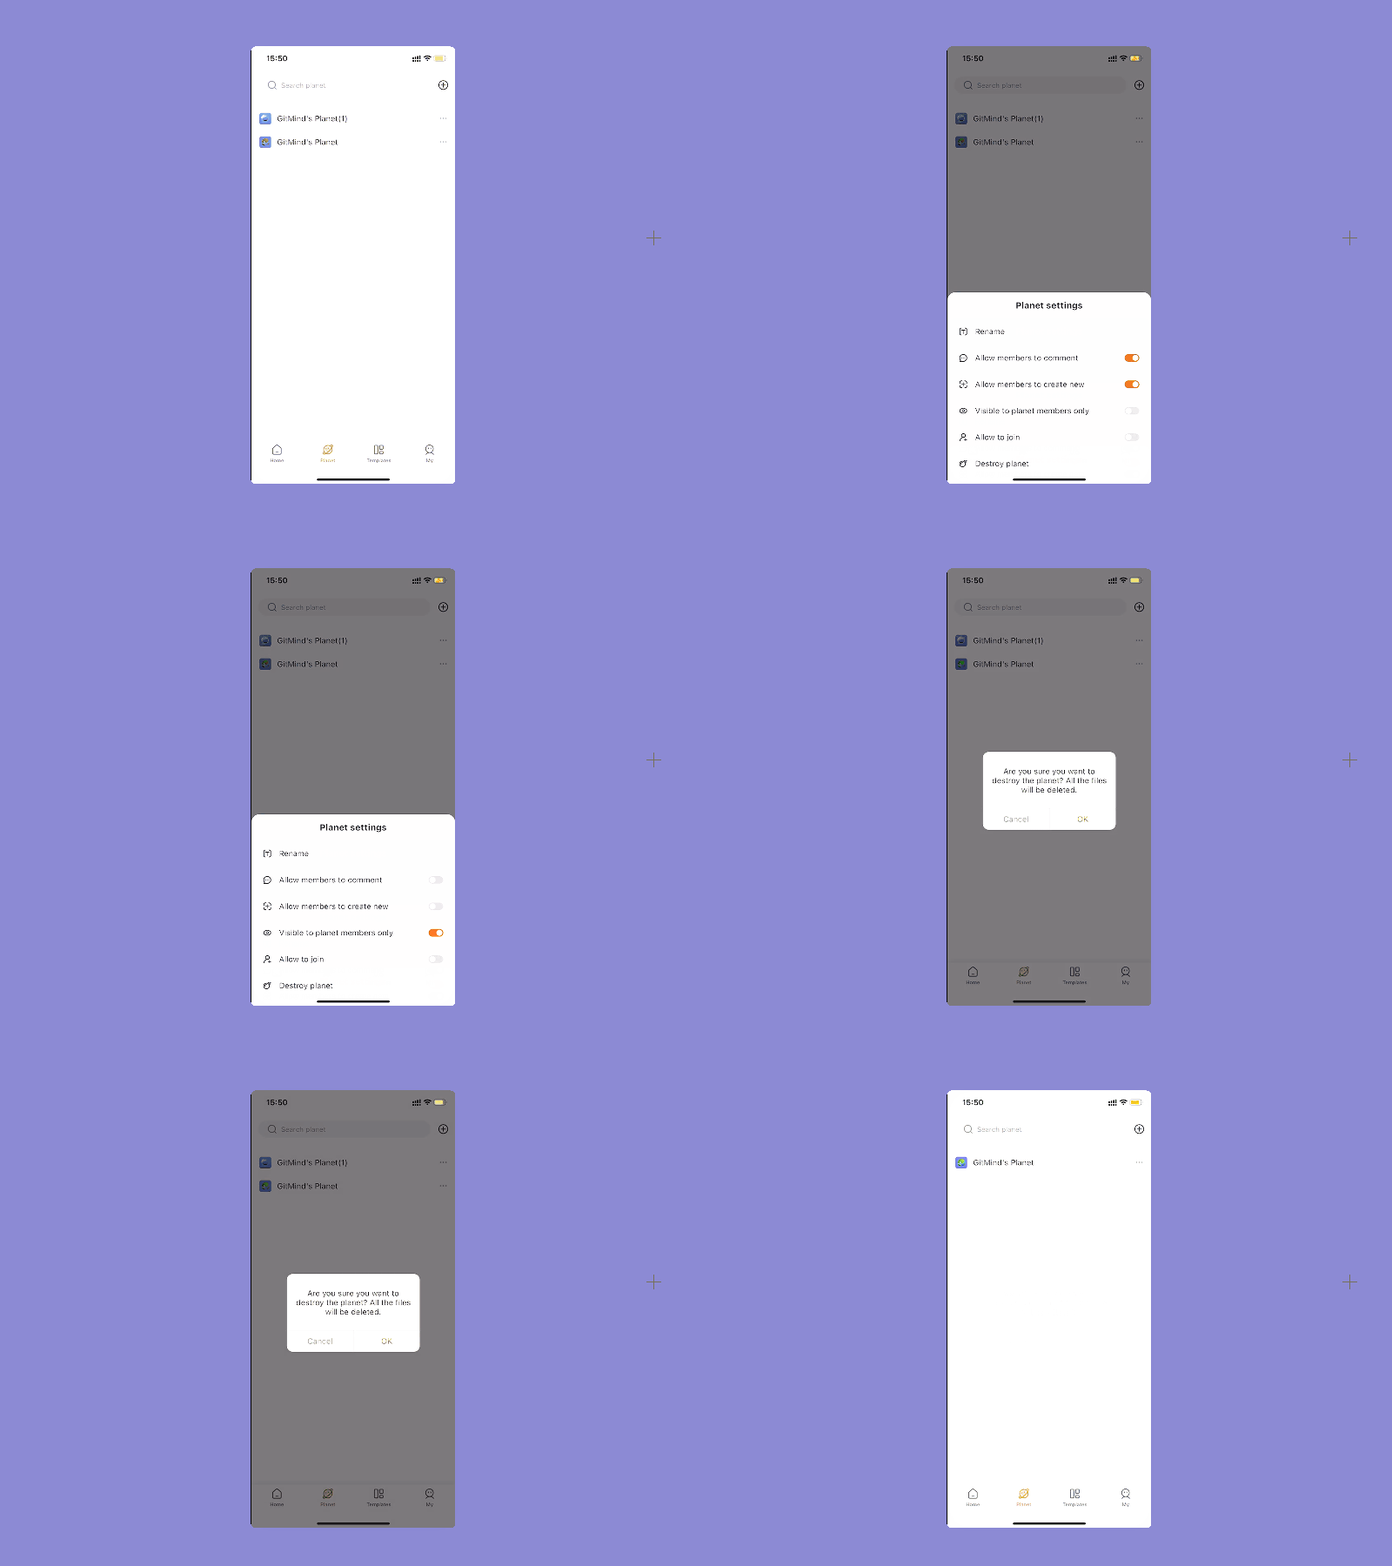
After creating a planet successfully, you can rename your planet, allow members to comment, allow members to create a new file, and destroy the planet. Click the … button behind the planet, and choose the corresponding operation.
3. Invite Planet Member
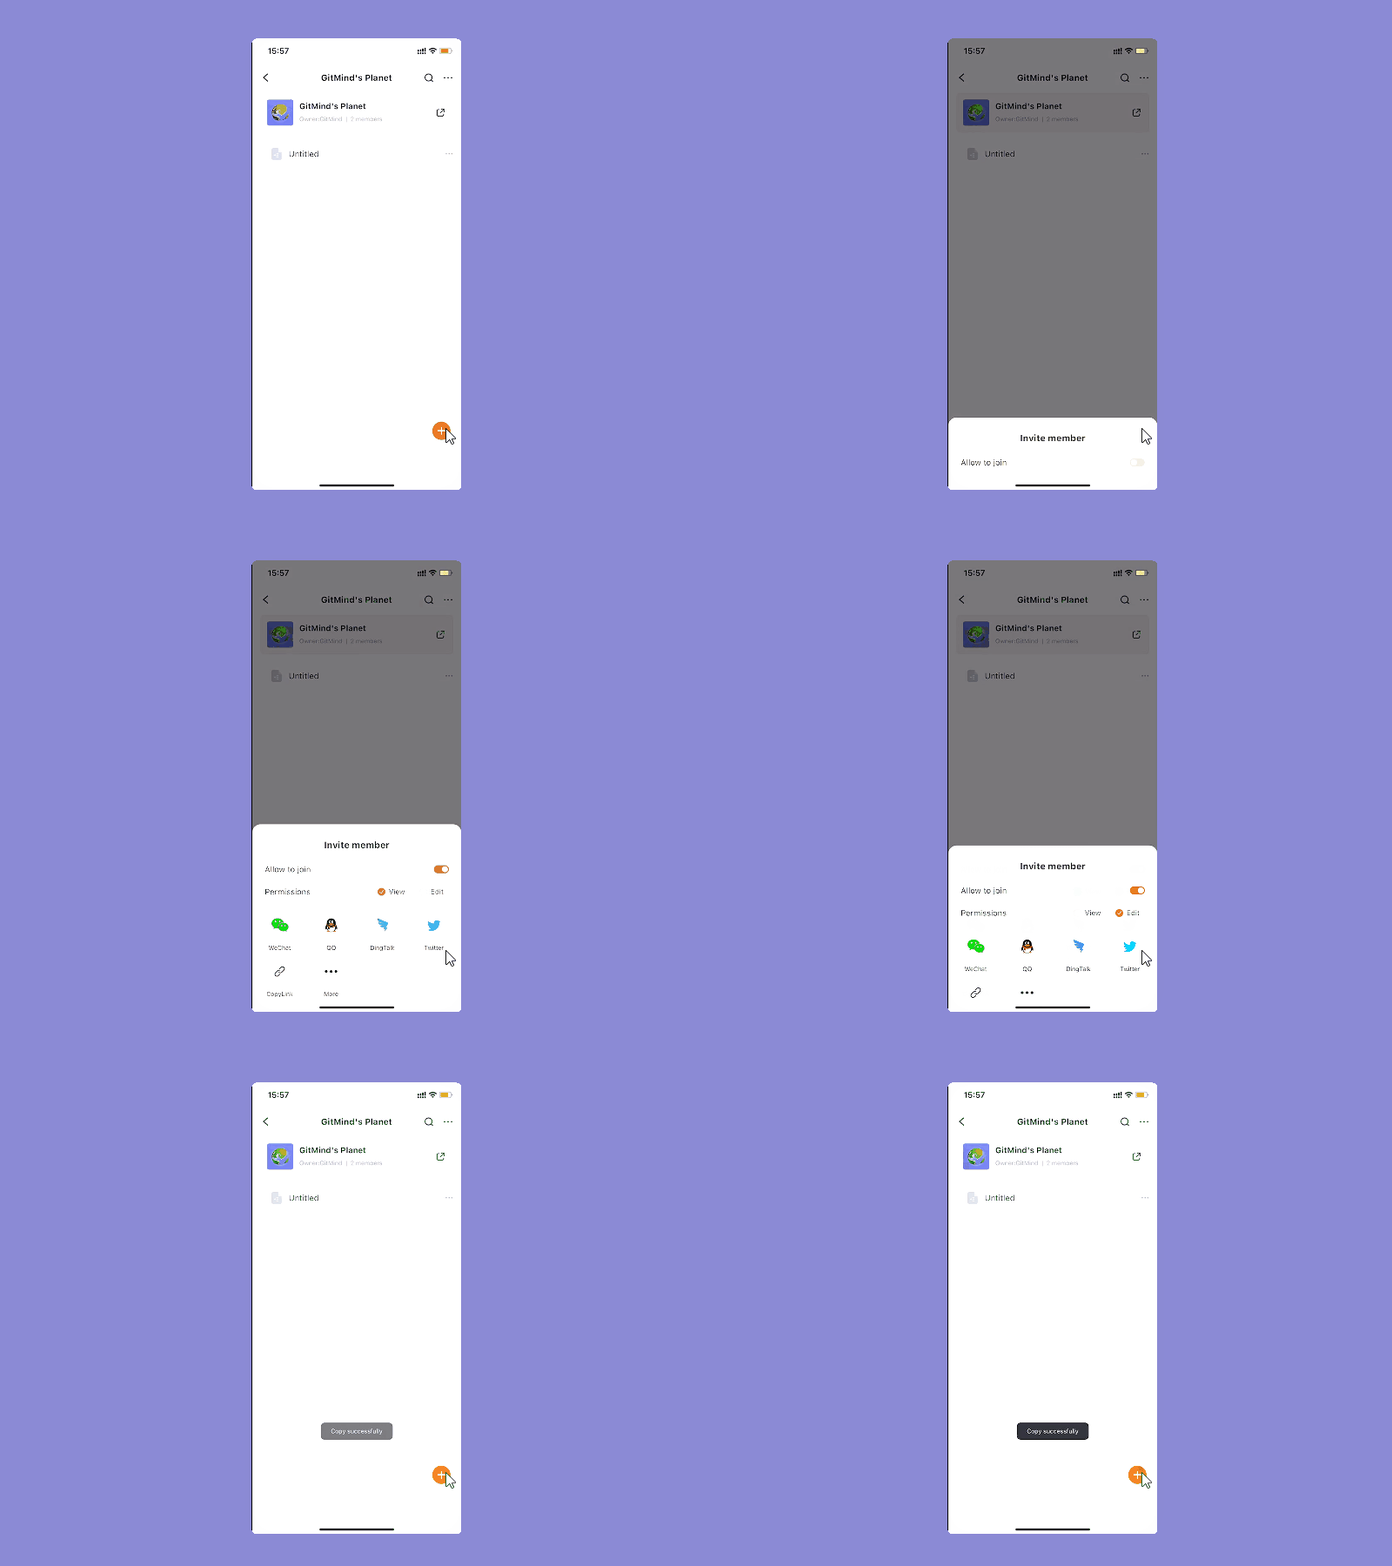
After creating a planet, you can invite others to join your planet. Click the corresponding planet, click the share button in the upper right corner, copy the link and share it with others. Then they can join your planet via the link.
4. Planet Member Management
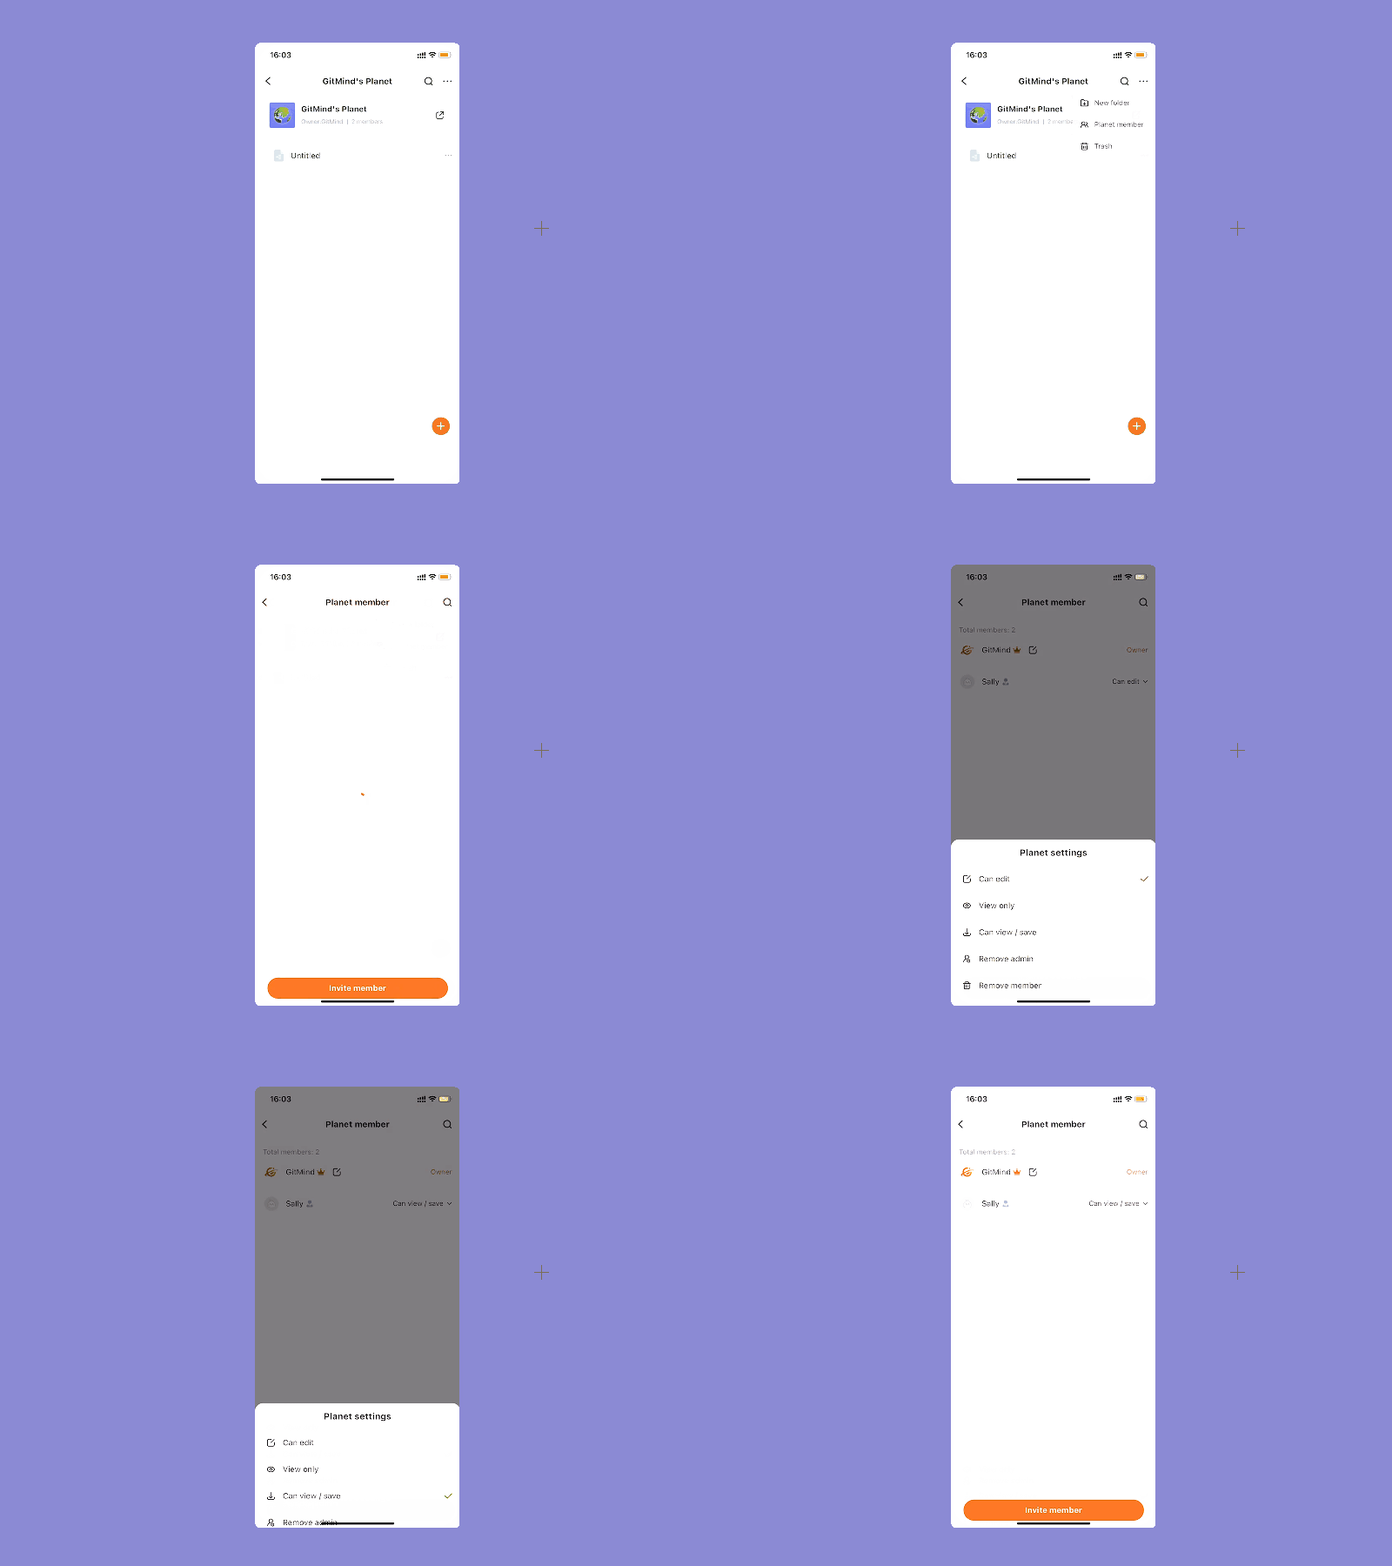
When other people join the planet you created, you can manage the members of the planet. Enter the planet, click … option in the upper right corner, select Member Management. Find the member and modify the member’s permissions.
You can change the member’s permission to “View Only”, “Can edit”, “Can view/save”, etc. You can also set the member as the planet administrator or move the member out of the planet.
Export
Open the file, open the pop-up window in the upper right corner, and click “Export” to save the file in JPG and PDF formats.

Feedback
Open the APP, select “My”, and click “Feedback” to send us your feedback and valuable suggestions.
Leave a Comment