These days, AI is everywhere, and tools for generating images are growing fast. It’s never been simpler to bring your ideas to life and express yourself creatively. One popular tool from X platform is Grok. In this guide, we will explore how to use Grok to generate images.
What is the Grok Image Generator?
Grok is an AI tool on the X platform that quickly and efficiently converts text into images. It uses the advanced Aurora model, which has powerful image generation capabilities. The tool can create JPEG images with a resolution of 1024×768 in just 3–5 seconds, making it highly appealing to users who value speed and efficiency.
What’s really nice about Grok is how user-friendly it is. Even if you’re using the free version, you can create up to 10 images every 2 hours, which is plenty for most casual users. But if you need more—like higher-resolution images or the ability to generate more frequently—there’s a premium subscription that’s perfect for professionals or anyone with higher-quality needs. And here’s the best part, since Grok is built right into the X platform, you don’t have to jump between apps to use it. Everything happens in one place, making the whole process super smooth and hassle-free.
How to Generate Images with Grok
Before using Grok to create images, some initial setup is required to ensure a smooth experience.
🔗 Access Grok → https://grok.com/
- Set Up a Grok Account
- Accessing the Grok Image Generation Tool
- Writing High-Quality Image Generation Prompts
- Generate and Adjust Pictures
- Limitations of Grok and Alternative Options
- GitMind: Recommended Powerful AI Image Generation Tool
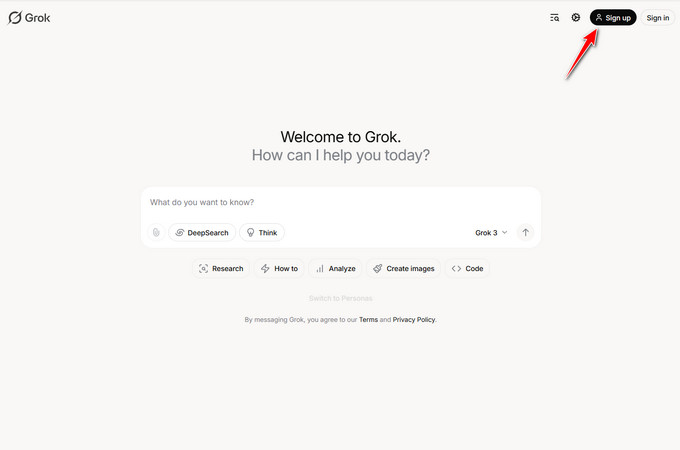
1. Set Up a Grok Account
Link Your Phone Number: To keep your account secure and make sure everything runs smoothly, Grok asks you to verify your phone number. This helps prevent misuse and ensures you can get important updates and verification codes when needed.
Account Age Requirement: Before you can start using Grok, your account needs to be at least 7 days old. This little wait helps the platform get to know its users better and improve the overall experience.
Update the X App: To unlock all of Grok’s cool features—especially image generation—make sure your X App is up to date. If you’re using an older version, you might run into issues with generating images or other compatibility hiccups.
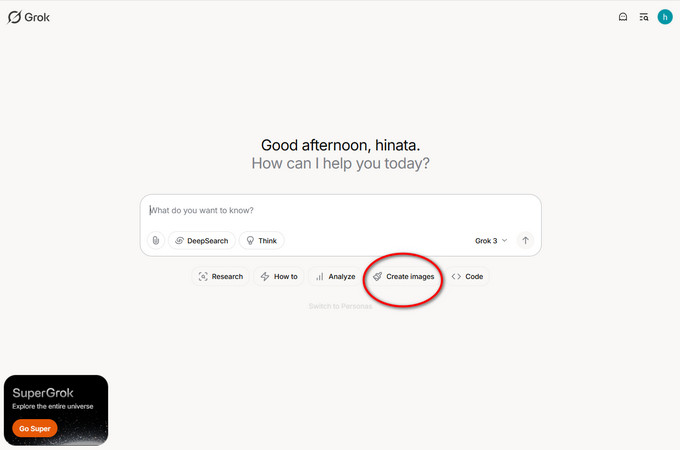
2. Accessing the Grok Image Generation Tool
The way to access Grok’s image generation tool depends on the device you are using.
- Desktop Version: If you are using X on a desktop, simply click the “Create Image” icon on the platform. Then, select the image generation option from the pop-up menu to enter the Grok image generation interface.
- Mobile Version: For mobile users, open the X App, tap the icon at the bottom, and select the image generation option to start using Grok.
3. Writing High-Quality Image Generation Prompts
When using Grok to create images, the key to getting great results is writing a clear and thoughtful prompt. A well-written prompt helps the AI understand exactly what you’re looking for, while a vague or unclear one might lead to images that don’t quite hit the mark.
How to Structure a Great Prompt
- Subject: Start by being specific about the main focus of your image. For example, instead of just saying “a cat,” try “a gray tabby cat with green eyes.” The more details you provide, the better the AI can bring your vision to life.
- Scene: Describe the background or setting to give the image depth and context. For instance, “a cozy Victorian-style library with sunlight streaming through the windows” paints a vivid picture and helps the AI place your subject in the right environment.
- Style: Let the AI know what kind of artistic style you’re going for. Whether it’s “digital art with a realistic touch” or “watercolor painting with soft edges,” this helps ensure the final image matches your creative vision.
- Lighting: Lighting sets the mood and adds realism. Phrases like “warm natural light with soft shadows” or “dramatic backlighting” guide the AI to focus on how light and shadows should look in your image.
- Composition: Think about how the image is framed. Do you want a close-up shot, a wide-angle view, or something in between? Adding details like “close-up shot with rule of thirds composition” helps the AI arrange the elements in a visually pleasing way.
- Emotion: Finally, consider the feeling or tone you want the image to convey. Words like “peaceful and contemplative” or “energetic and vibrant” help the AI create an image that captures the right mood.
By breaking your prompt into these elements, you’ll give Grok all the tools it needs to generate an image that truly matches your vision!
4. Generate and Adjust Pictures
Once you’ve finished writing your prompt, it’s time to let Grok work its magic and create your images. After they’re generated, you can tweak or refine them as needed to get exactly what you’re looking for.
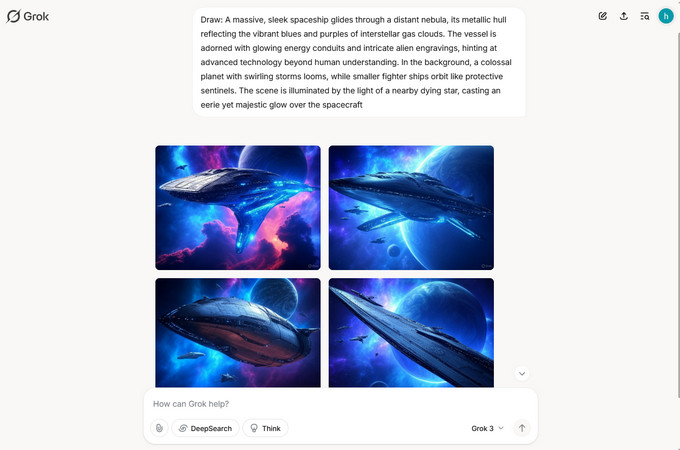
Steps to generate the image
After entering the question, Grok will quickly generate four different versions of the image. These images are automatically generated by AI based on the input, and each image can have different characteristics and styles. Users can select “Share” to share the image on social media or other platforms, “Download” to save the image to their local device, or “Regenerate” to let Grok regenerate a new image until it finds a satisfactory result.
5. Limitations of Grok and Alternative Options
While Grok has a lot of great features, it’s not without its limitations. Depending on your needs, you might want to explore other tools that could be a better fit.
(1) Limitations of Grok
- No Built-in Editing Features: Grok doesn’t have editing tools, so if you need to tweak your images, you’ll have to use third-party software. This can be a bit of a hassle if you’re looking for an all-in-one solution.
- Account Restrictions: To use Grok, you need an X platform account. If you’re not already on X or don’t want to sign up, this could be a dealbreaker.
- Watermark Issue: Every image generated by Grok comes with a “GROK ⧄” watermark. While this might not be a big deal for personal use, it can make the images less ideal for professional or commercial projects.
(2) GitMind: A Great Alternative
If you’re looking for something more flexible, GitMind is a solid alternative for AI image generation. It offers a range of features that might better suit your needs, especially if you’re looking for more control or a watermark-free experience.
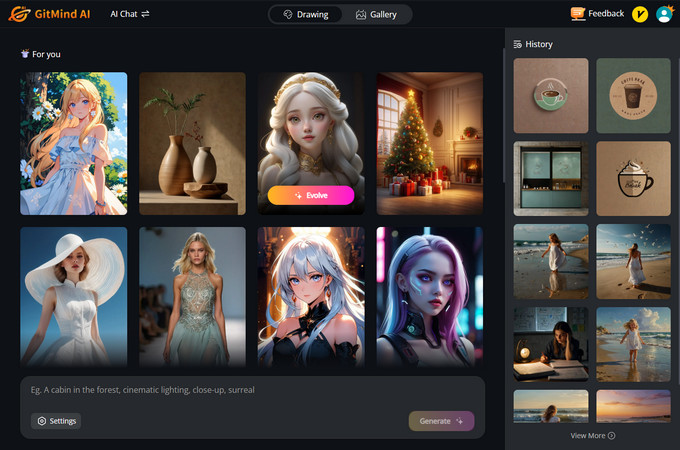
GitMind: Recommended Powerful AI Image Generation Tool
If you’re looking for a flexible and user-friendly AI image generator, GitMind is a great choice. Here’s why it stands out:
Try it now1. No X Account Required: Unlike Grok, GitMind doesn’t force you to sign up for an X platform account. This makes it much more accessible and hassle-free for everyone.
2. Multiple Style Options: Whether you’re into classic art, modern designs, Chinese-inspired aesthetics, or Japanese anime, GitMind has a wide range of styles to match your creative vision. It’s perfect for exploring different artistic directions.
3. High-Resolution, Lossless Images: You can download your creations in stunning high quality, making them ideal for everything from social media posts to professional graphic design or even anime character creation.
4. No Forced Watermarks: Unlike Grok, GitMind doesn’t slap a watermark on your images. This makes it a great choice for both personal projects and commercial use without any annoying restrictions.
5. Integrated AI Features: GitMind isn’t just about image generation. It also offers tools like mind mapping, image-to-text conversion, and PDF-to-image tools, making it a versatile all-in-one platform for boosting your creativity and productivity.
When choosing an AI image generation tool, we should make decisions based on our actual needs. Both Grok and GitMind can bring convenience to our creation, improve creative efficiency, and make AI drawing simpler and more convenient. I hope that everyone can make full use of the advantages of AI by choosing tools reasonably and create more excellent works.
Leave a Comment