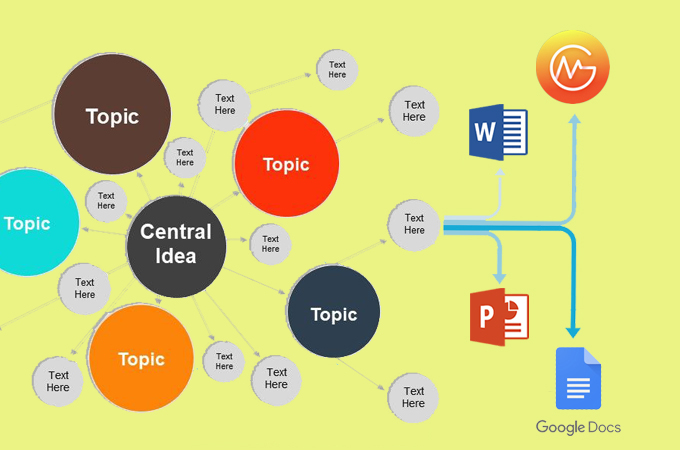
Learning a new concept or complex information often leads to confusion when you are not very familiar with the topic. As such, it is suggested to breakdown large complex information into chunks. A concept map is a perfect fit for this kind of need. Using a concept map as a visual organizer is one of the best ways to make meaningful connections between concepts, identify lapses, and enhance learning. Concept map also works very well for studying like nursing and engineering. Therefore, we prepared a guide on how to make a concept map using some handy tools.
4 Methods to Create Concept Map
Use Microsoft Word
Creating a concept map does not need to be complicated. It is only composed of basic shapes and you can get this done even when you are just using Microsoft Word. The best thing about Microsoft Word is it has a built-in SmartArt Graphic option that allows you to create various diagrams. At the same time, you can use it to create a concept map. If you want to know how to draw illustrations using Word, take a look at the brief guide below.
- Open a new document and go to the “Insert” tab then open the “Shapes” tab. Next, select shapes like rectangles, circles, and lines. Arrange them by forming a hierarchy structure wherein the main idea is the top branch and branch out sub-topics at the bottom.
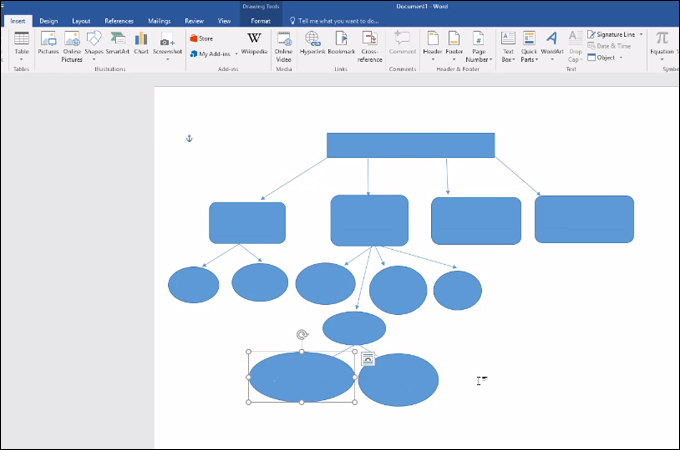
- On the other hand, you can use the SmartArt Graphic to make a concept map. Look for SmartArt Graphic under the “Insert” tab. Next, choose the Hierarchy category from the panel.
- After designing the structure, modify and customize the map by editing the text, cross-links, and other elements until satisfied with the outcome. When finished, save the map by going to “File” and click “Save.”
Use Microsoft PowerPoint
Another Microsoft Office program that you can utilize to make a concept map is PowerPoint. This is normally used for creating visual aids for delivering presentations. Needless to say, it provides shapes and figures for illustrations. Also, you can take advantage of its presentation features to deliver an impressive and eye-catching slideshow or business presentations. Check out the following steps on how to make a concept map using PowerPoint.
- Open MS PowerPoint on your desktop and start with a blank slide. From the “Home” tab you will already find the shapes at the right side part of the interface. Drag the desired shapes and adjust the sizes and alignment as necessary.
- Say you picked circles to represent each idea. Duplicate them according to the branches you need to create a concept map. Remember to position the main circle at the top and sub-branches underneath to form a structure of hierarchy. After adjusting the alignment, connect the relating ideas using lines or arrows.
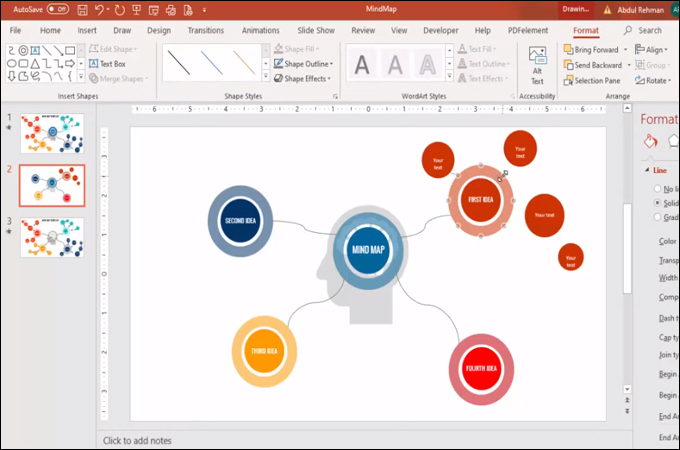
- This time, fill the shapes with information or a picture that represents an idea. You can also make a concept map in free-style where the main idea is at the center while subtopics are positioned around it. Just make sure each idea is linked to the relevant ideas. Once satisfied, you can save the presentation and edit it anytime.
Use Google Docs
Google Docs is also a good alternative for those who want to make a concept map online. All you need is a Gmail account to completely make use of this program. This is primarily used for editing documents integrated with “Drawing” functionality that allows you to create illustrations using basic shapes. To learn how to use this tool to create a concept map. Follow along with the instruction.
- Open a new blank document on Google Docs and click “Insert” from the menu. Choose “Drawing” and hit “New” to enter the drawing panel.
- To create a concept map, you can either choose a rectangle or circle to represent an idea. Resize the shape and adjust the alignment. Identify the main and subtopics of the concept map. Next, connect them by clicking the “Line” feature and hover your mouse to one of the shapes. Several dots will appear around the shape.
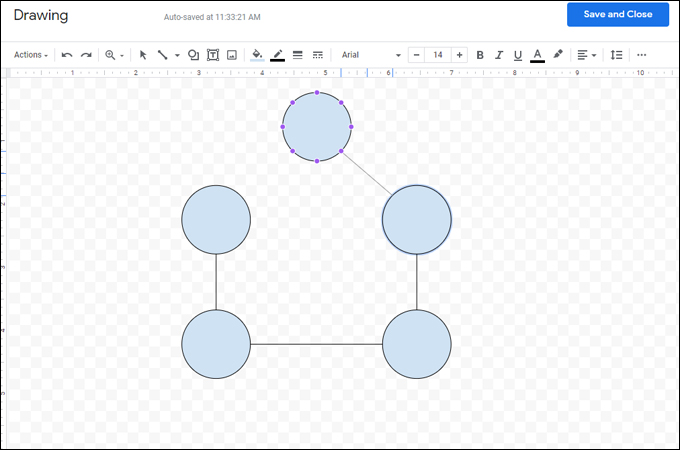
- Select your desired point, click and hold the cursor then connect it to another shape. Keep doing this until all ideas are connected to make a concept map. After that, you can customize the style to make it more attractive. Finally, click the “Save and Close” button to save the file. For future editing, you can click double-click the illustration from the document.
Make Concept Map With GitMind
The last tool in the list to make a concept map online is GitMind. It lets you create various diagrams for free without the need to install extra software. You can use it to make creative visual illustrations including concept maps, mind maps, flowcharts, and a lot more. On top of that, this tool has plenty of stylish templates and themes you can edit to help you create a professional and impressive concept map. To get started, you may refer to the guide below on how to make a concept map using GitMind.
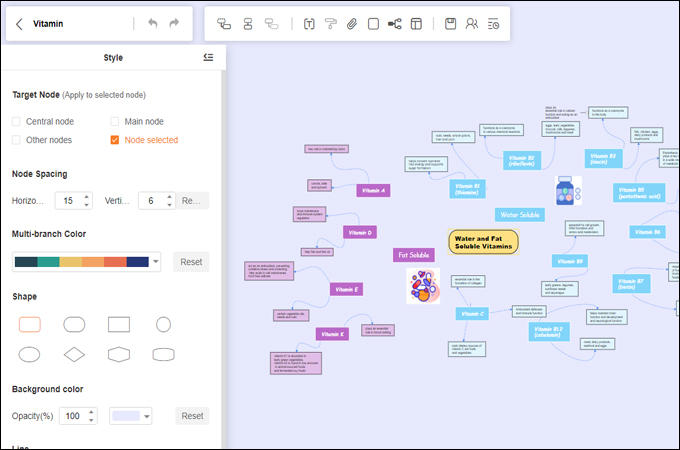
- Visit GitMind and go to the “Templates” gallery. Look for a concept map template that best fits the topic you want to make. Then, double-click on each node to edit the content of the nodes.
- You can also choose to create a concept map from scratch. From the “Templates” section, click the “New Mindmap” button and you will be welcomed with the “Main Theme” branch. Select the main node and press the “Tab” key then it will automatically add sub-nodes. Another way of adding a node to make a concept map is by using the “Floating node” option from the menu. Select this option and click anywhere you want to place the node.
- Modify the content of the nodes according to the information on your concept map. Then, customize the concept map, from the “Style” option or choose from the themes available. Lastly, export the project to an image, document, or gitmind file or share it with your friends via link.
You can also use its desktop version from the download button below:
DOWNLOADConclusion
If you have read all introduced ways to create concept map, you can now effectively brainstorm ideas, make meaningful connections, and understand and analyze concepts better. Also, to discover more visual illustrations, GitMind offers a bunch of diagrams to help you organize ideas and information.
Leave a Comment